Android Publishing (Cloud)
Draftbit supports publishing your app to the Google Play Store. In order to do this, you’ll need to complete a few setup steps and provide us with some information. This guide details those steps.
App Configuration
Section titled “App Configuration”Before you start the publishing process, make sure your app’s configuration properties are up to date in the App Configuration view. At a minimum, we recommend you review and update:
- App Name: The name shown on the device home screen after install
- Slug: A URL-friendly identifier used in publishing/build processes
- URL Scheme: URL scheme for deep linking into your app (e.g., myapp:// would use ‘myapp’).
- Description: A short description of your app
- App Icon: Your app’s icon (we recommend uploading a 1024×1024 PNG)
- Splash Screen: The launch screen users see while your app loads
For more details (and the full list of available properties), see App Configuration.
Google Developer Account
Section titled “Google Developer Account”First, in order to publish to the Google Play Store, you’ll need a Google Developer account.
- Create a Google Developer Account if you don’t already have one
- Pay the $25 fee.
- Provide the required information
- Verify your account by providing a government-issued photo ID that matches the information you provided on sign-up if required.
See this guide for more information on how to sign up.
Create a Package Name
Section titled “Create a Package Name”Next, you’ll need to create a Package Name for your app. This is unique to your app which identifies it inside of Google’s system. You’ll need to add it to the Google Play Console configuration in Draftbit.
Create a new app in Google Play
Section titled “Create a new app in Google Play”You’ll need to create an App in your Google Play Console in order to upload Draftbit app binaries.
-
Open Google Play Console
Go to your Google Play Console

-
Create a new app
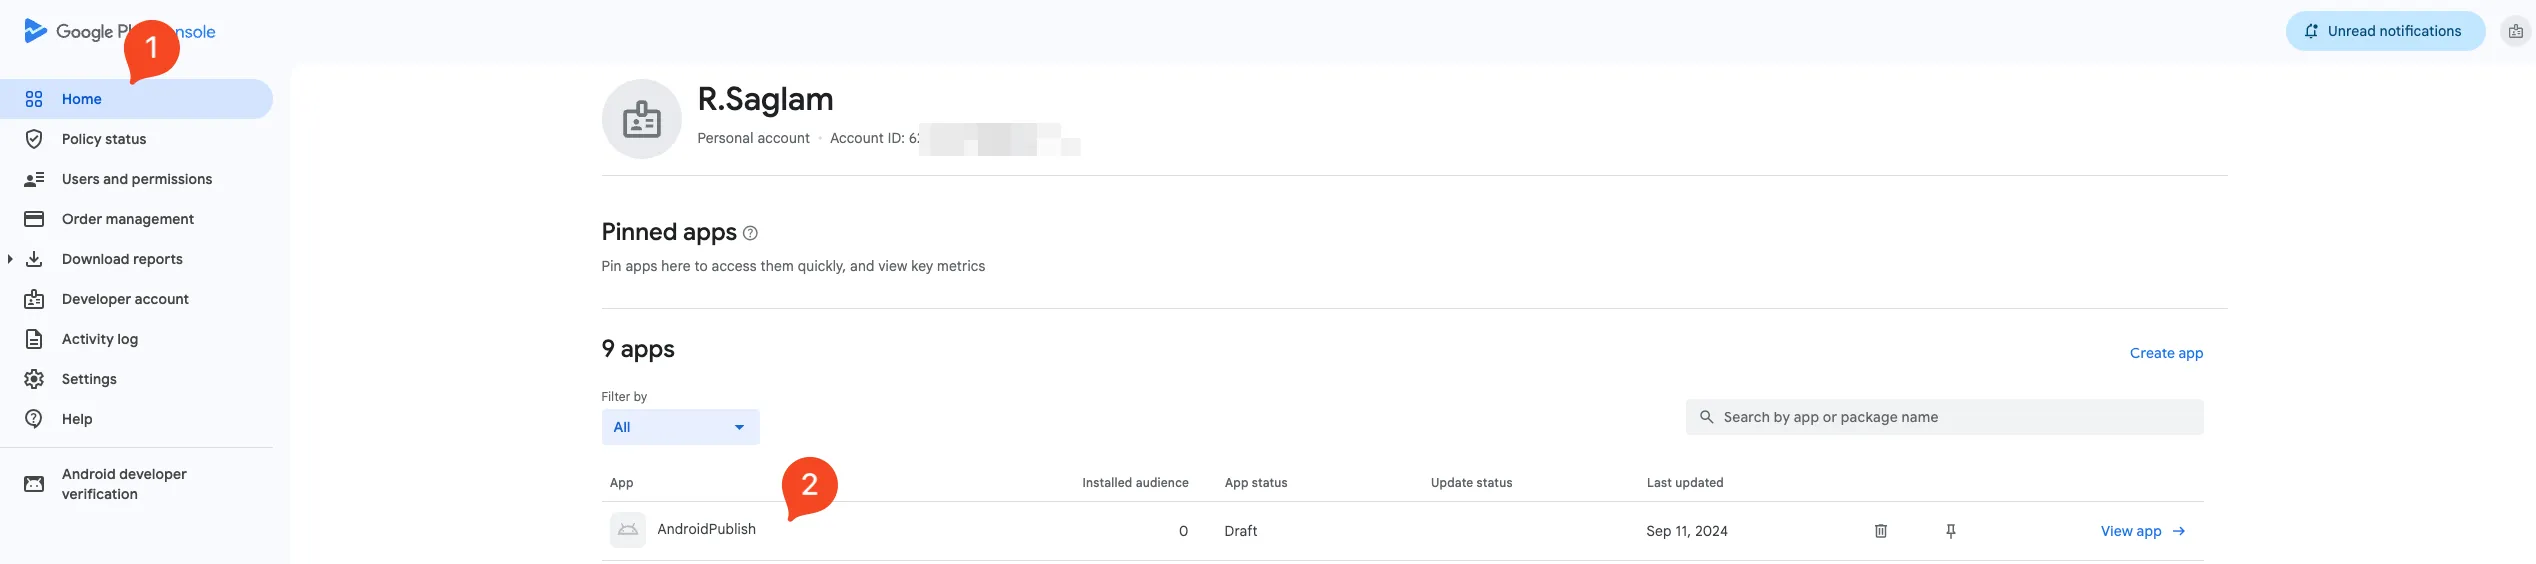
Navigate to the All Apps page, then click the Create app button in the upper right.
Select Default language, App or game, Free or paid, fill in the App name input and click Create app in the bottom right.
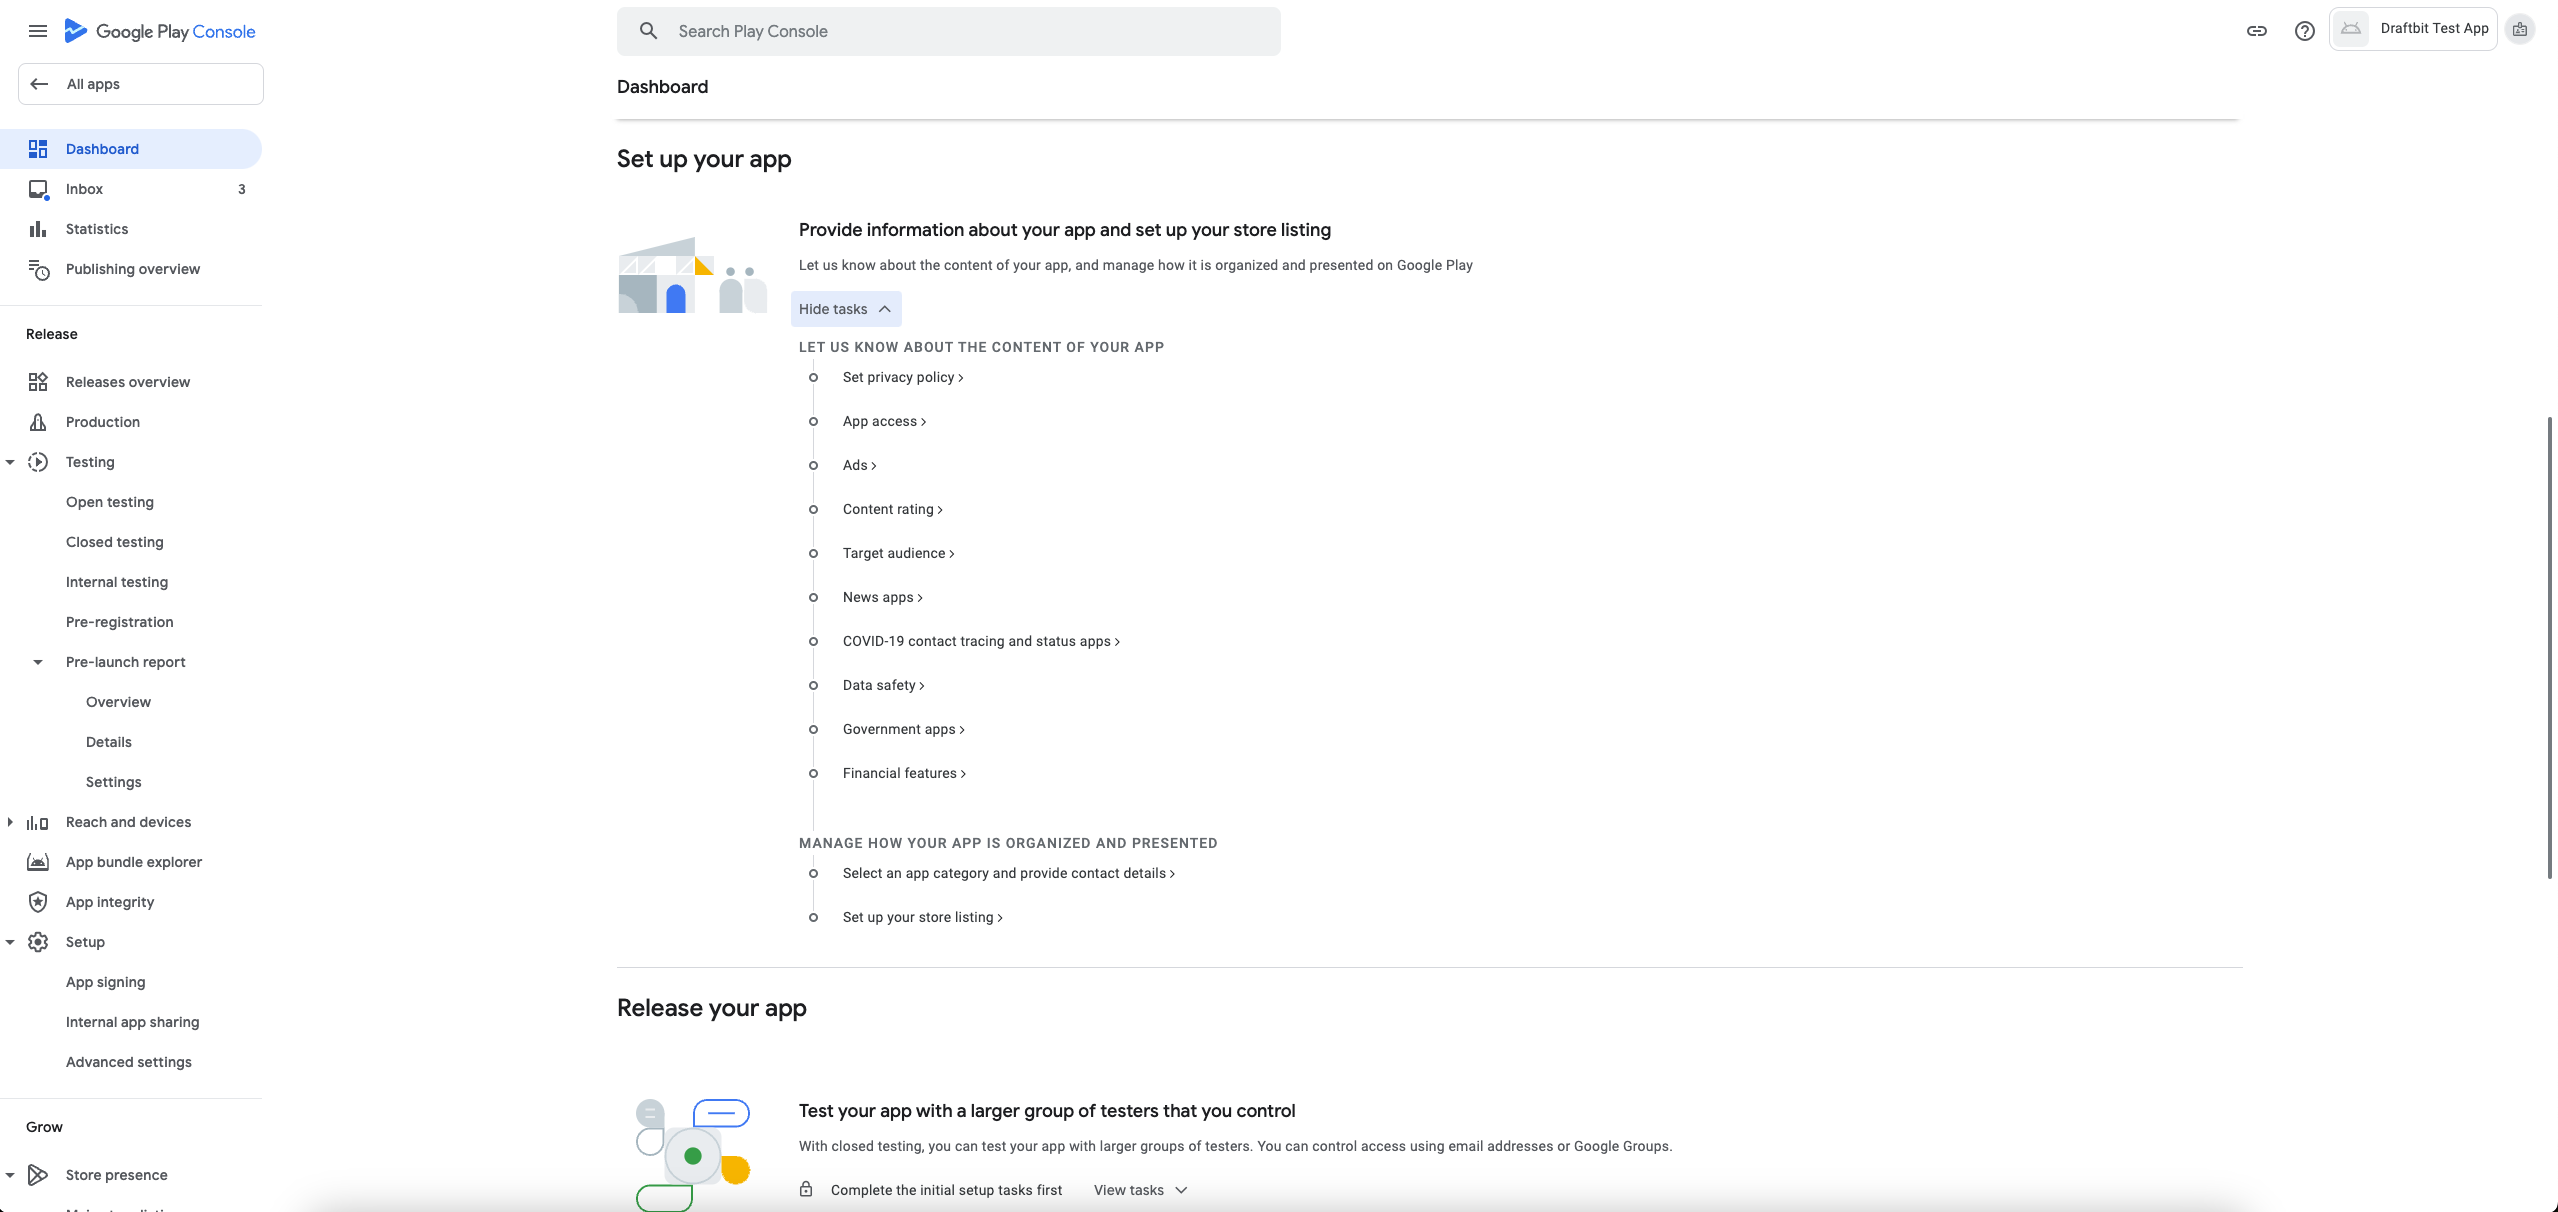
You’ll be redirected to a new page, Dashboard, where you can fill in all information about your application. This step can be done later if you prefer.
Create Service Account Key
Section titled “Create Service Account Key”In order for Draftbit to publish builds to your Google Play Console, you’ll need to create a Google Service Account Key and upload it to your Draftbit account.
-
Open Google Cloud Console
You will be directed to New Project page. You need to enter your project name and organization name (optional) and press on Create to continue.
-
Enable Google Play Android Developer API
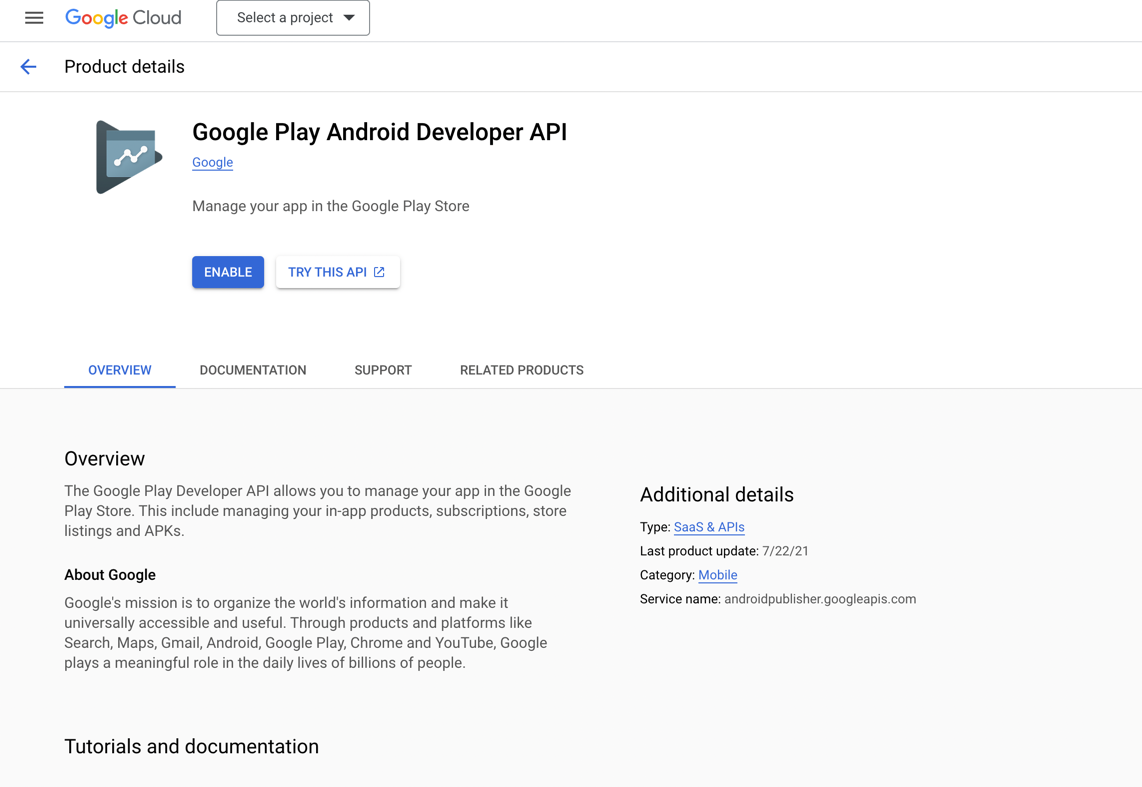
In the upcoming page ensure that you have selected the project you have recently created and then click on Enable button
-
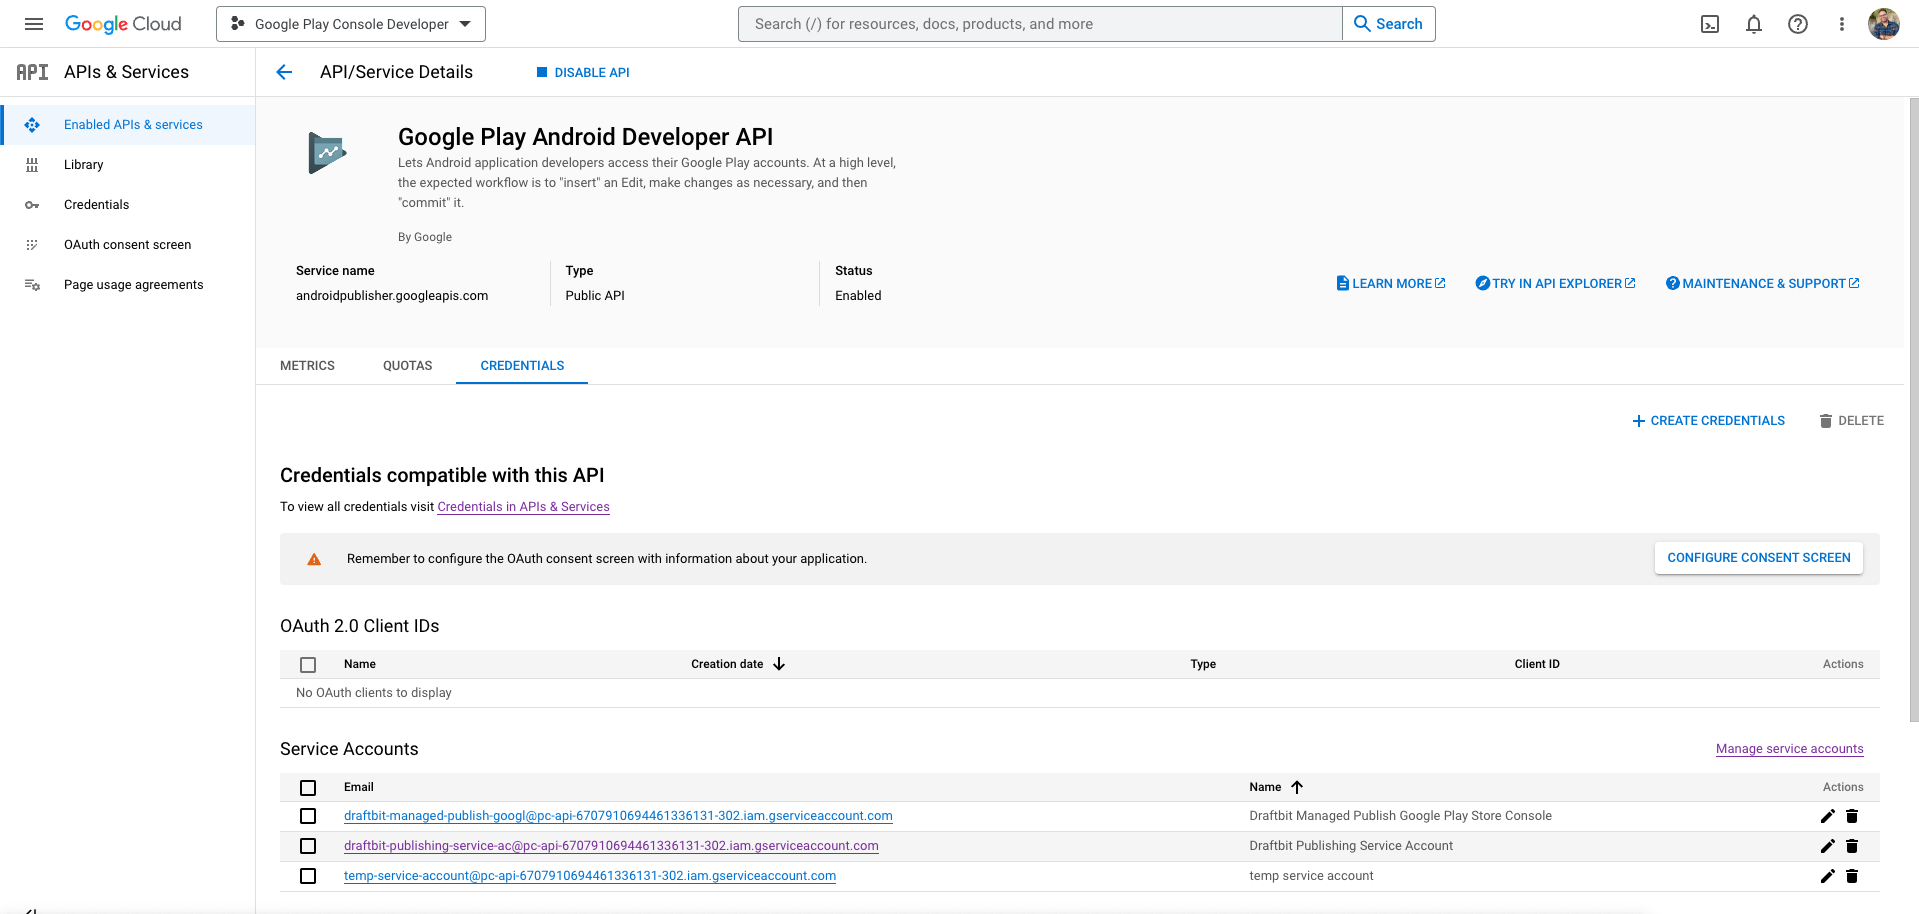
Create credentials
Now select Credentials tab and click Create Credentialsbutton. From the dropdown menu select Service Account option.
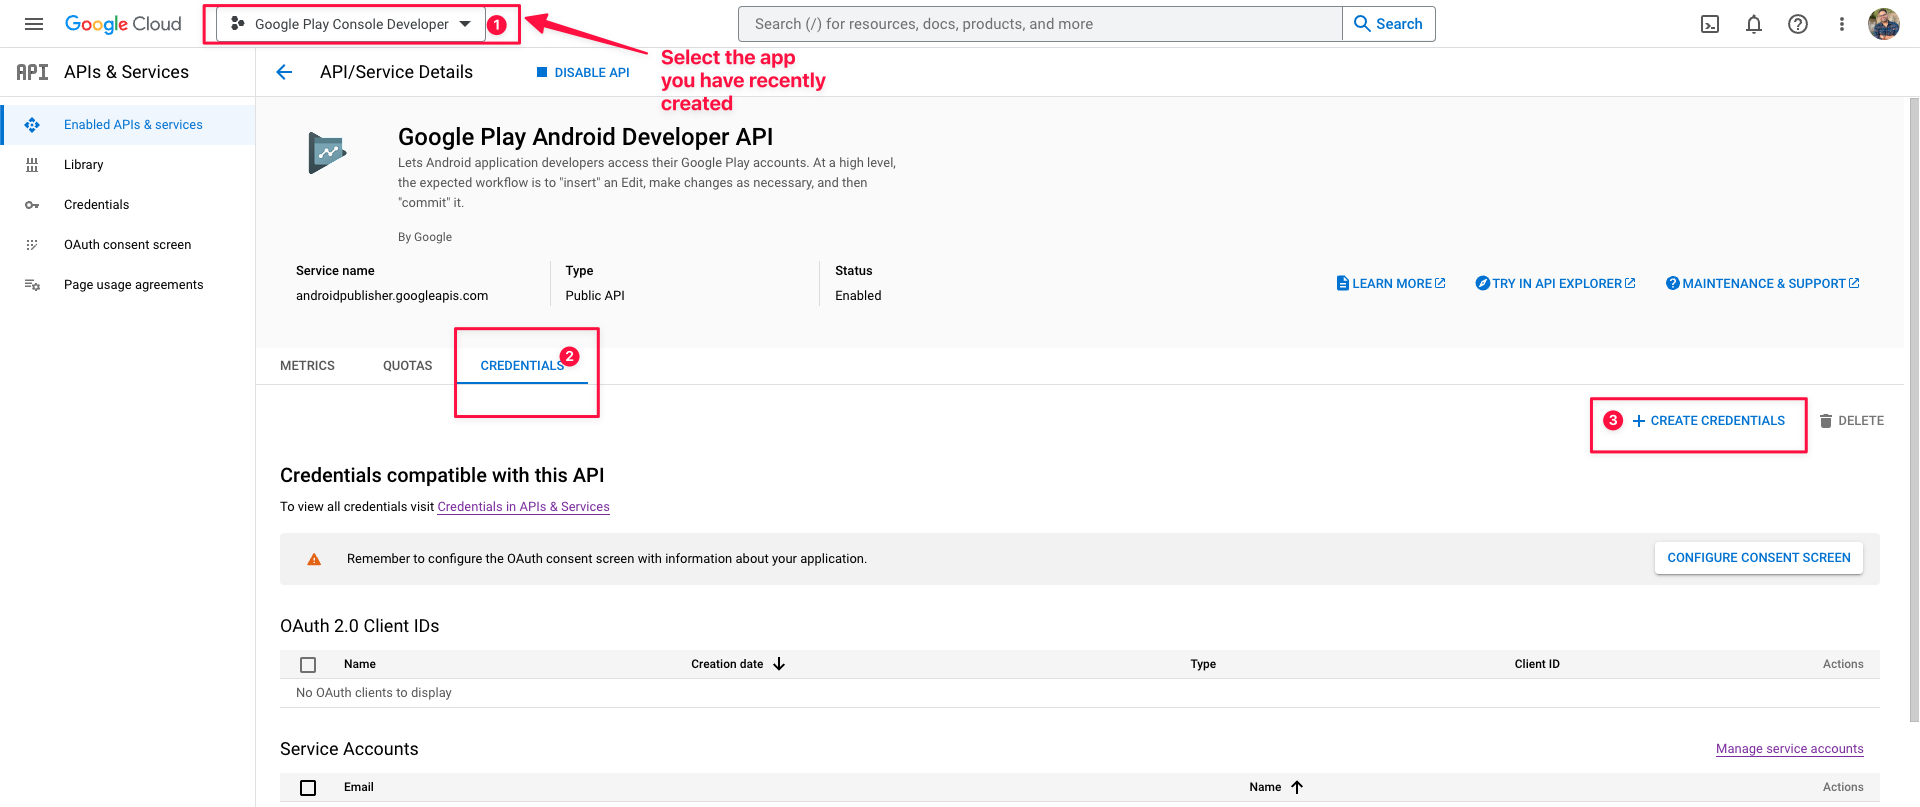
You will be directed to IAM & Admin page.
-
Enter a Service account name
Enter a Service account name. Pick a name that makes it easy to identify that this account is for the Google Play Store.
A “Service account ID” will be added automatically, but you can edit to be whatever you like.
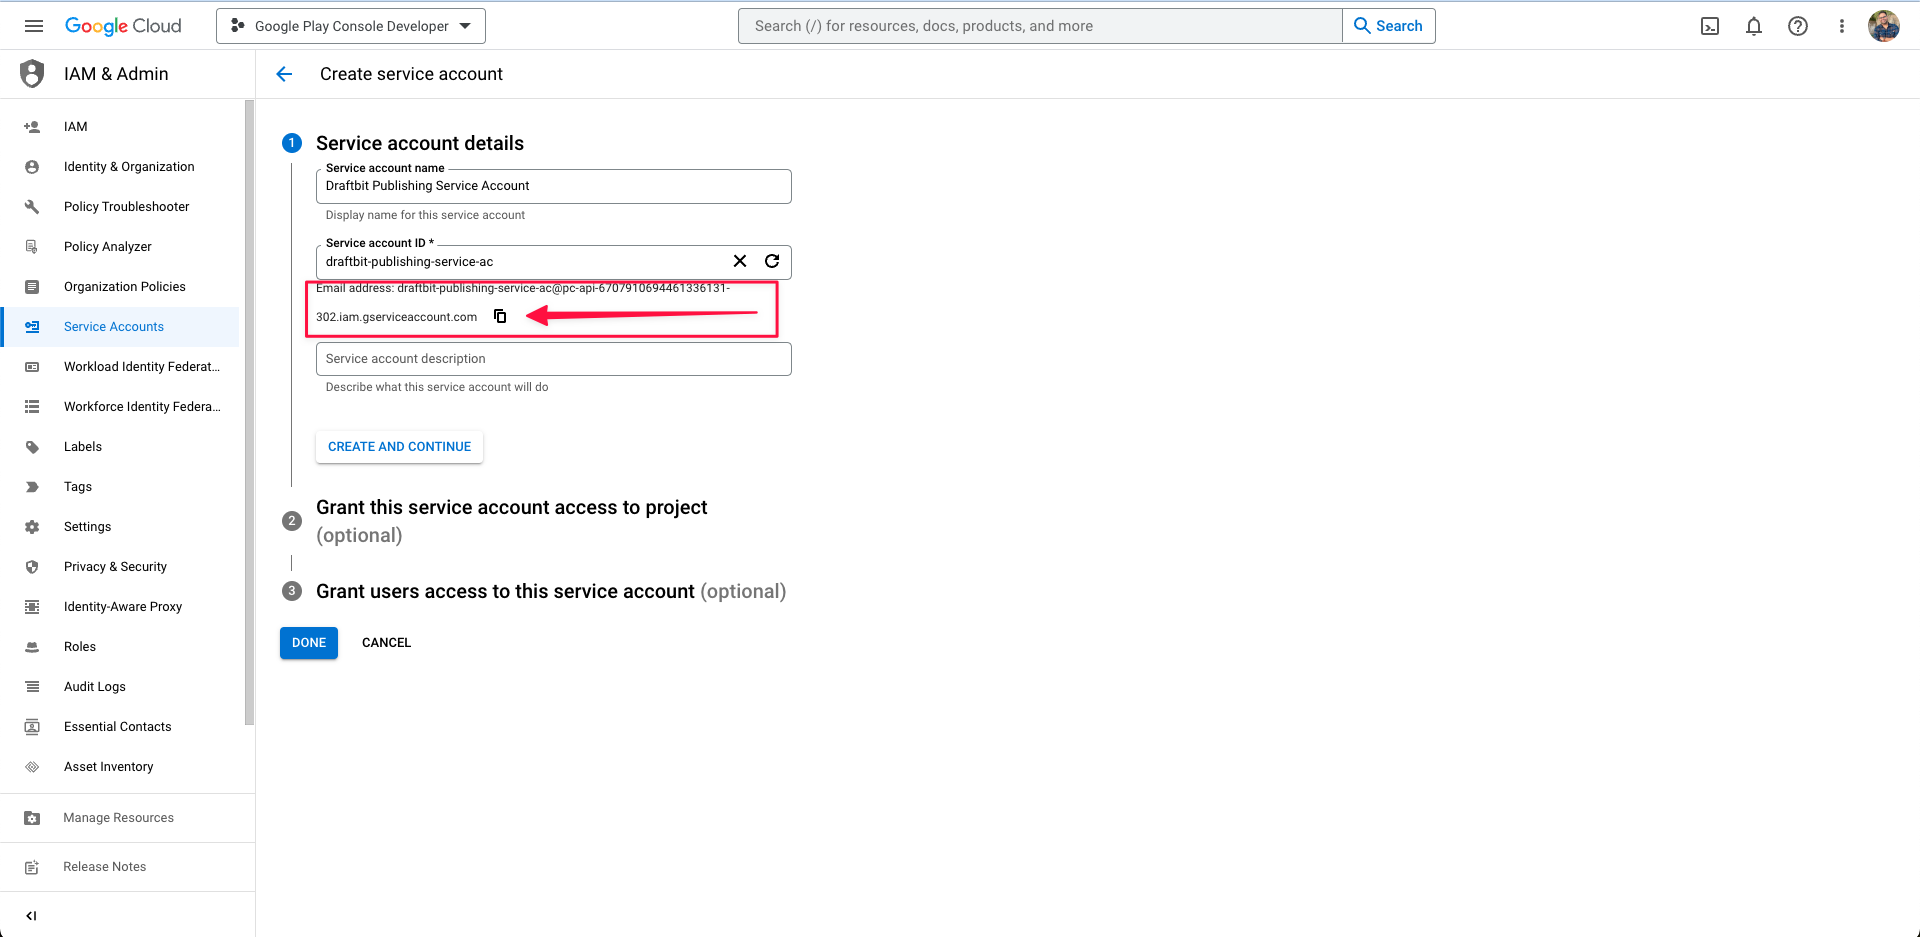
Copy the email address given when you have entered the Service account name and click on Create and Continue button.
-
Select a role
Next, you’ll grant your service account access to your Google Play Console Developer account. Click Select a role and choose Service Accounts > Service Account User. Note that typing in the filter text box won’t return the Service Accounts role - you’ll have to scroll to it.

-
Done
The third step is optional, you can leave it as it is and click Done to continue.
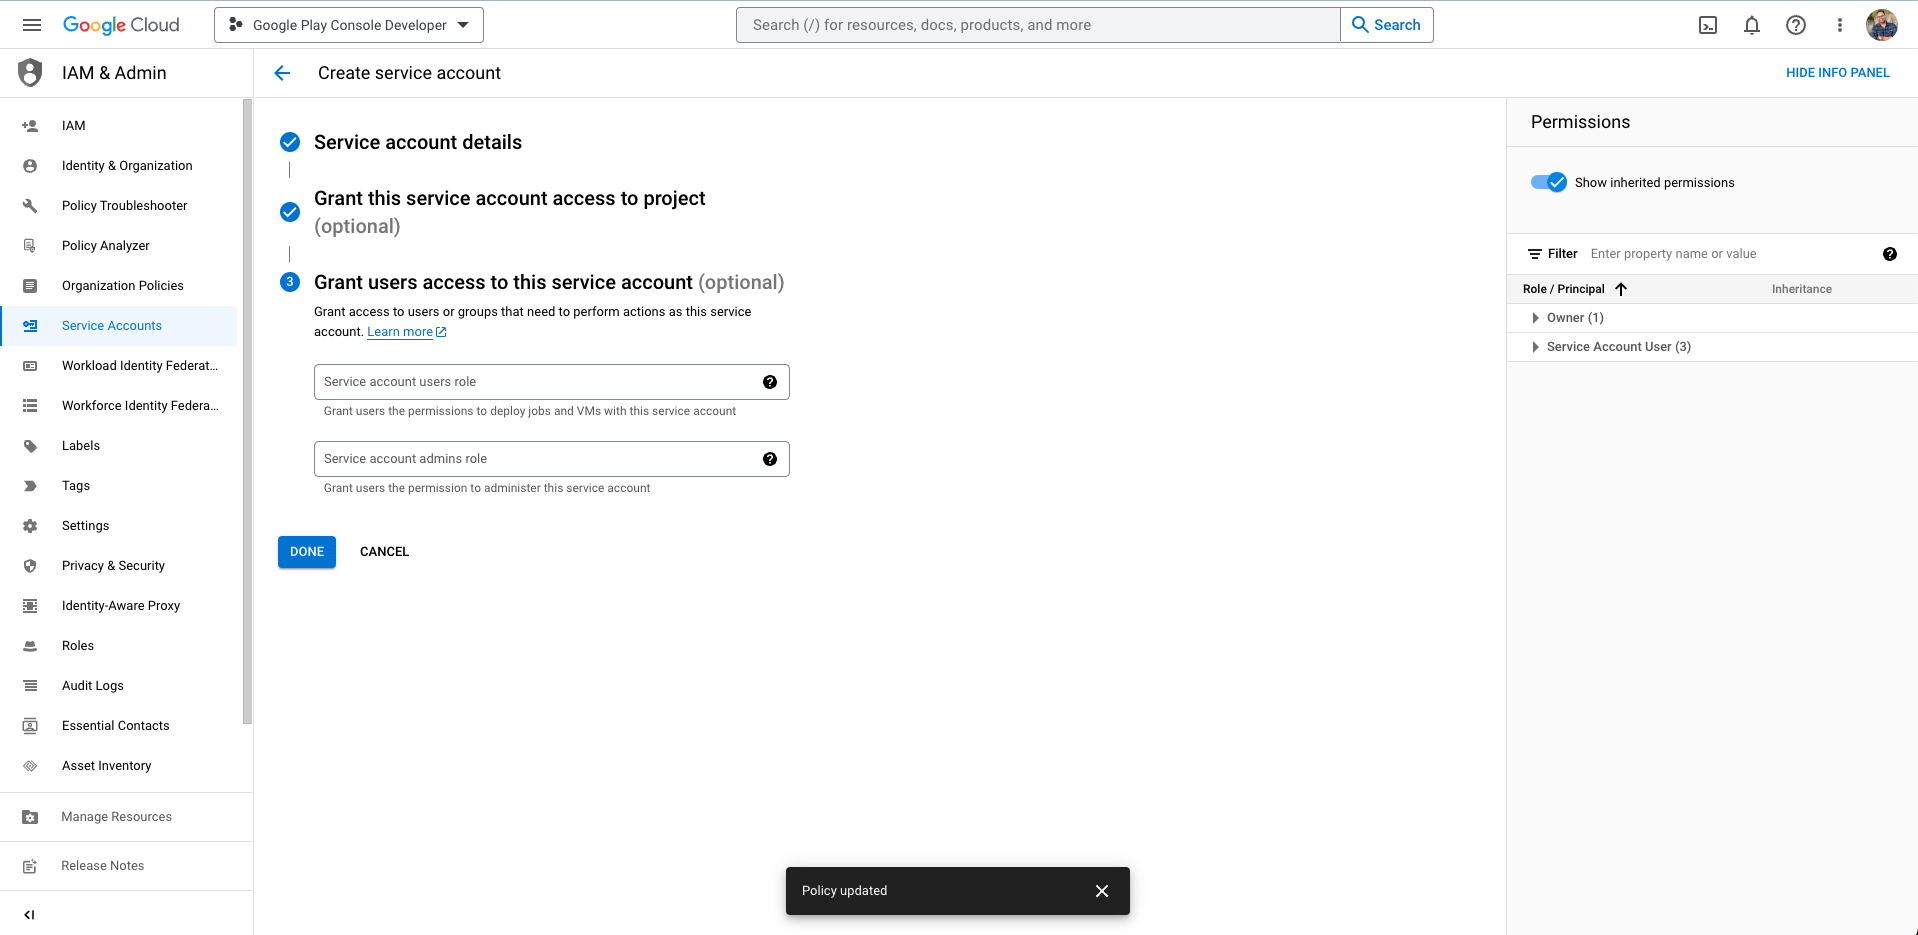
You will be navigated back to APIs & Services page.
-
Navigate to Service Accounts
Now select the service account you have created here and the page will be directed to Service Accounts automatically.
-
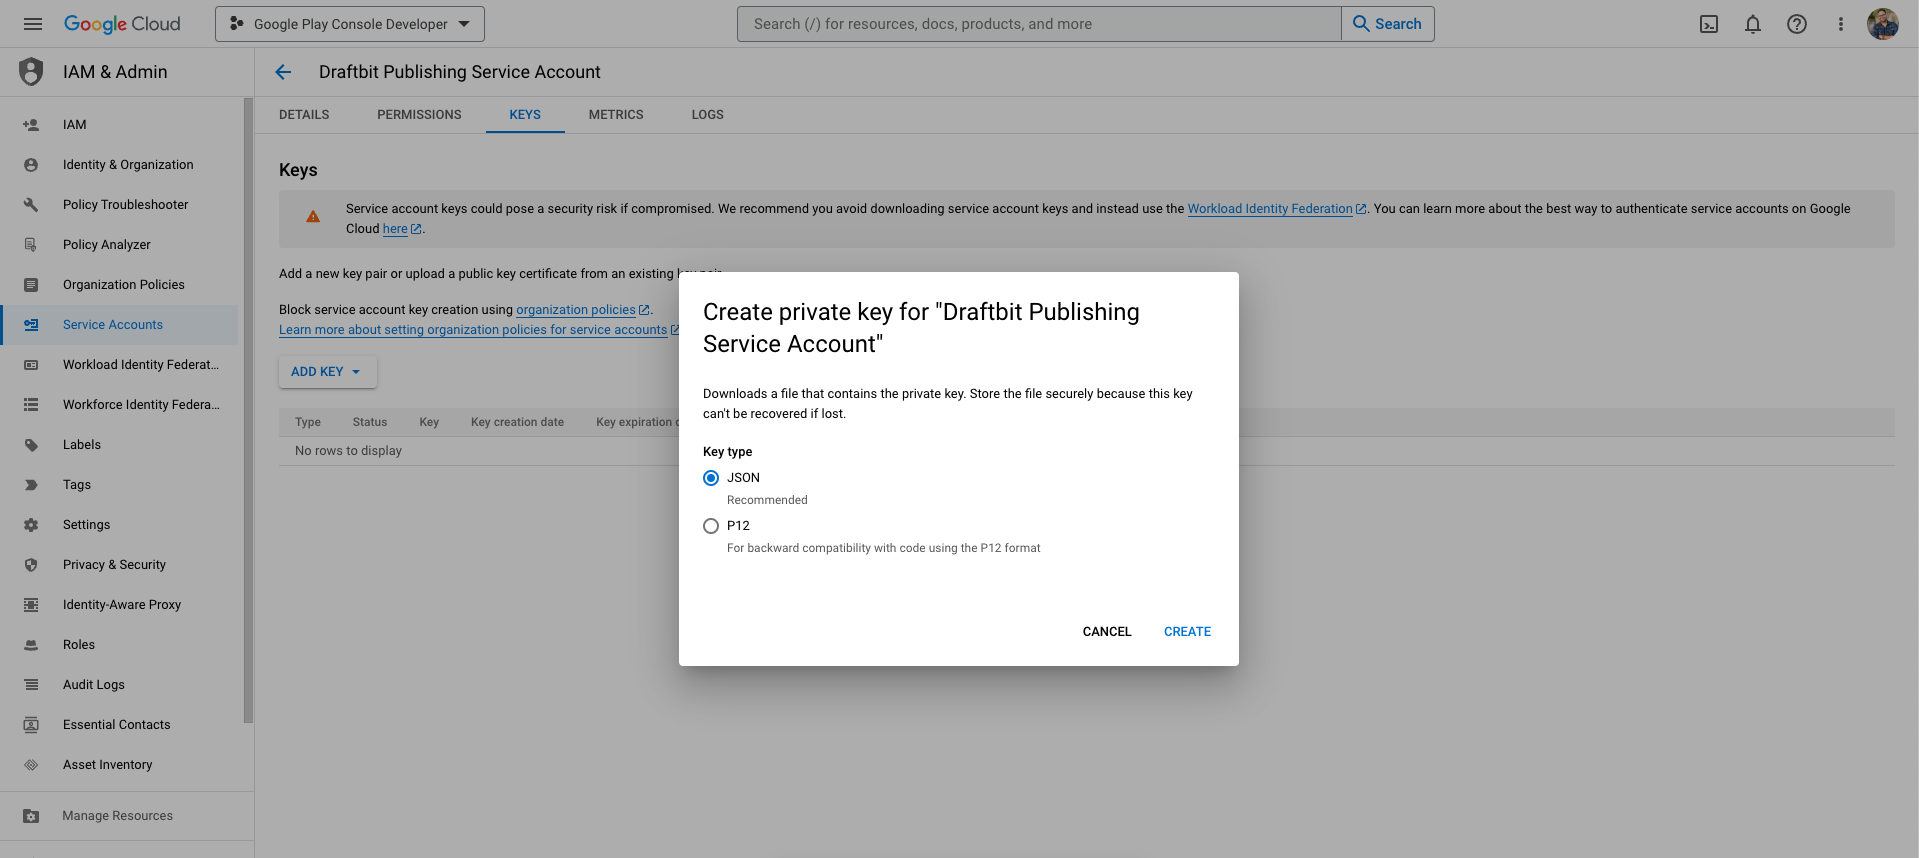
Create new key
In the navigated page, select Keys from the options button for your newly created Service Account. Select Create new key.
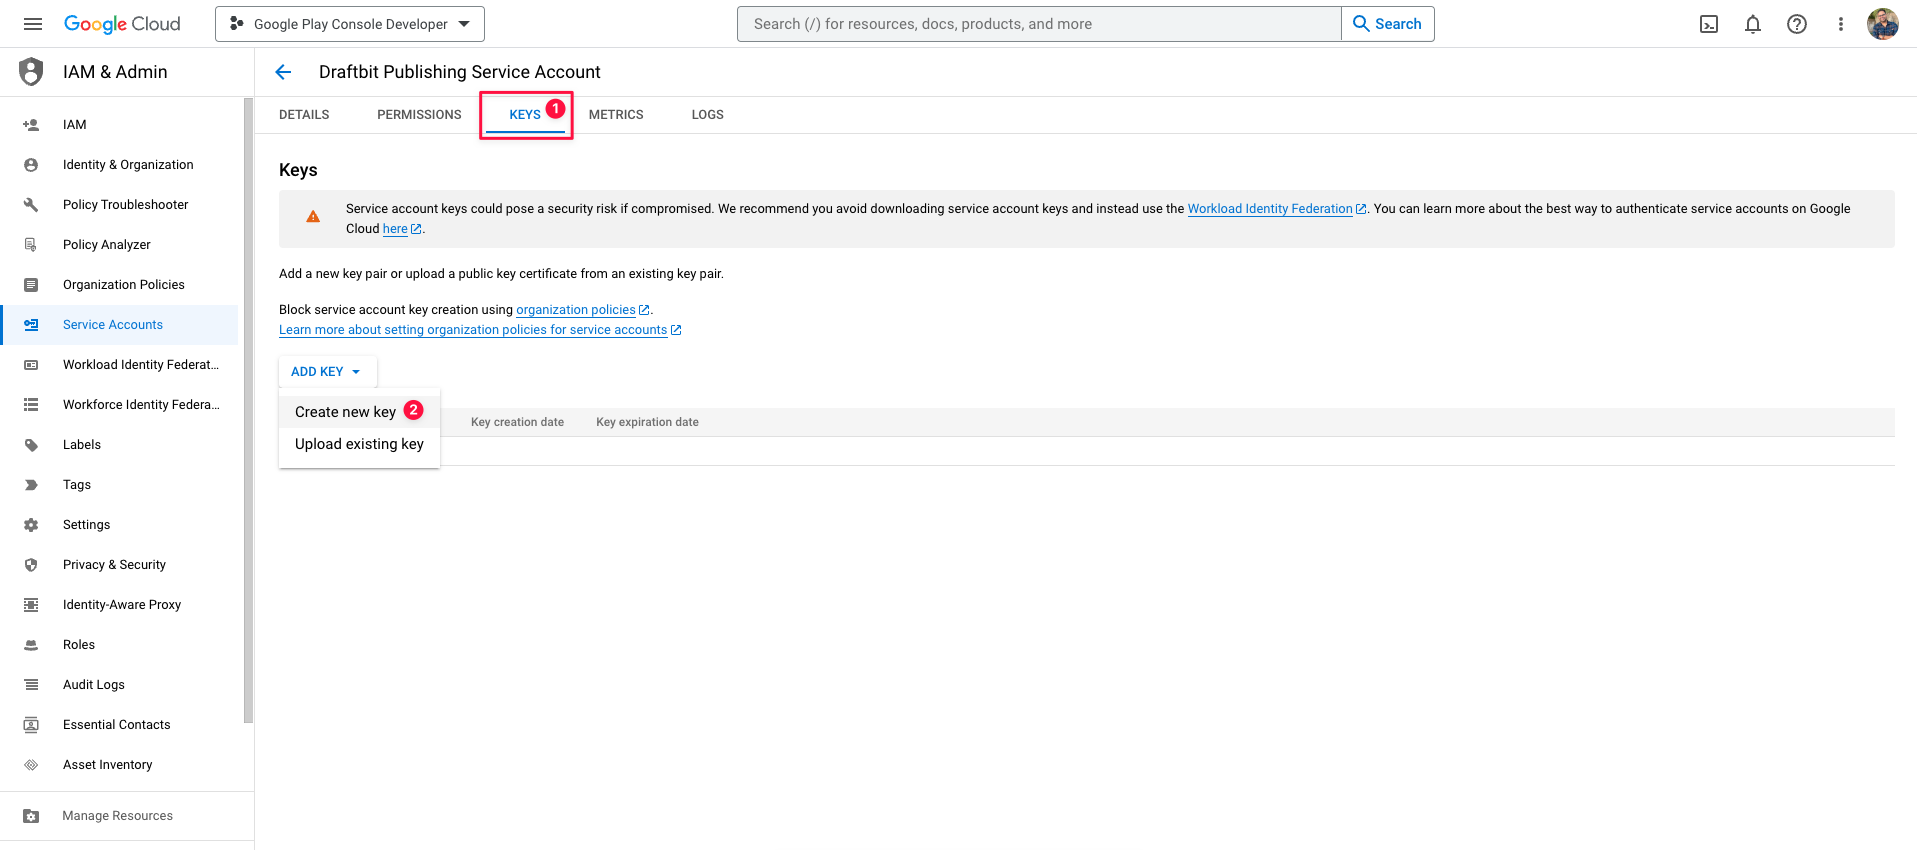
Select JSON and then click Create. Download the .json file and store it in a safe place for future reference.
Set up account permissions
Section titled “Set up account permissions”-
Open Google Play Console
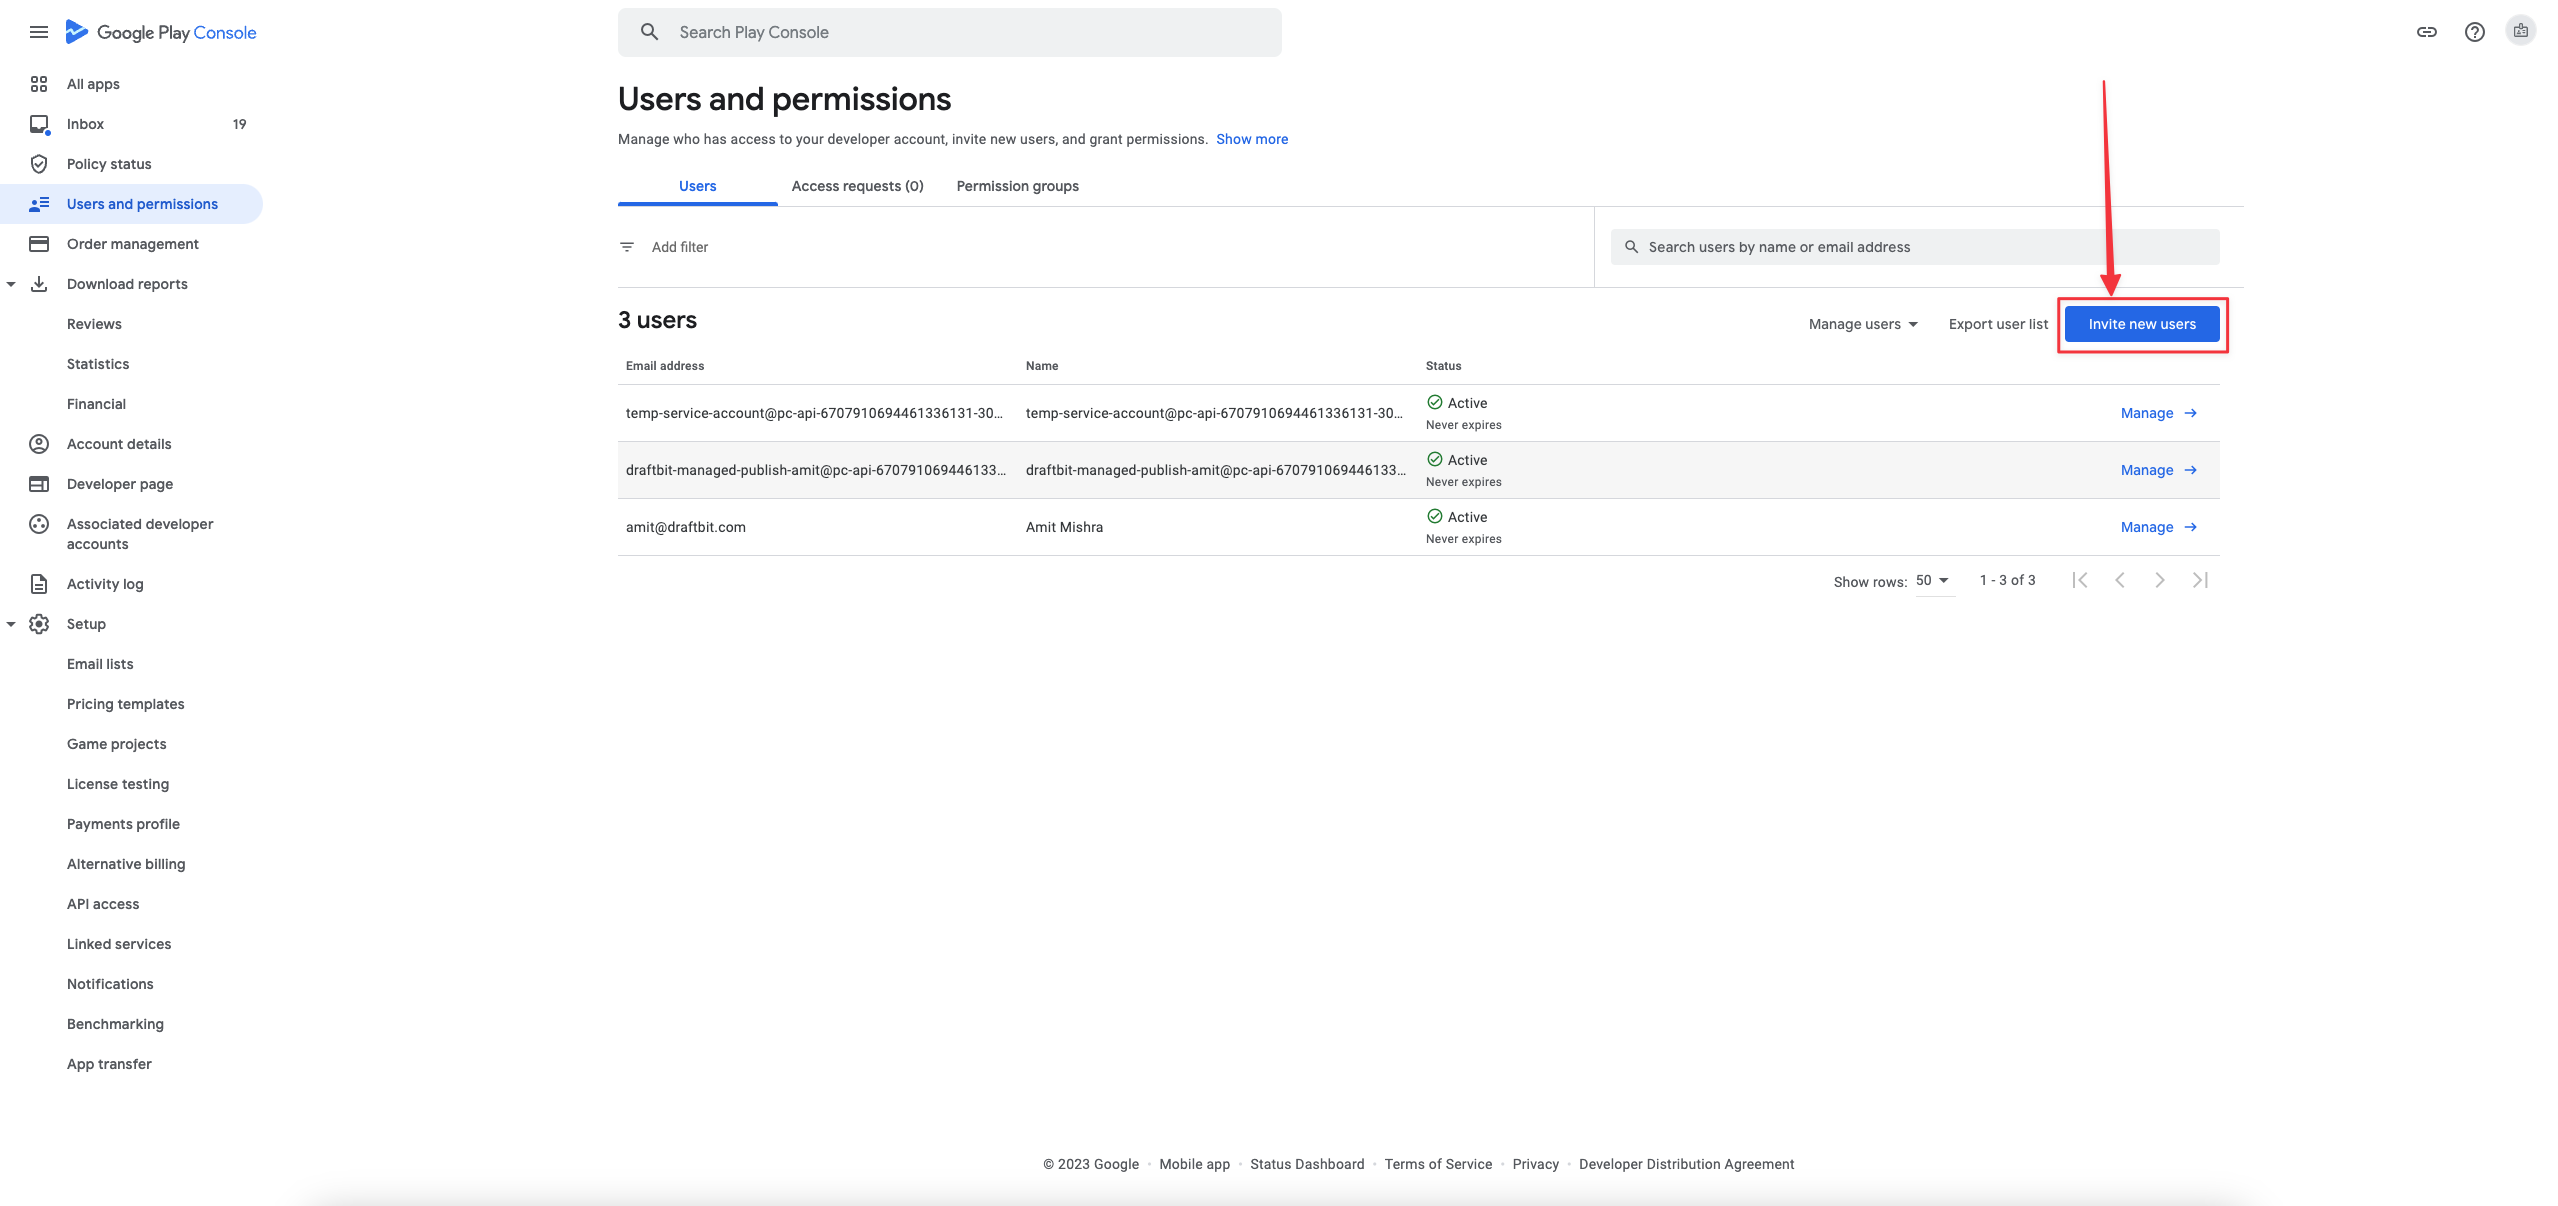
Now in your Google Play Console go to the Users and permissions page and select Invite new users option.
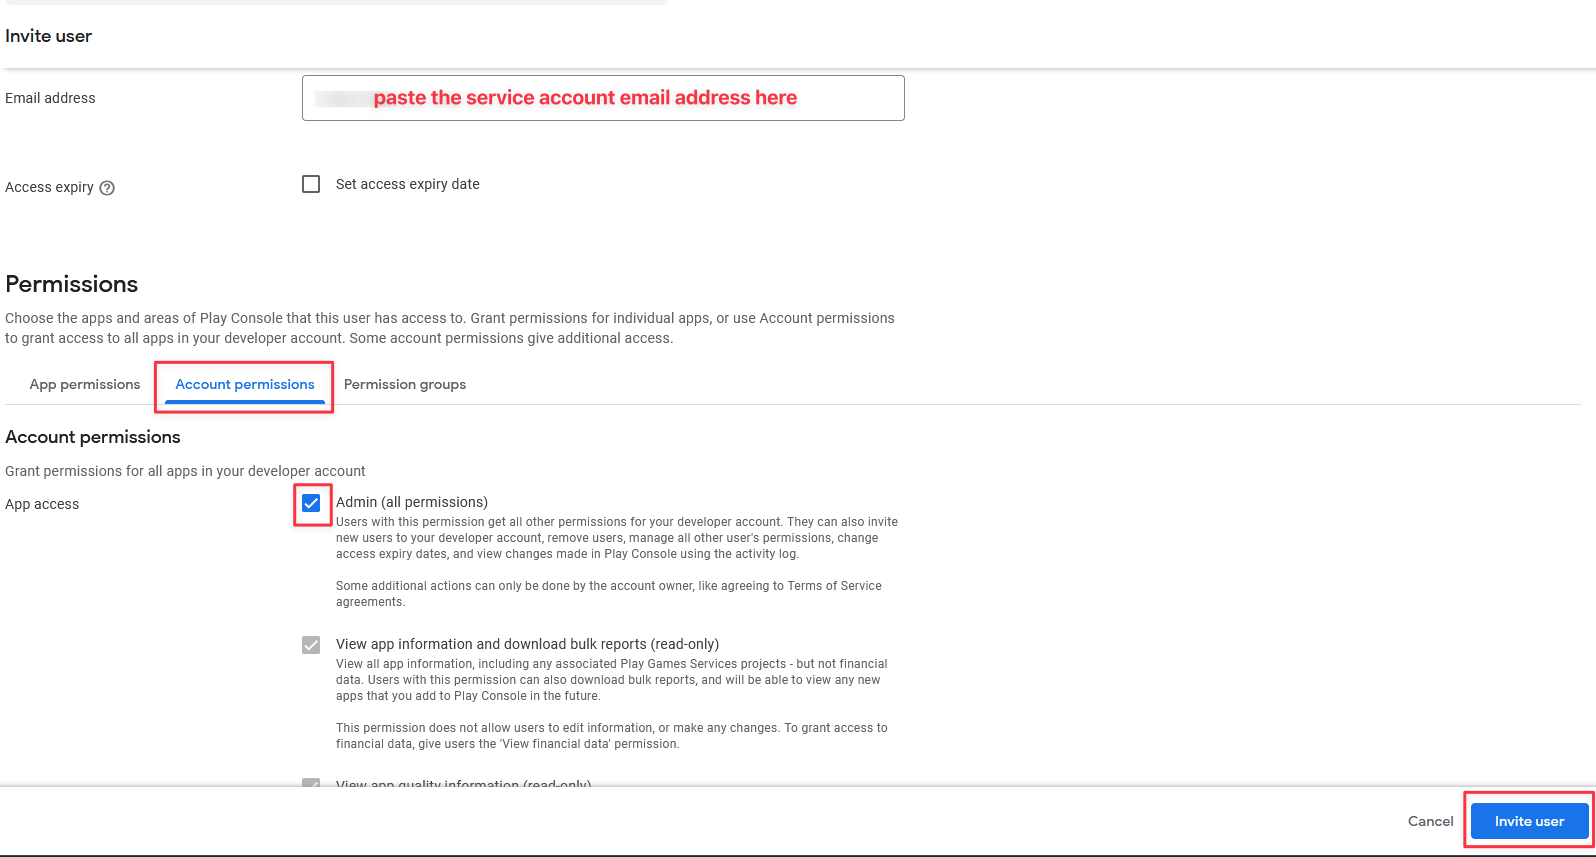
Paste the copied email address at the beginning of the key generation process and then select the account permissions.
-
Account permissions
In Account permissions, you should choose Admin for enabling all the permissions. Then click Invite User.
Upload your first Android binary
Section titled “Upload your first Android binary”Now that you have a successful build, you would need to submit it. When submitting your Android app to Google Play Store for the first time, Google requires that you manually upload it in the Google Play Console. As a result, when you first request an Android publish from Draftbit for a new app, we’ll send you your app binary (.aab) and you’ll need to upload it via your Google Play Console account. Future publishes for that app will be uploaded automatically by Draftbit
-
Open Google Play Console
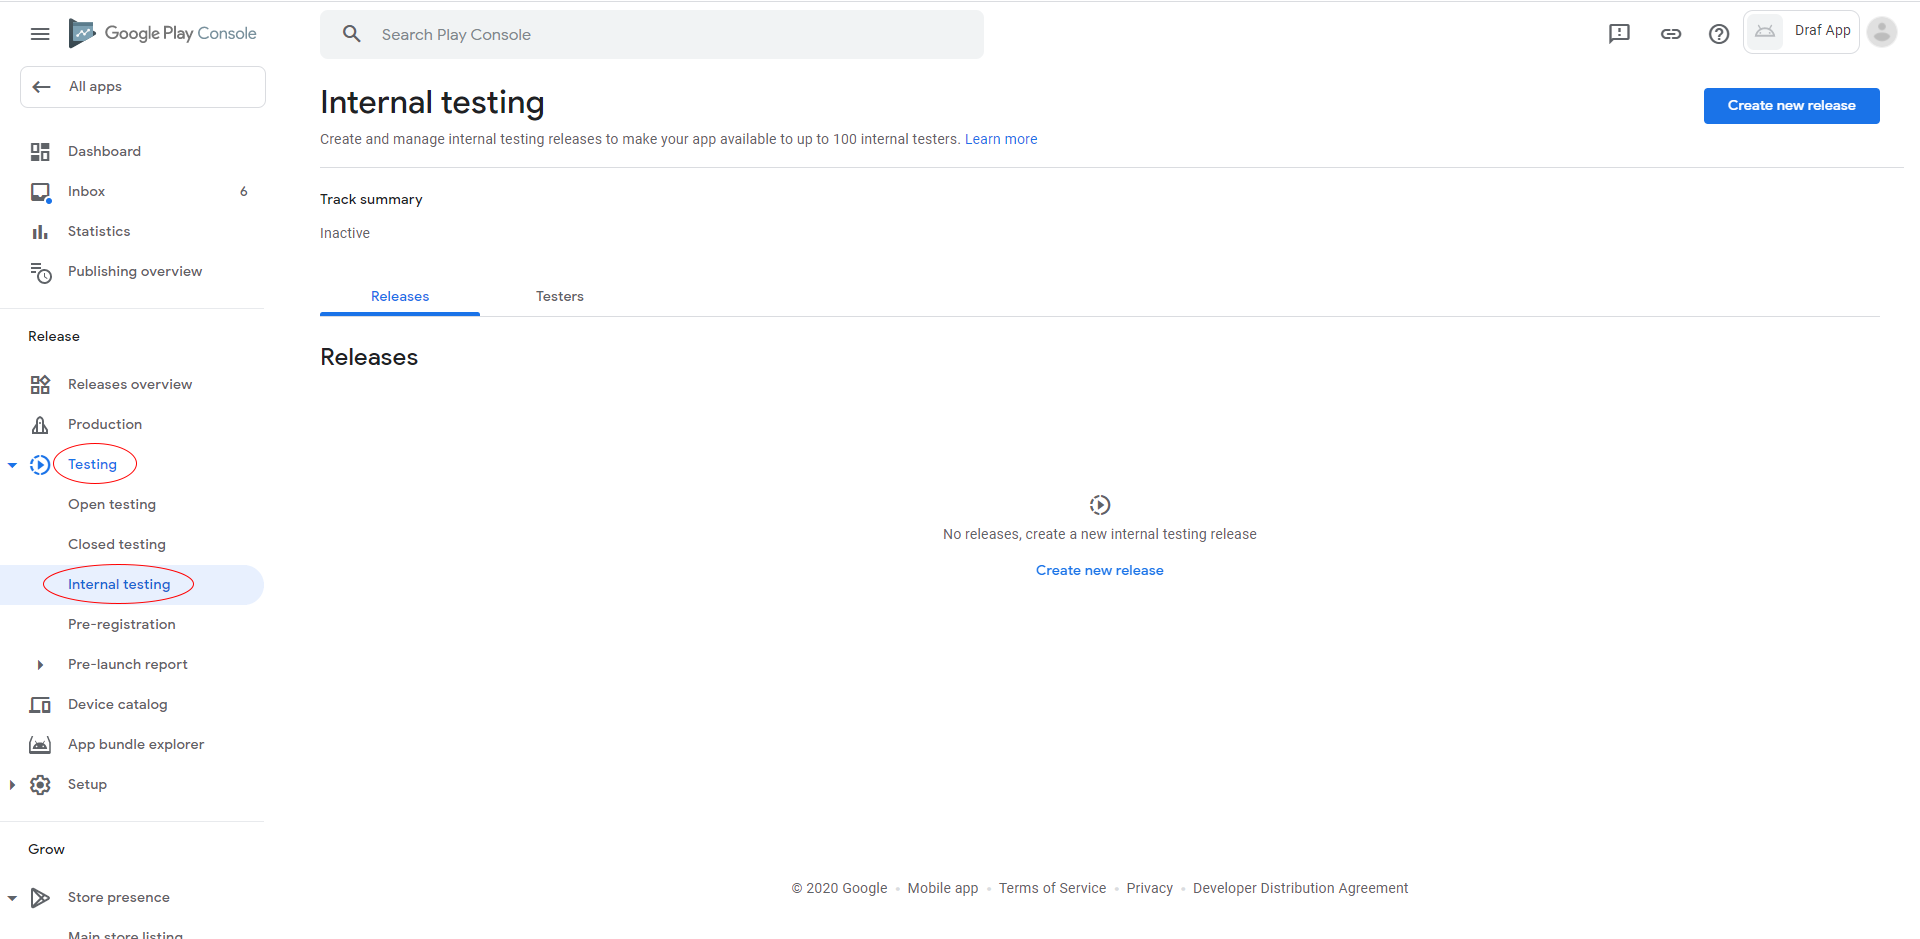
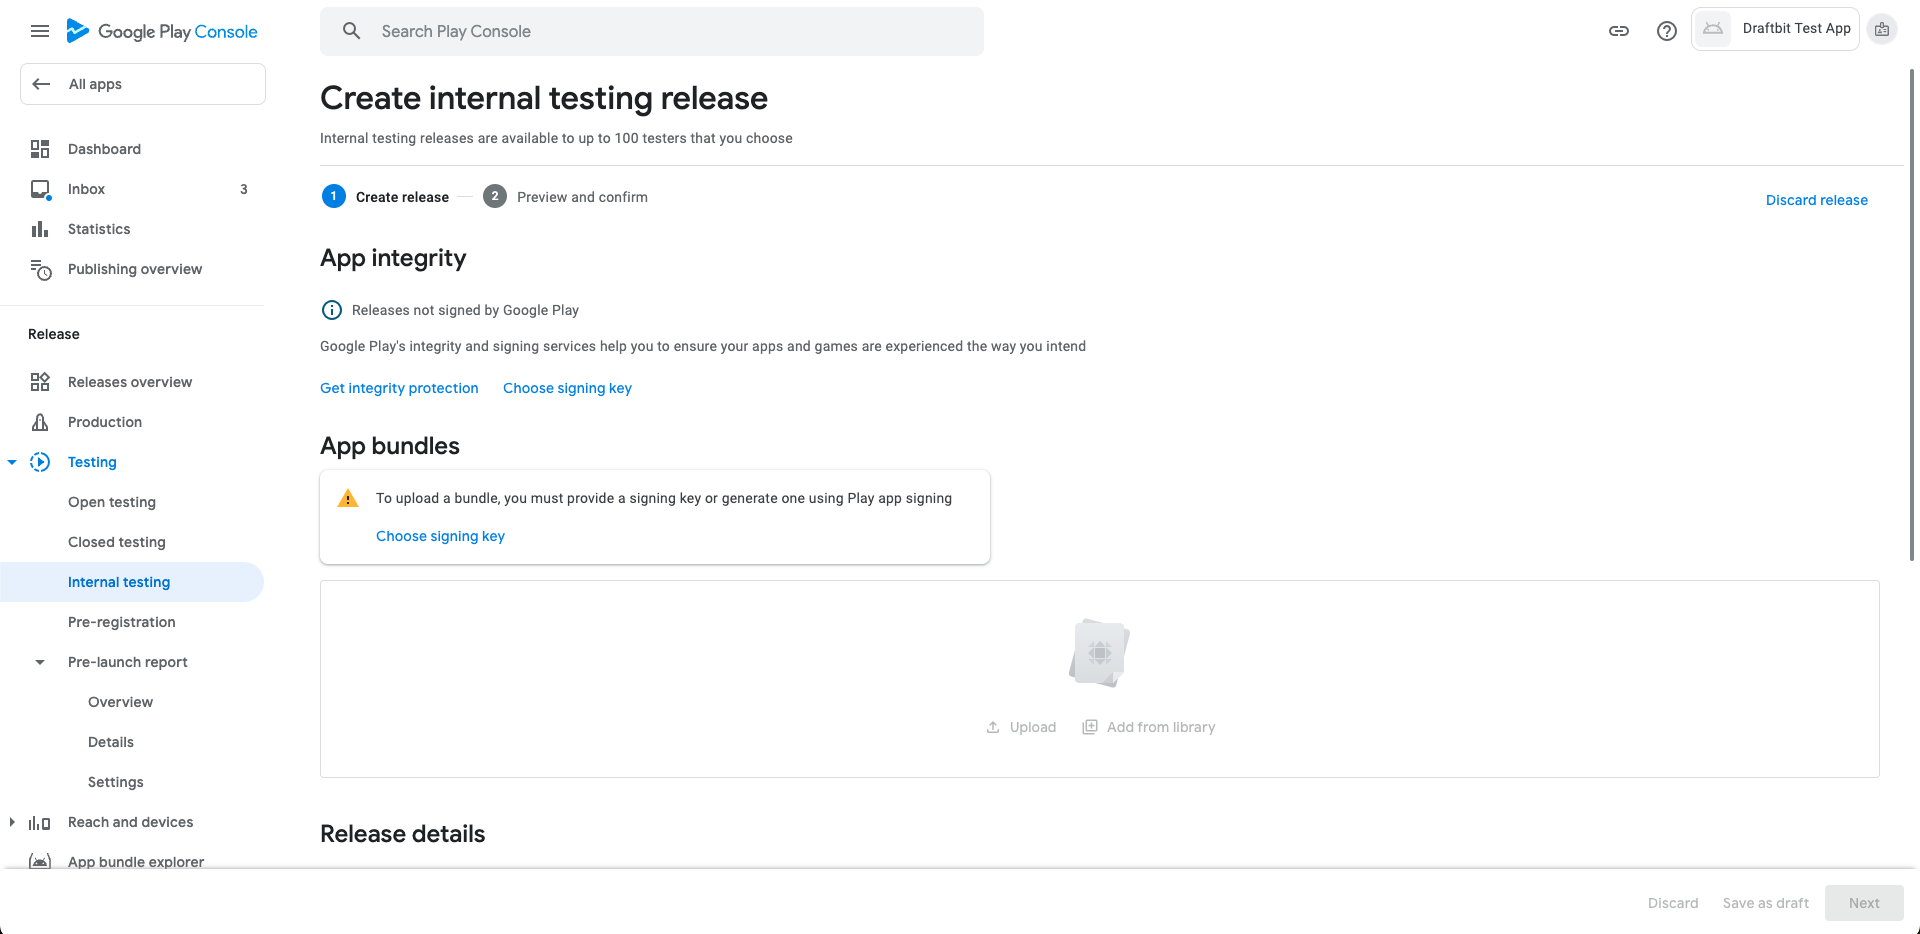
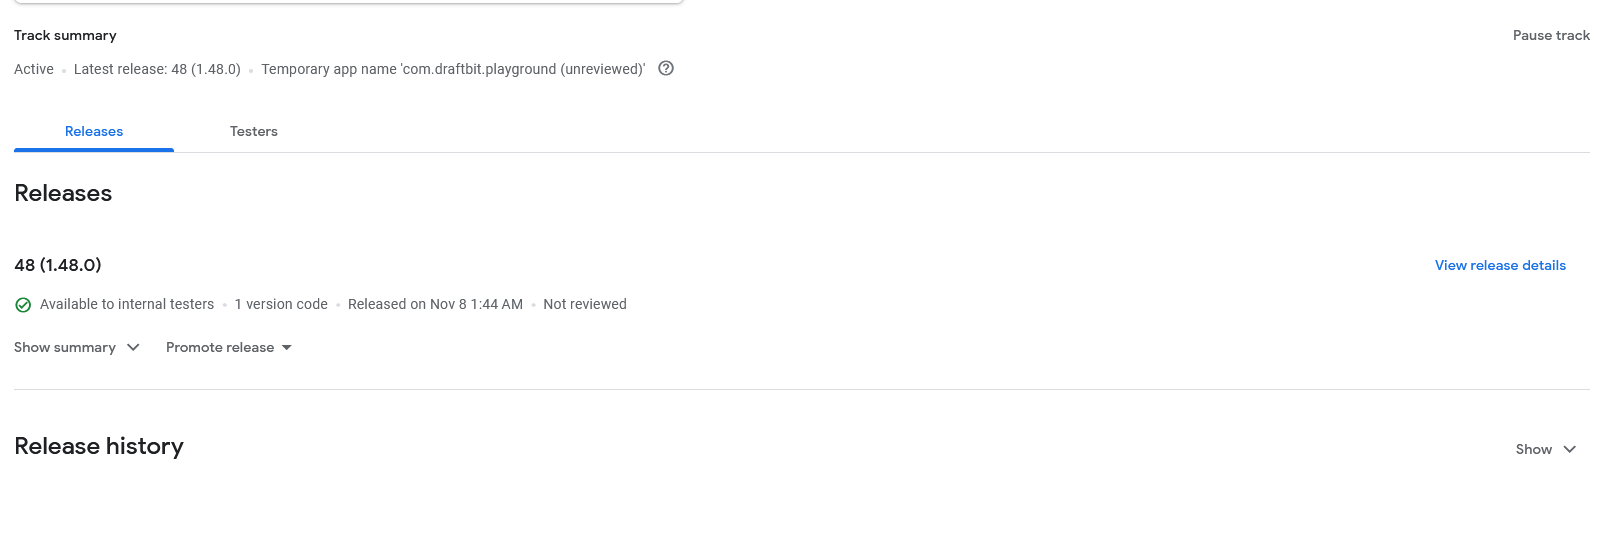
Go to your Google Play Console and navigate to your app’s Dashboard. Click on Testing in the left-hand sidebar, then select Internal testing.
-
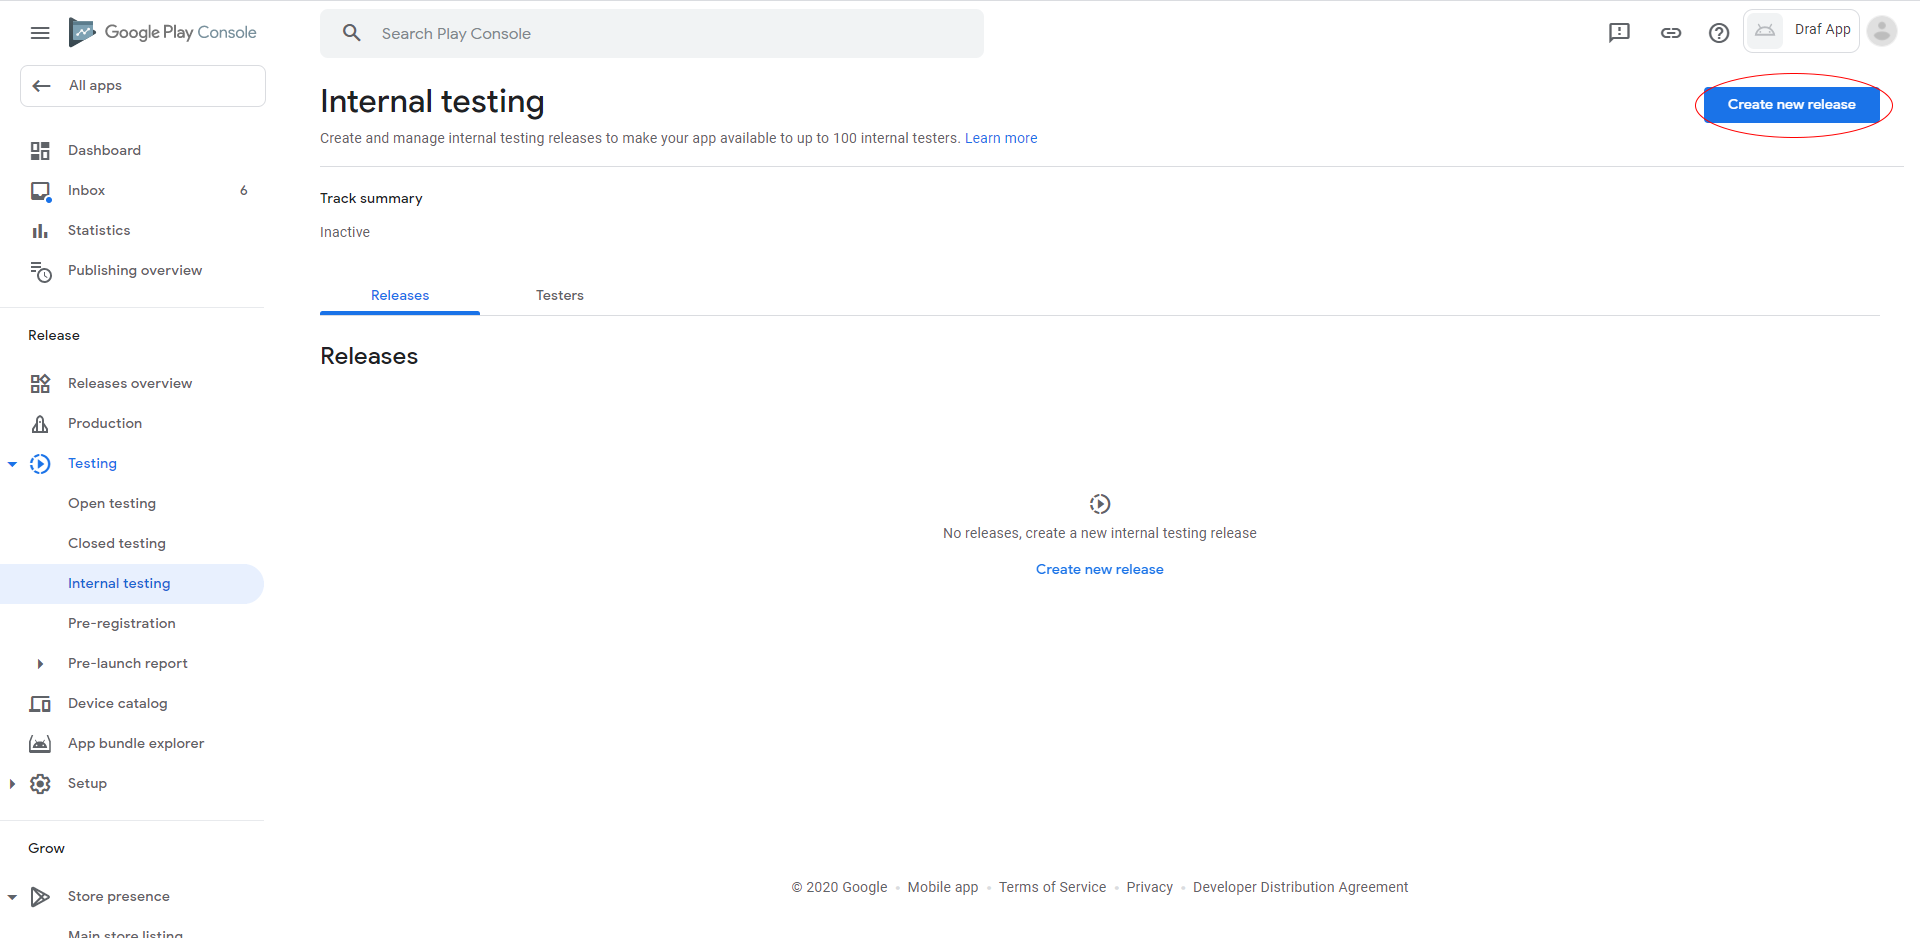
Create new release
Click the Create new release button
App signing by Google Play.
-
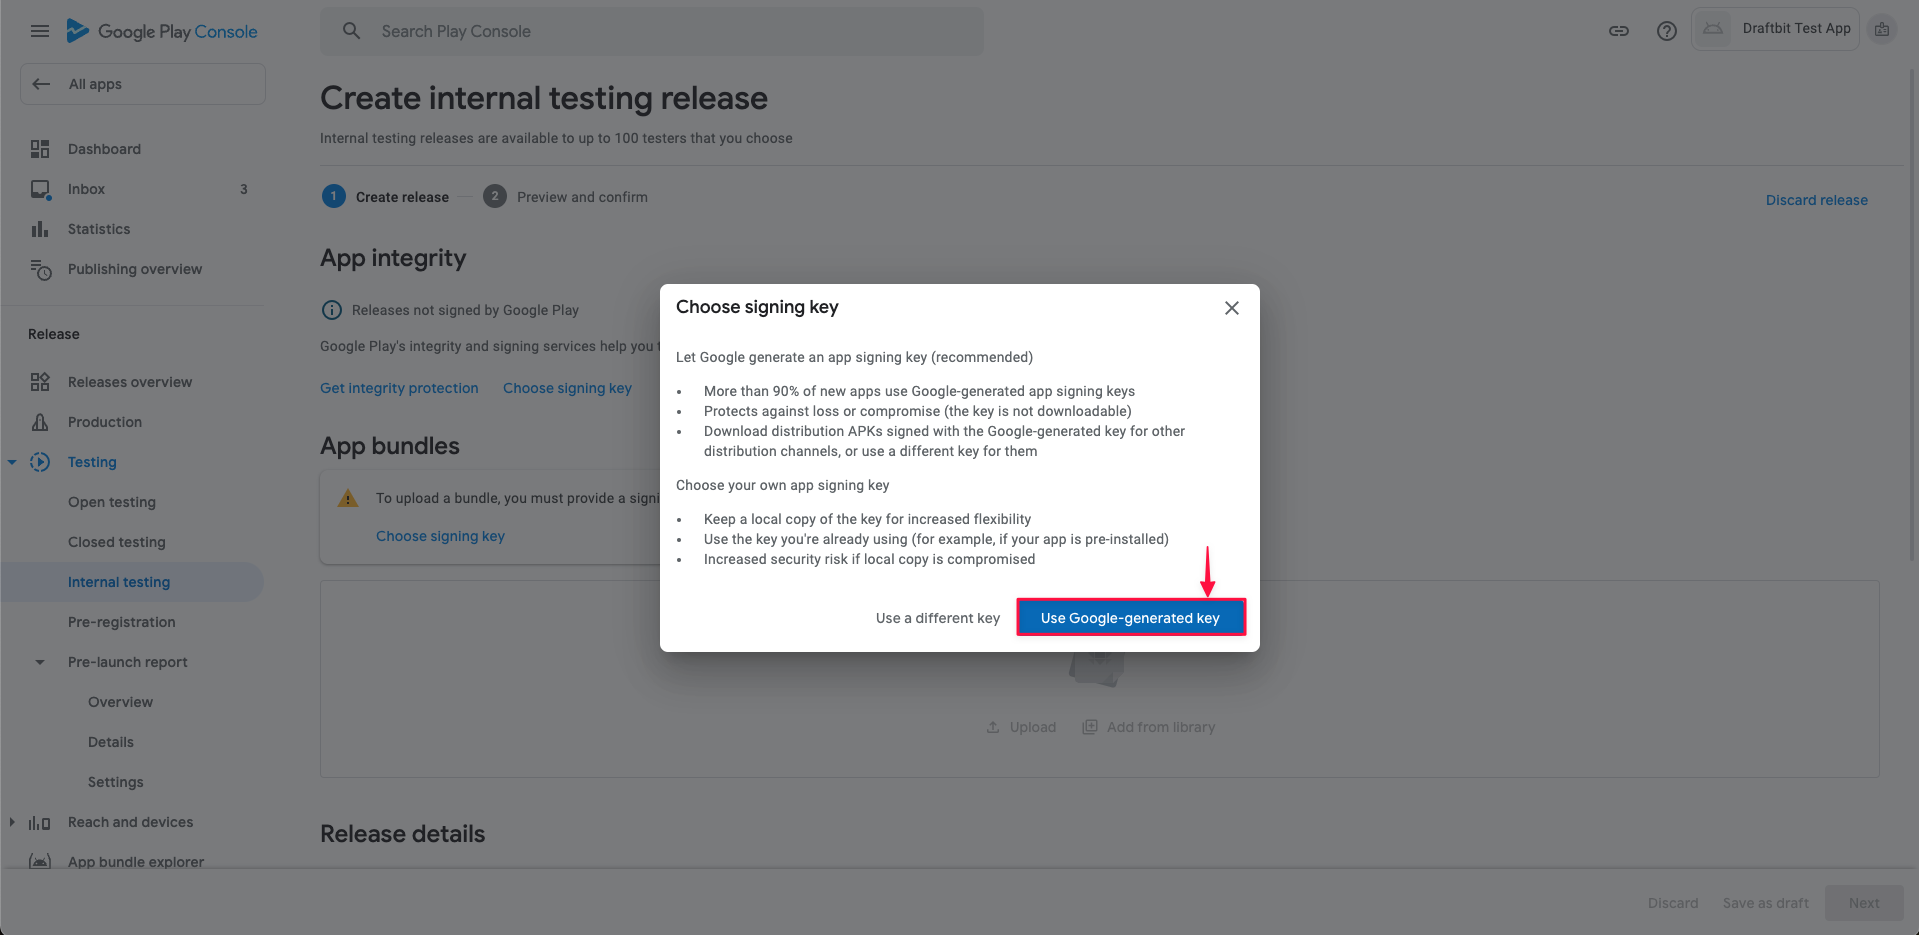
Choose Signing Key
In the appearing modal select use Google-generated key option. This is critical to allow Draftbit publish future app for you.
-
Submit Release
Then, enter your Release name, enter any relevant Release notes and click Review release.
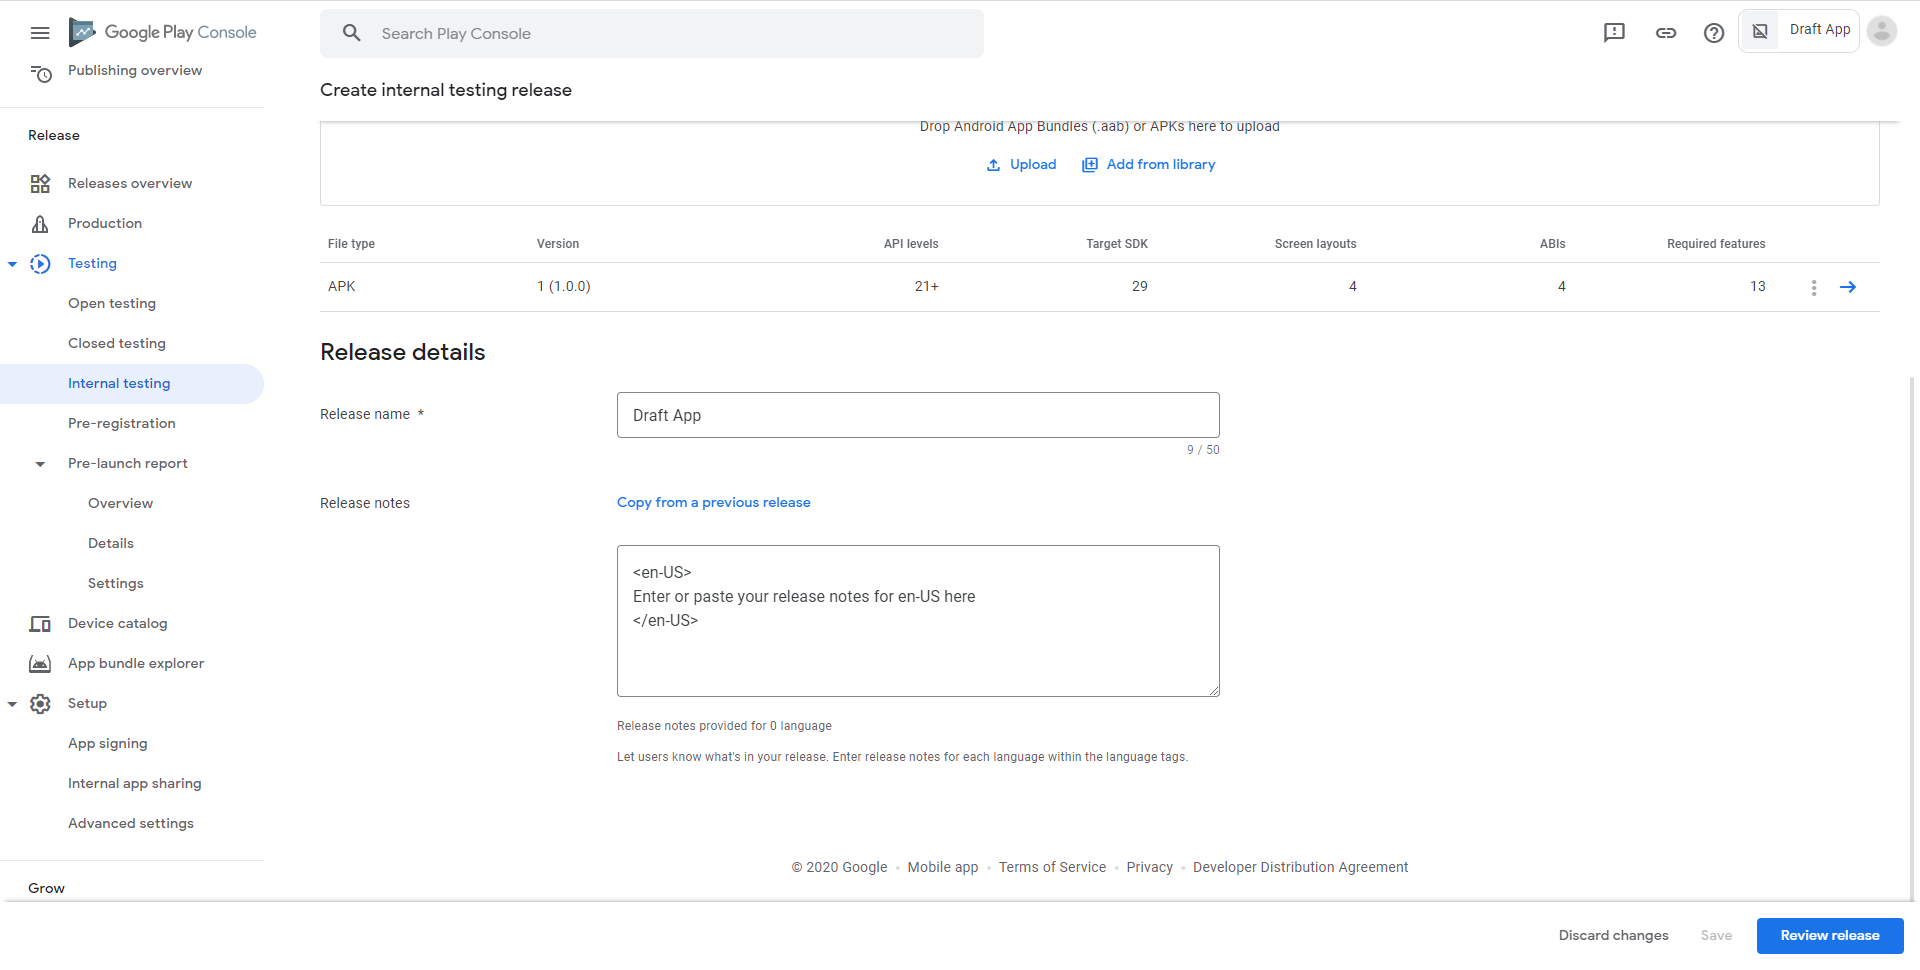
You’ll then be navigated to the Review summary view. At the top, you’ll see the Errors section. If there are errors, click Show more to view the details.
Add a privacy policy to your app
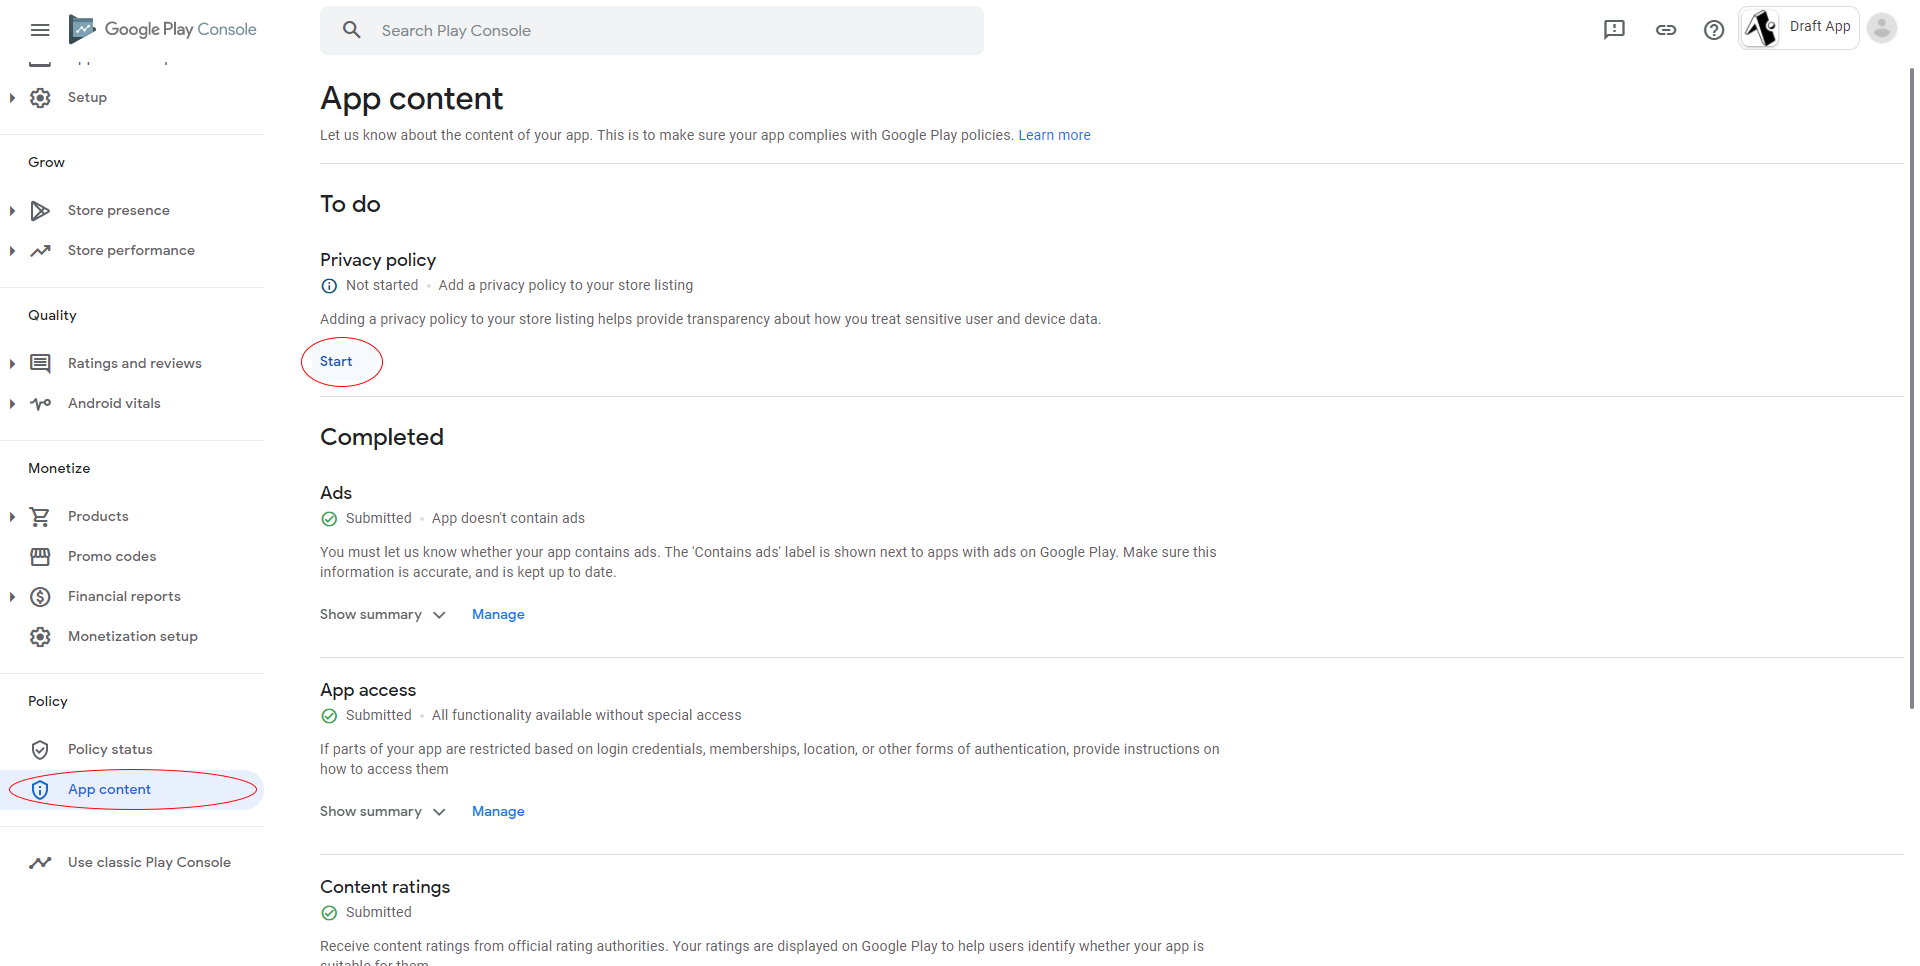
Section titled “Add a privacy policy to your app”Google requires that all apps in the Play Store have an associated Privacy Policy. If you don’t have one, you may have noticed a resulting error when you uploaded your binary/.aab file the first time.
-
Open Google Play Console
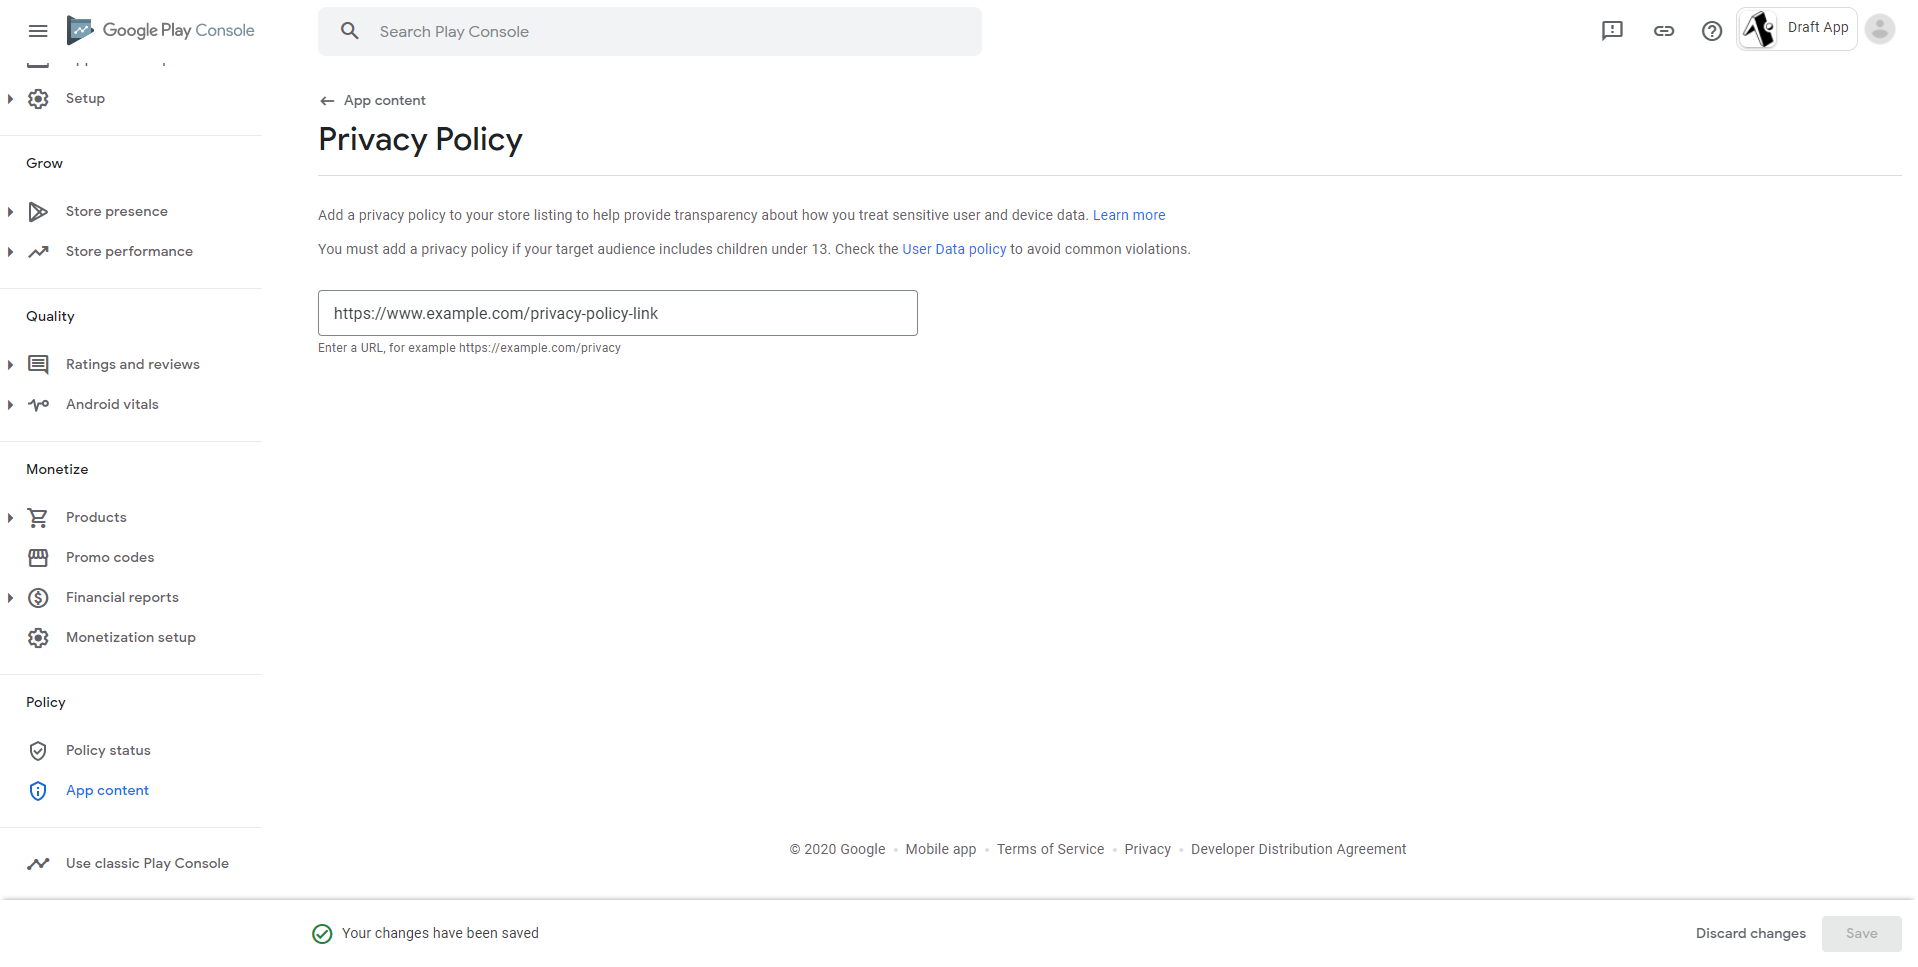
Go to your Google Play Console and navigate to your app’s Dashboard and click App content. You’ll see a Privacy Policy section at the top of that page - Click Start in that section.
-
Enter Privacy Policy
Enter your Privacy Policy link in the prompt and click Save
Navigate back to the Internal testing page and click the Edit button for your App. You should no longer see the Privacy Policy error on the Review Summary page for your App.
Add testers for your app
Section titled “Add testers for your app”You can invite people to test your app before publishing it to the Play Store. Here’s how to add testers to your app.
-
Open Google Play Console
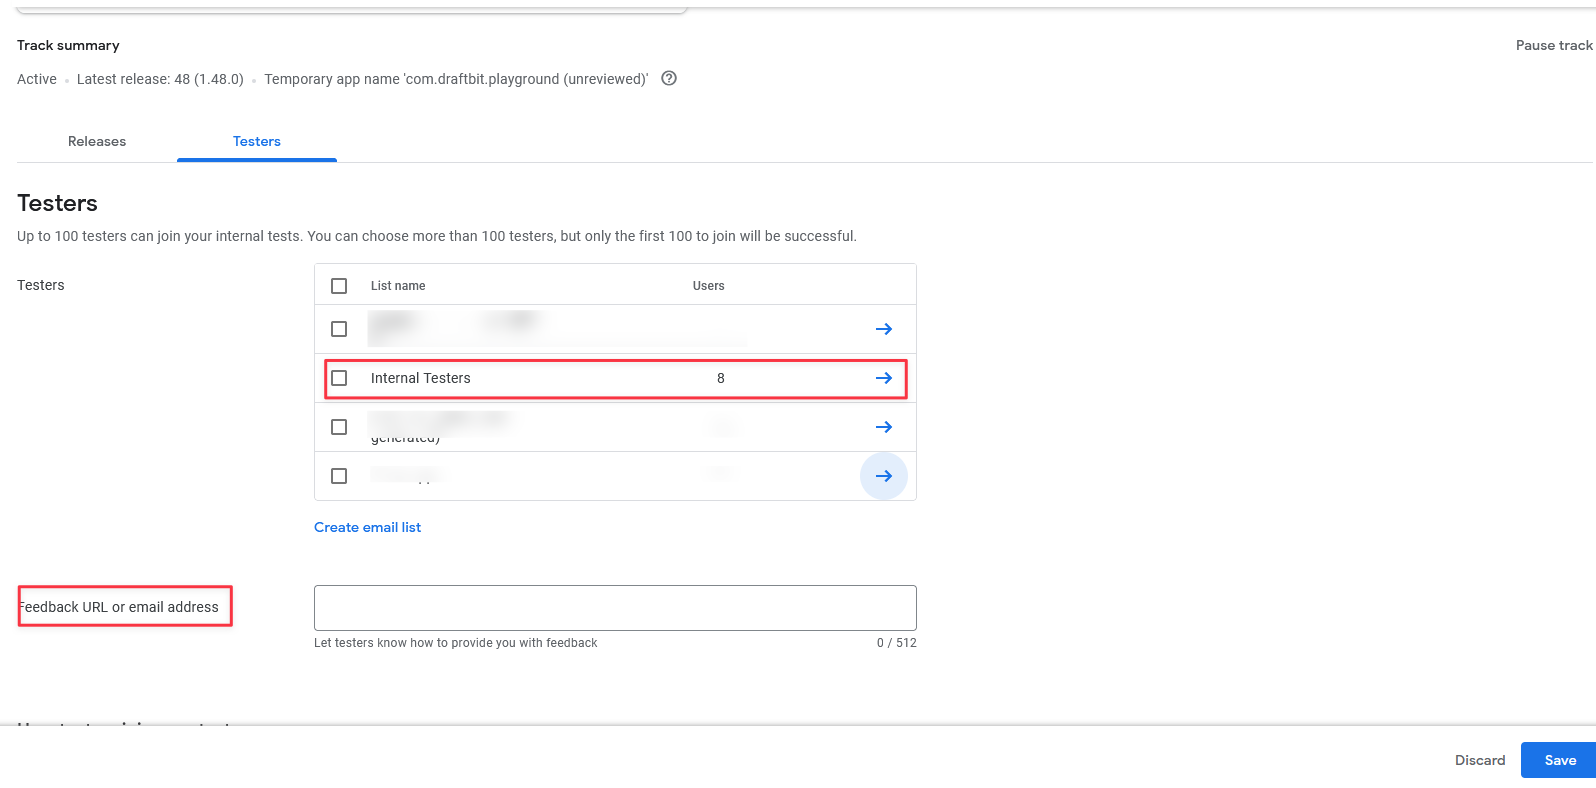
Go to your Google Play Console and navigate to your app’s Internal Testing by clicking on Testing > Internal testing. In the upcoming page select the Testers tab.
-
Create Email List
Under “Testers,” you are able to create an email list for testers.
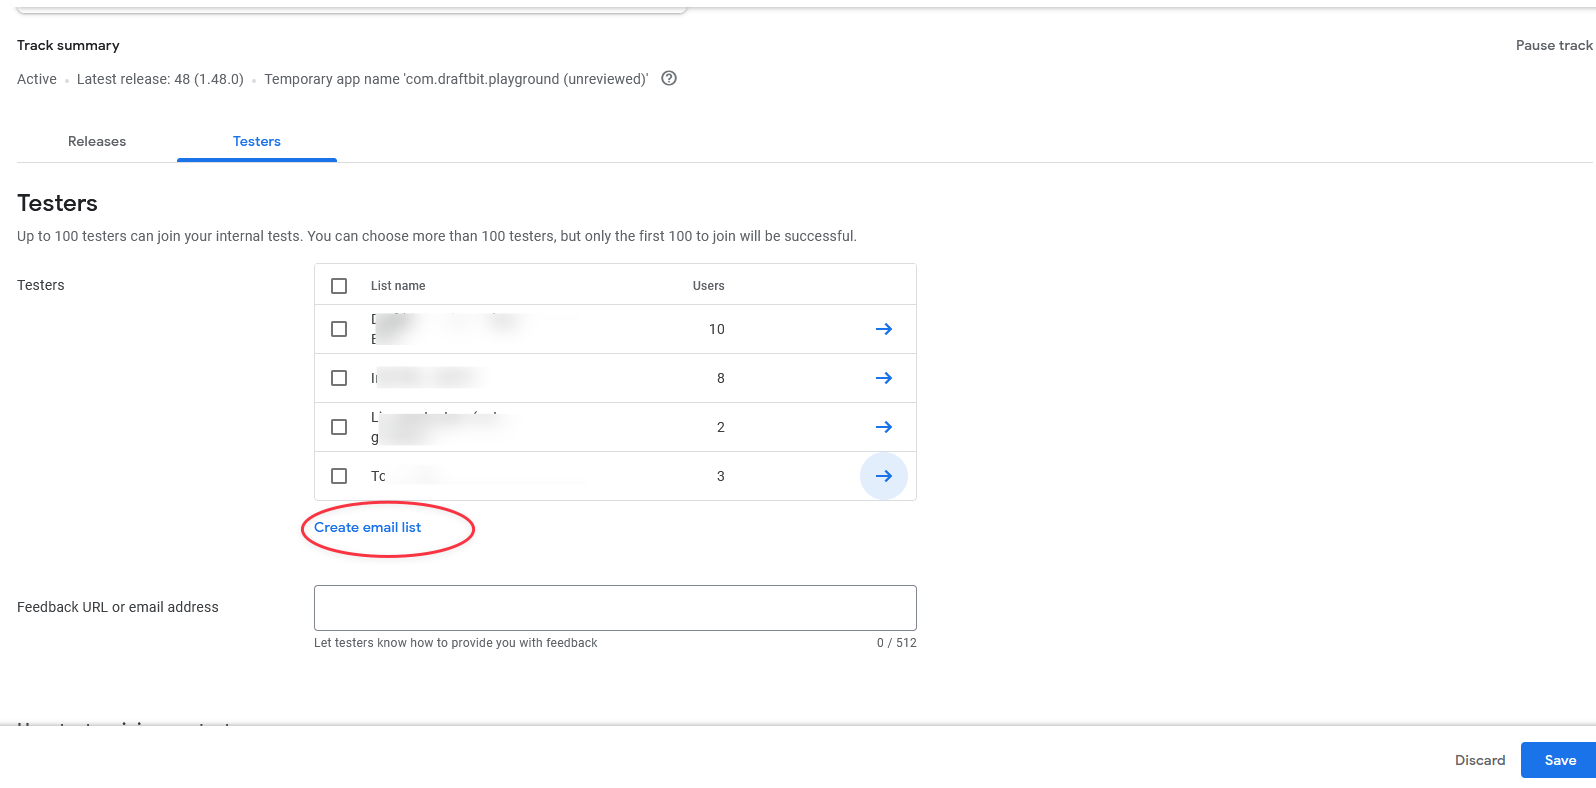
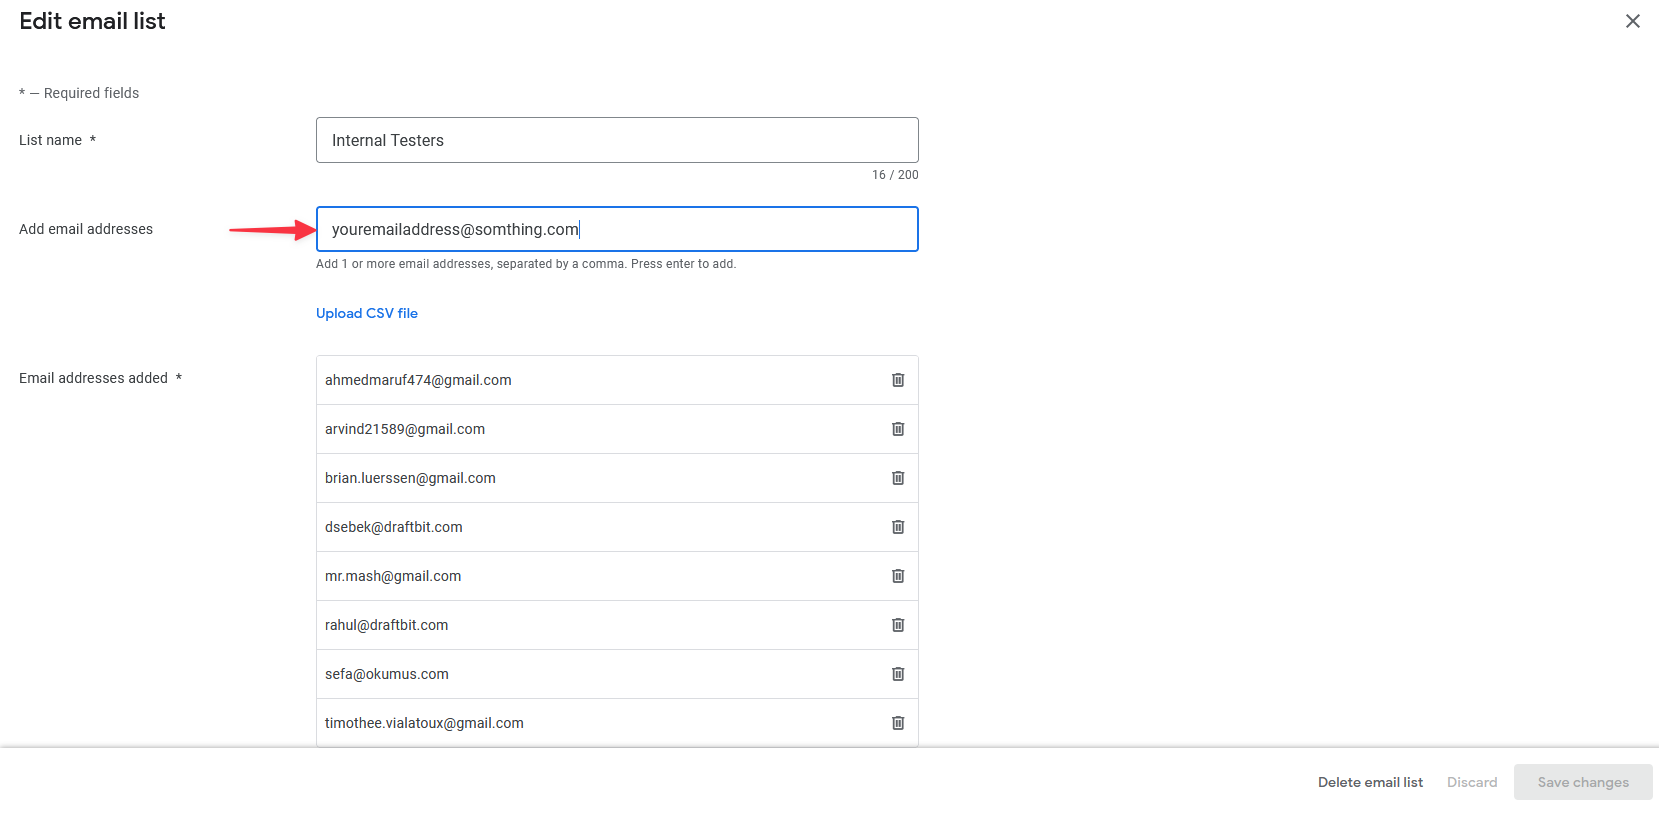
Enter a list name and add email addresses you wish to add. You can also upload CSV file that includes listed testers. Then select Save changes, then Create.
-
Invite testers
In the “Testers” tab, you can select the user lists you want to test your release.
In the below, to gather feedback from testers, you can provide a feedback URL or email address. Copy the shareable link to share the release with testers and save the changes

Configure your app settings
Section titled “Configure your app settings”Go to Publishing page and select the Google Play Store option.
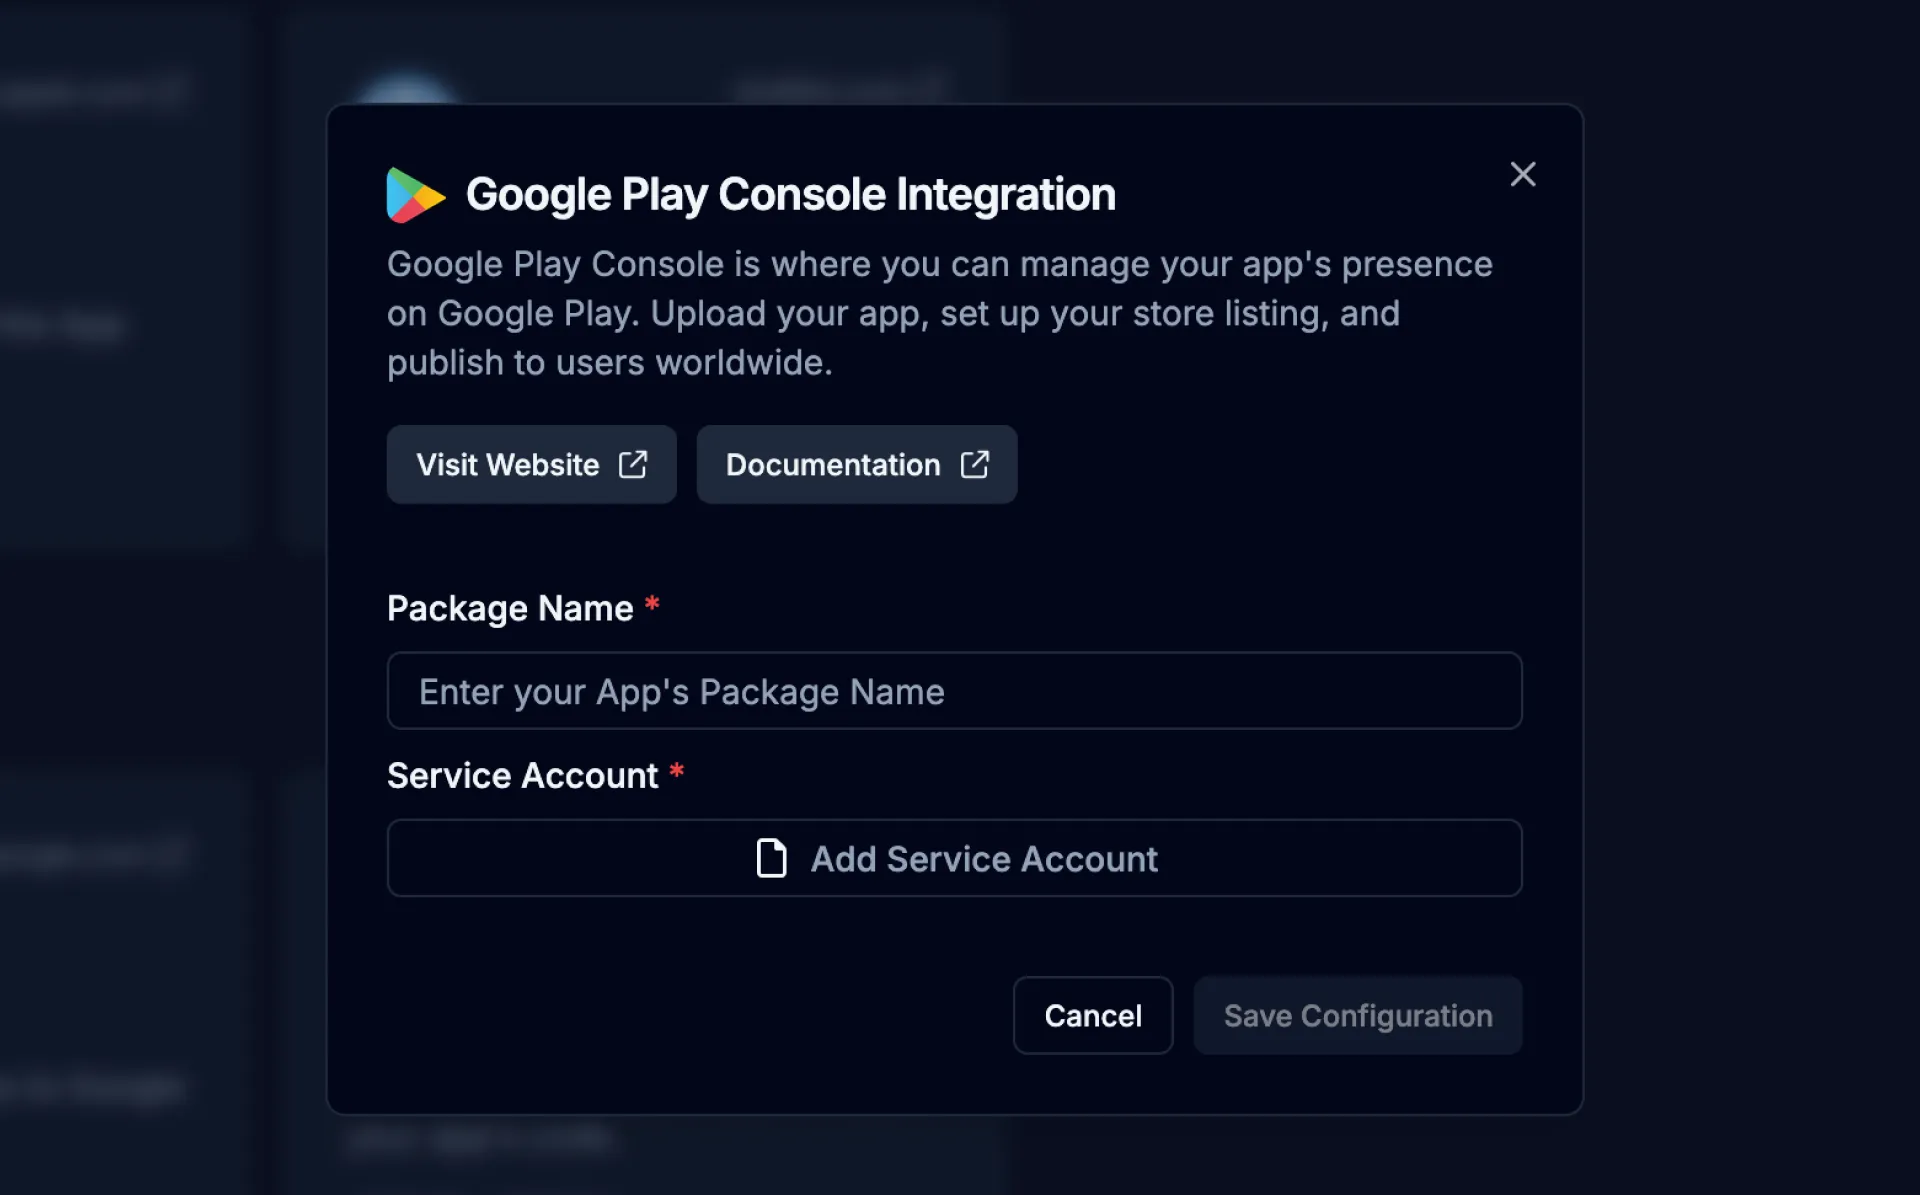
- Enter the Package Name you created in the previous step into the
- Package Name field. Upload the Google Service Account Key file that you downloaded in the previous step into the Service Account field. Click the
- Save Configuration button
Publish your app
Section titled “Publish your app”Now, you’re ready to publish your app to the Google Play Store.
-
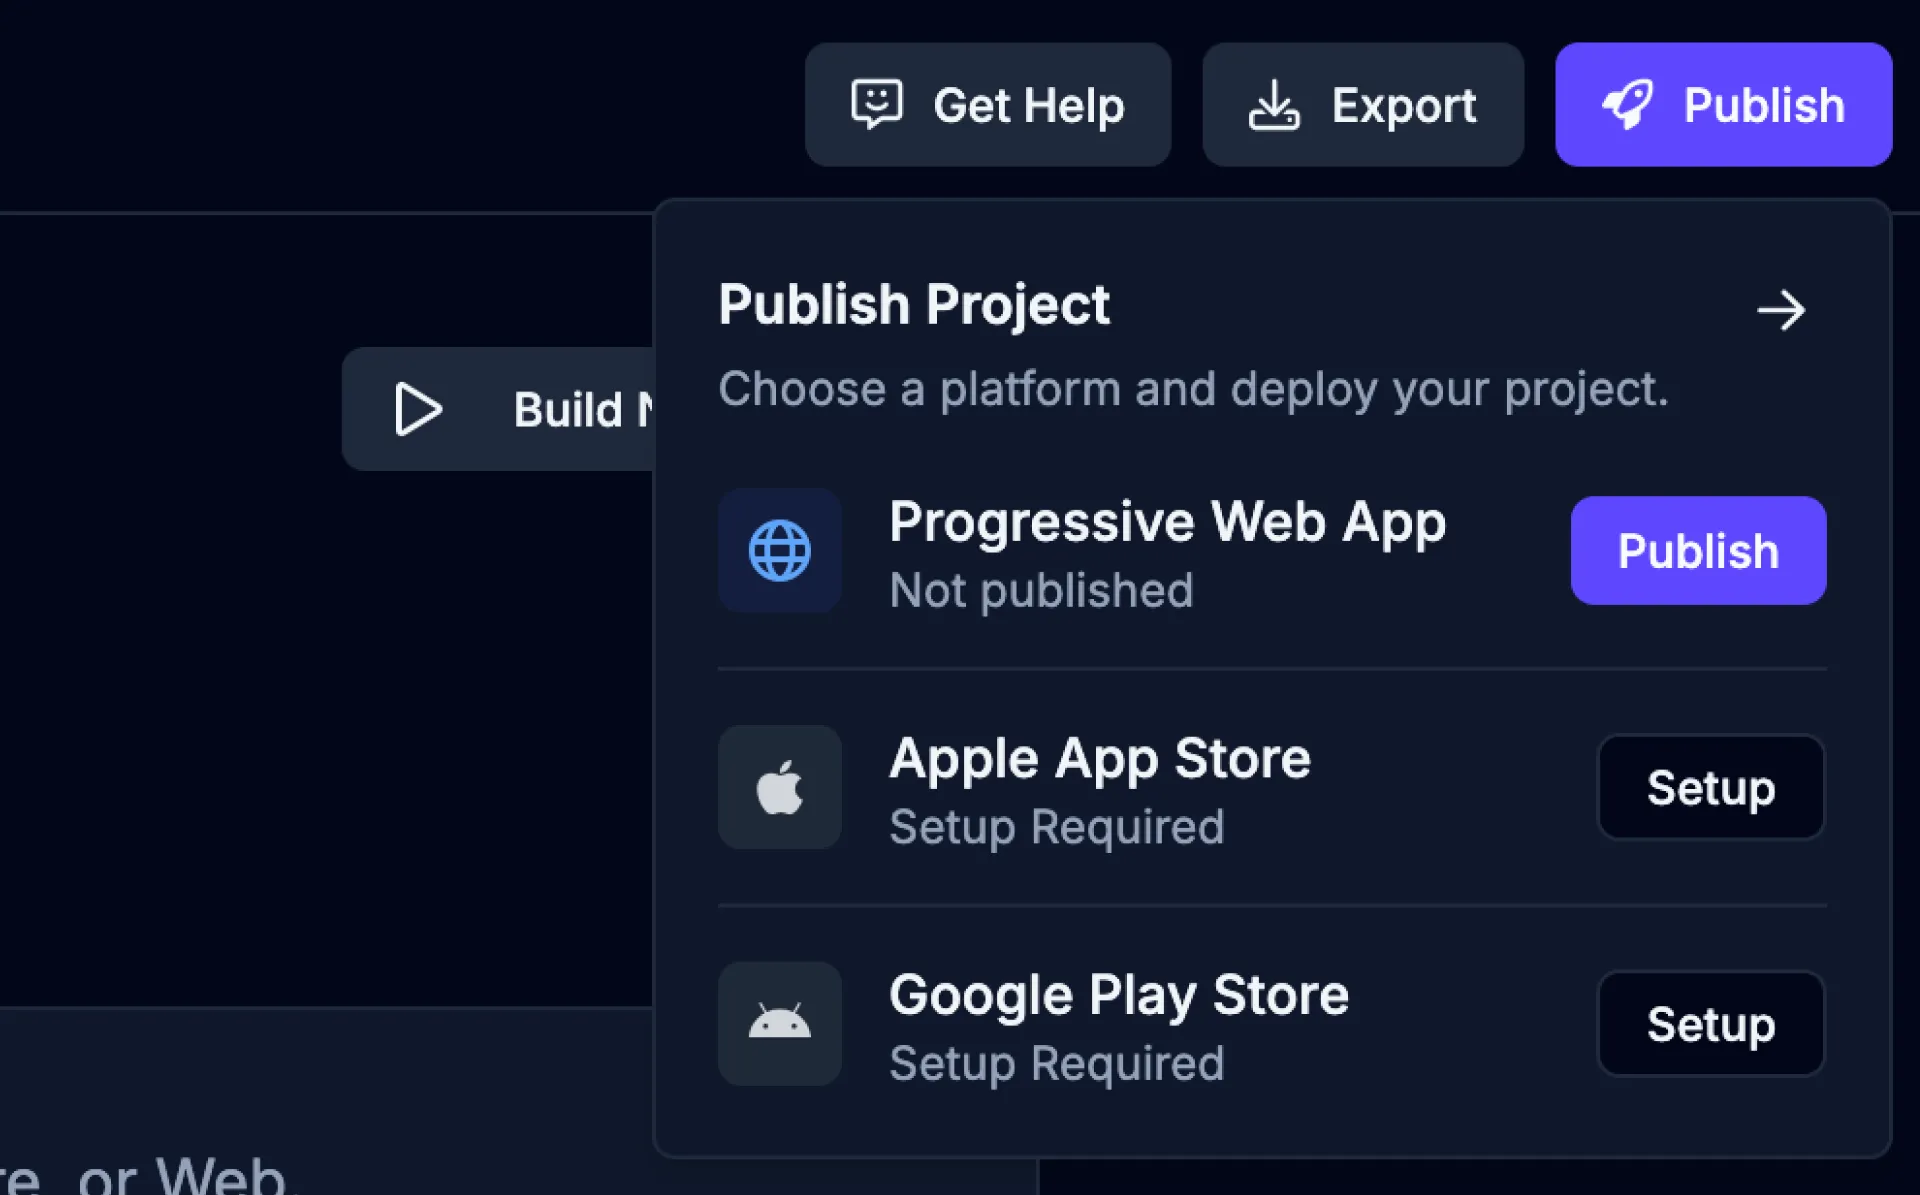
Open the Publish dropdown
Click the
 button from the top-right of the Builder to open the Publish dropdown.
 -
Choose Google Play Store
Click the
 button for the Google Play Store option.
 -
Start a new publish
Enter a version name, number, and environment for your publish and then click the
 to start the publishing process.
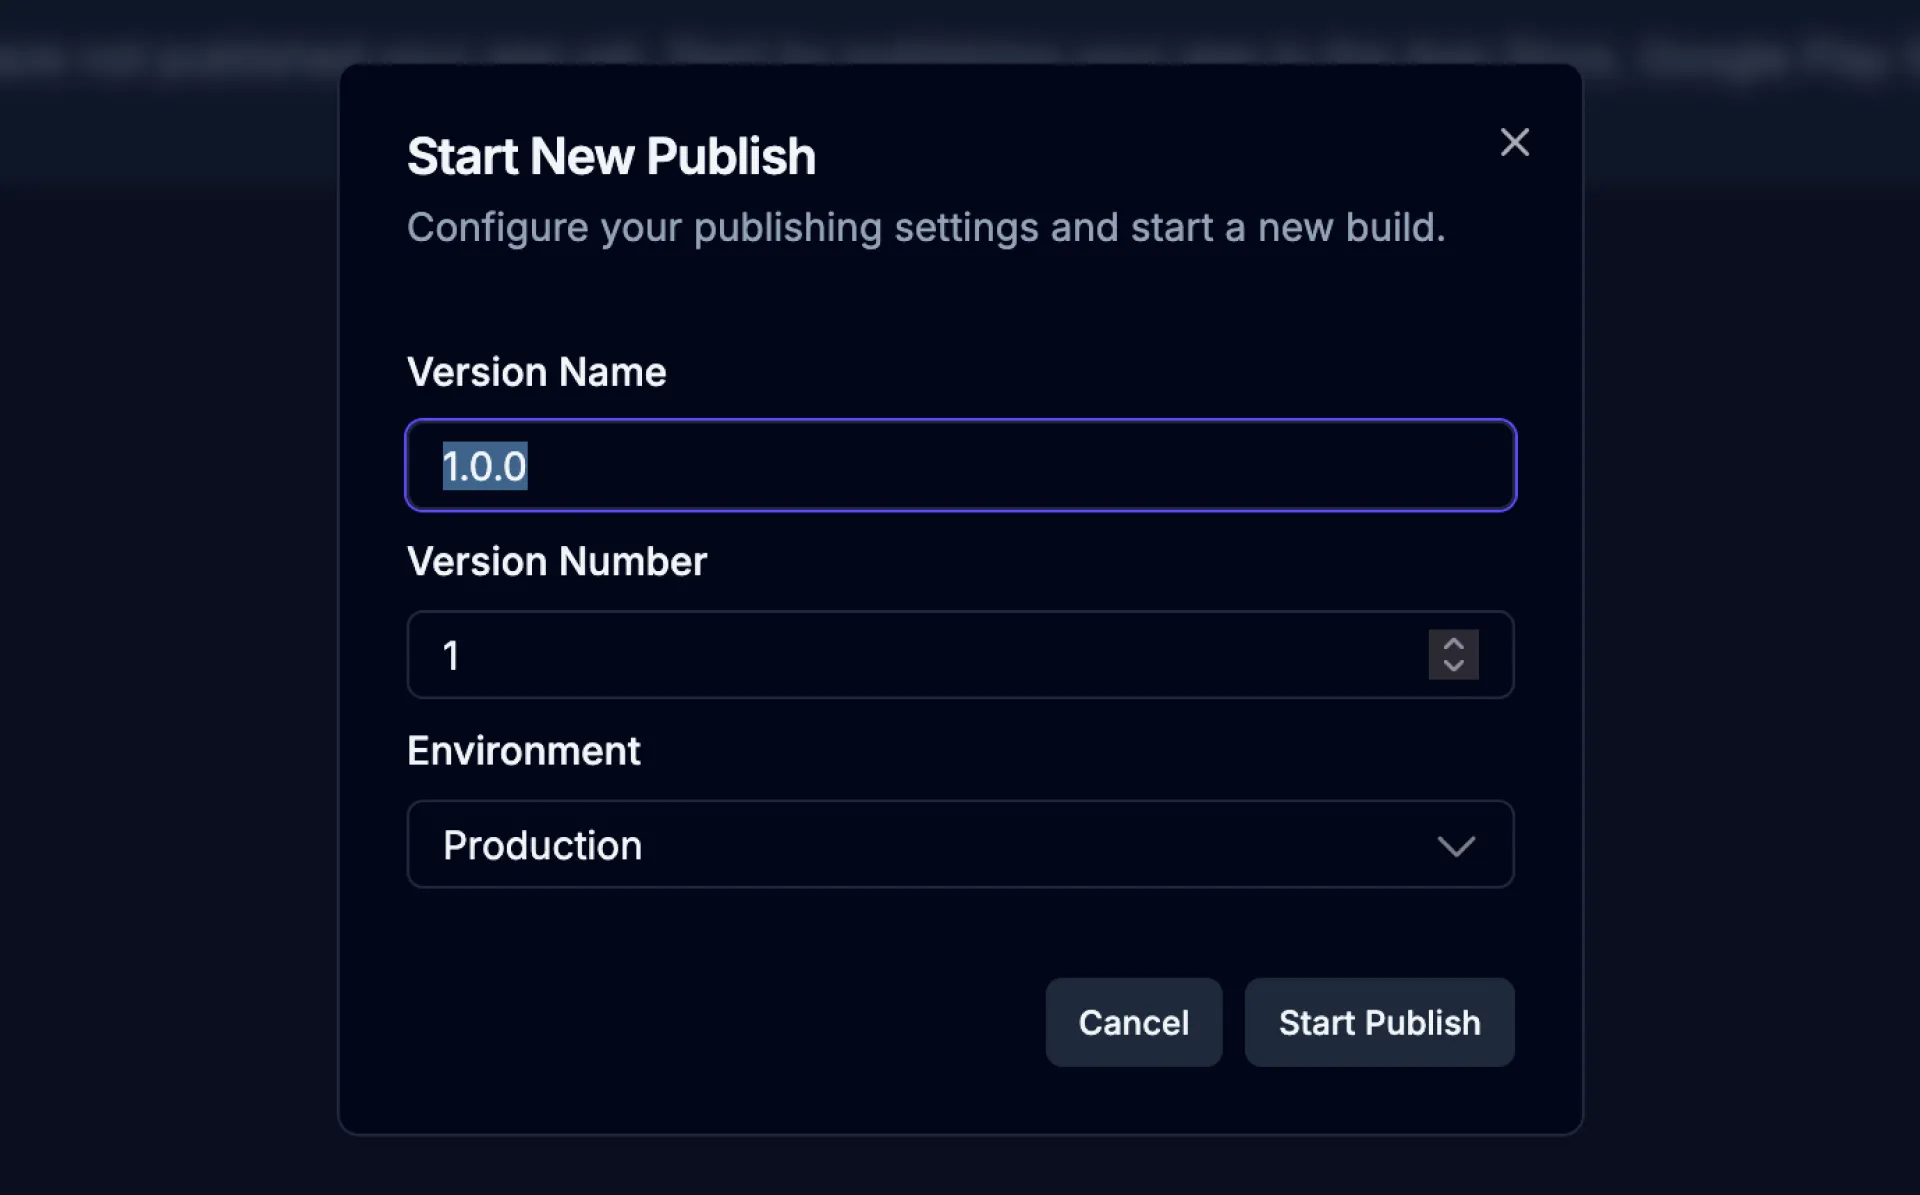
| Name | Description |
|---|---|
| Version Name | A name for this version of your web app (e.g., “Initial Release”, “Major Update”, “v3”). |
| Version Number | The version number assigned to this publish (e.g., “1”, “2.0”, “3.1”). |
| Environment | The environment to publish your web app to. Only Production is supported. |
Publishing apps built outside Draftbit Next
Section titled “Publishing apps built outside Draftbit Next”If an Android app was originally published using another toolchain or Draftbit v1, update builds submitted through Draftbit Next can fail because Draftbit Next uses a different upload key. Google Play will reject the upload due to signature mismatch.
Draftbit Next signs Android builds with a different upload key. If the Play Store listing was created with another key (external build or Draftbit v1), Google Play requires an upload key reset before accepting new builds.
To resolve this issue, you need to reset the upload key for your app. Here’s how to do it:
-
Open Google Play Console
Go to the Google Play Console and sign in.
-
Choose the app you want to reset the upload key for
-
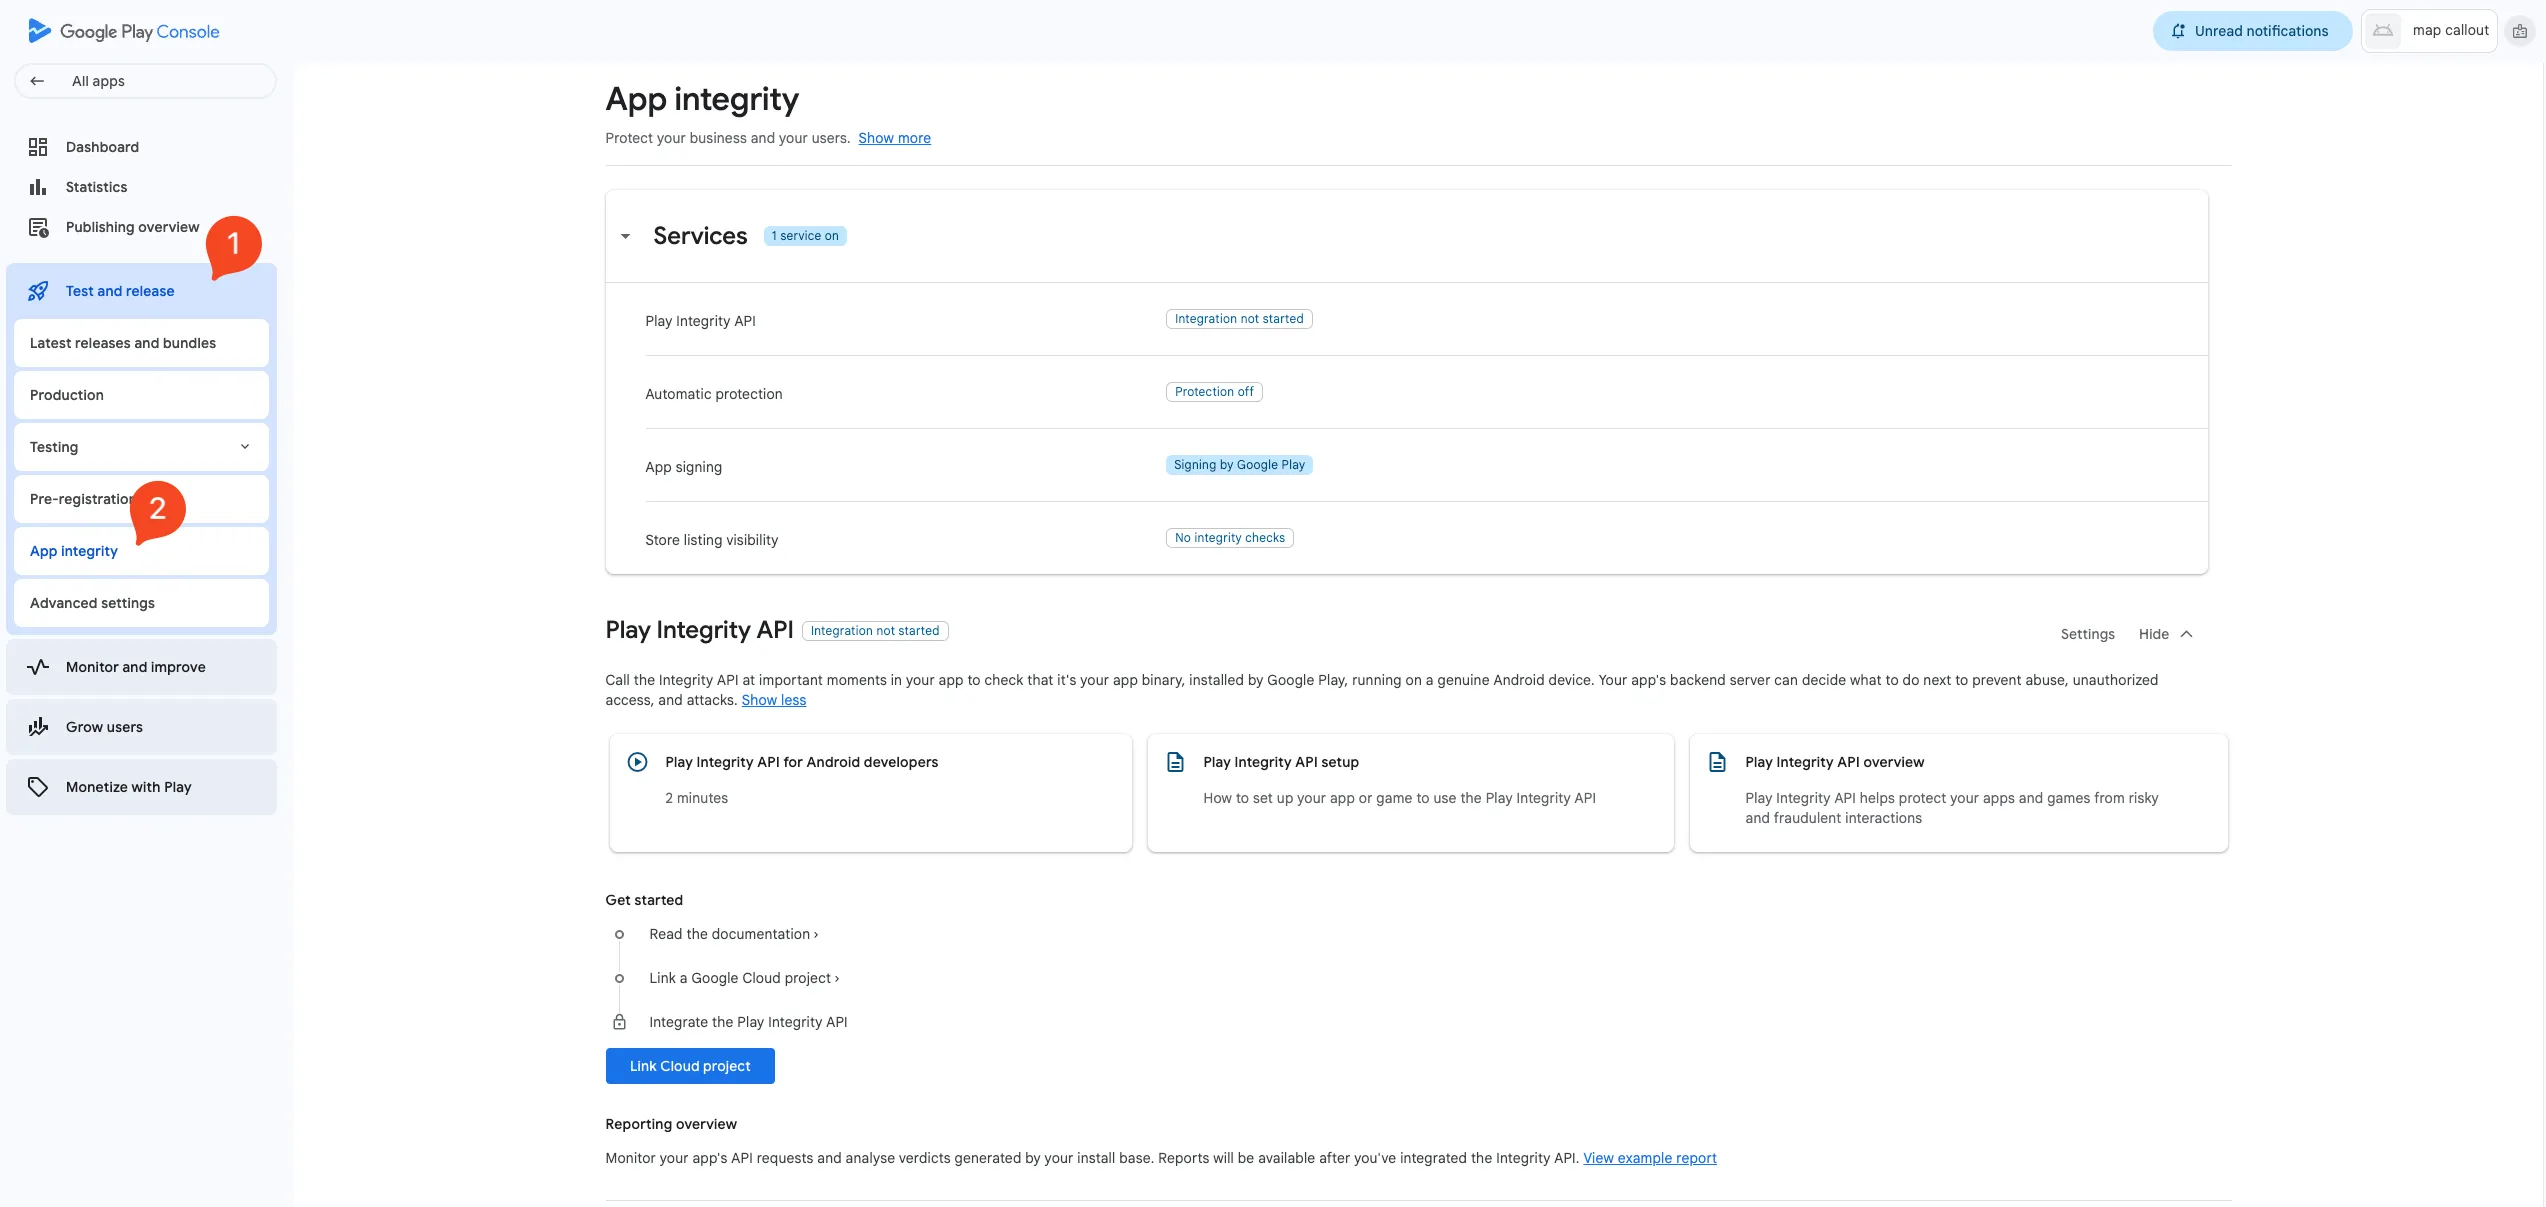
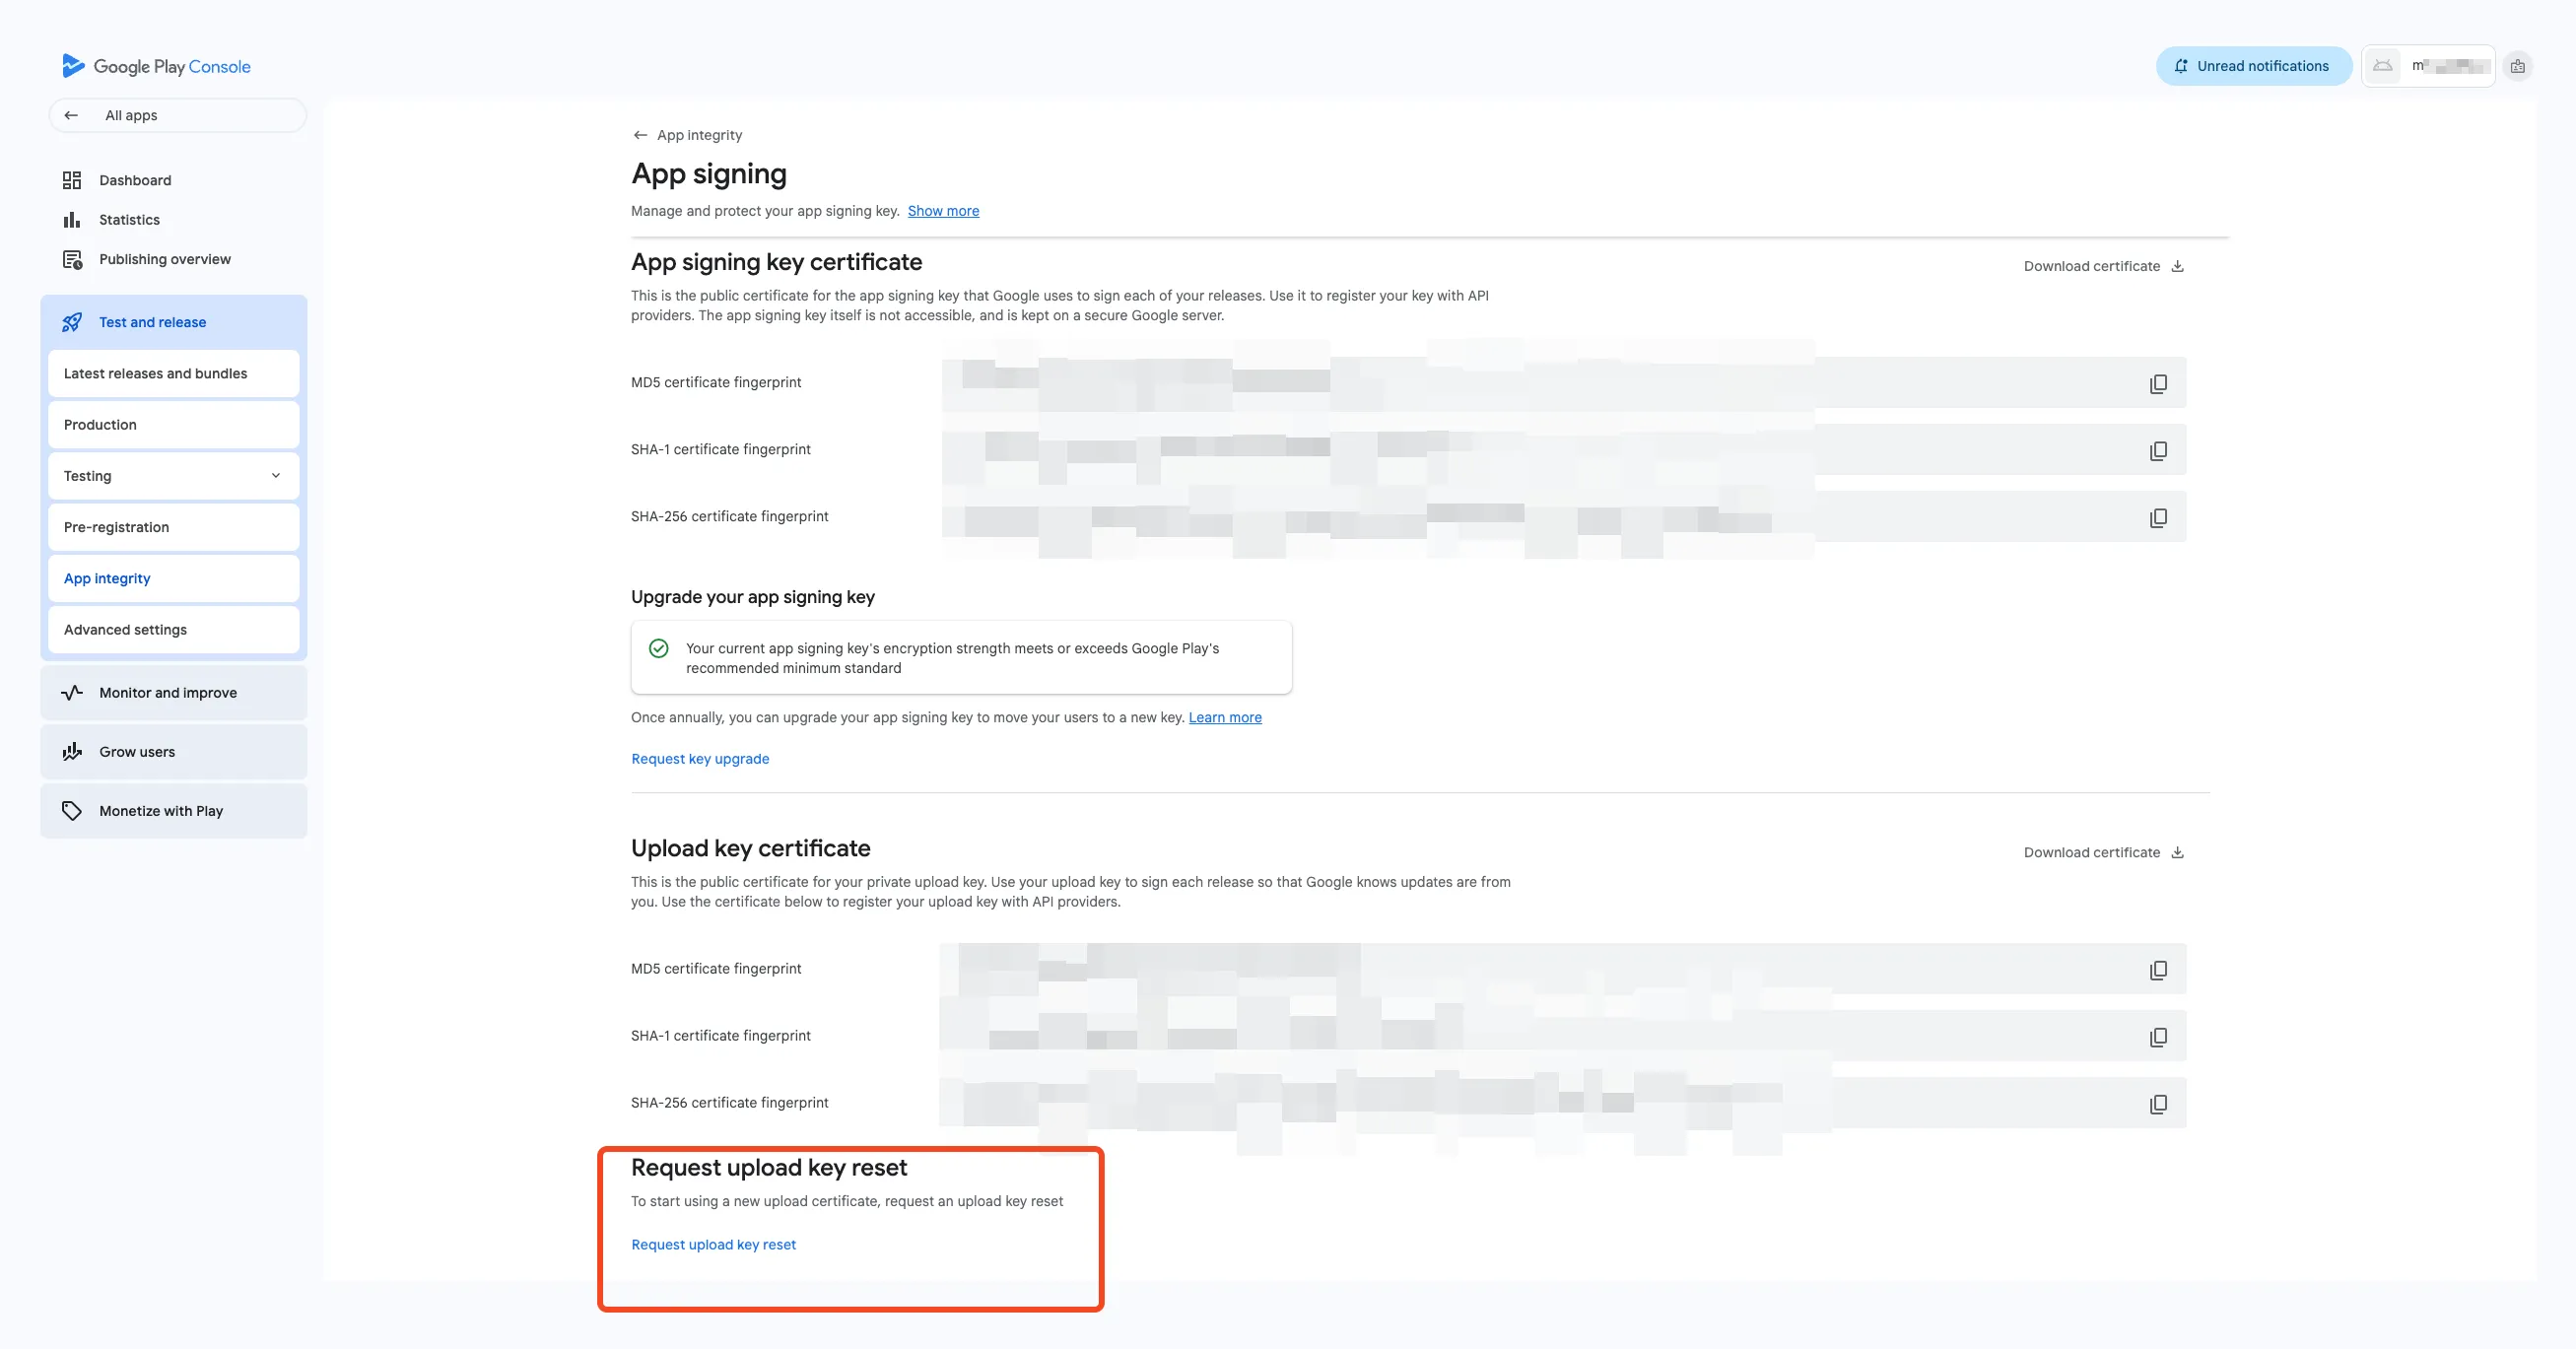
Go to Test & Release → App integrity
-
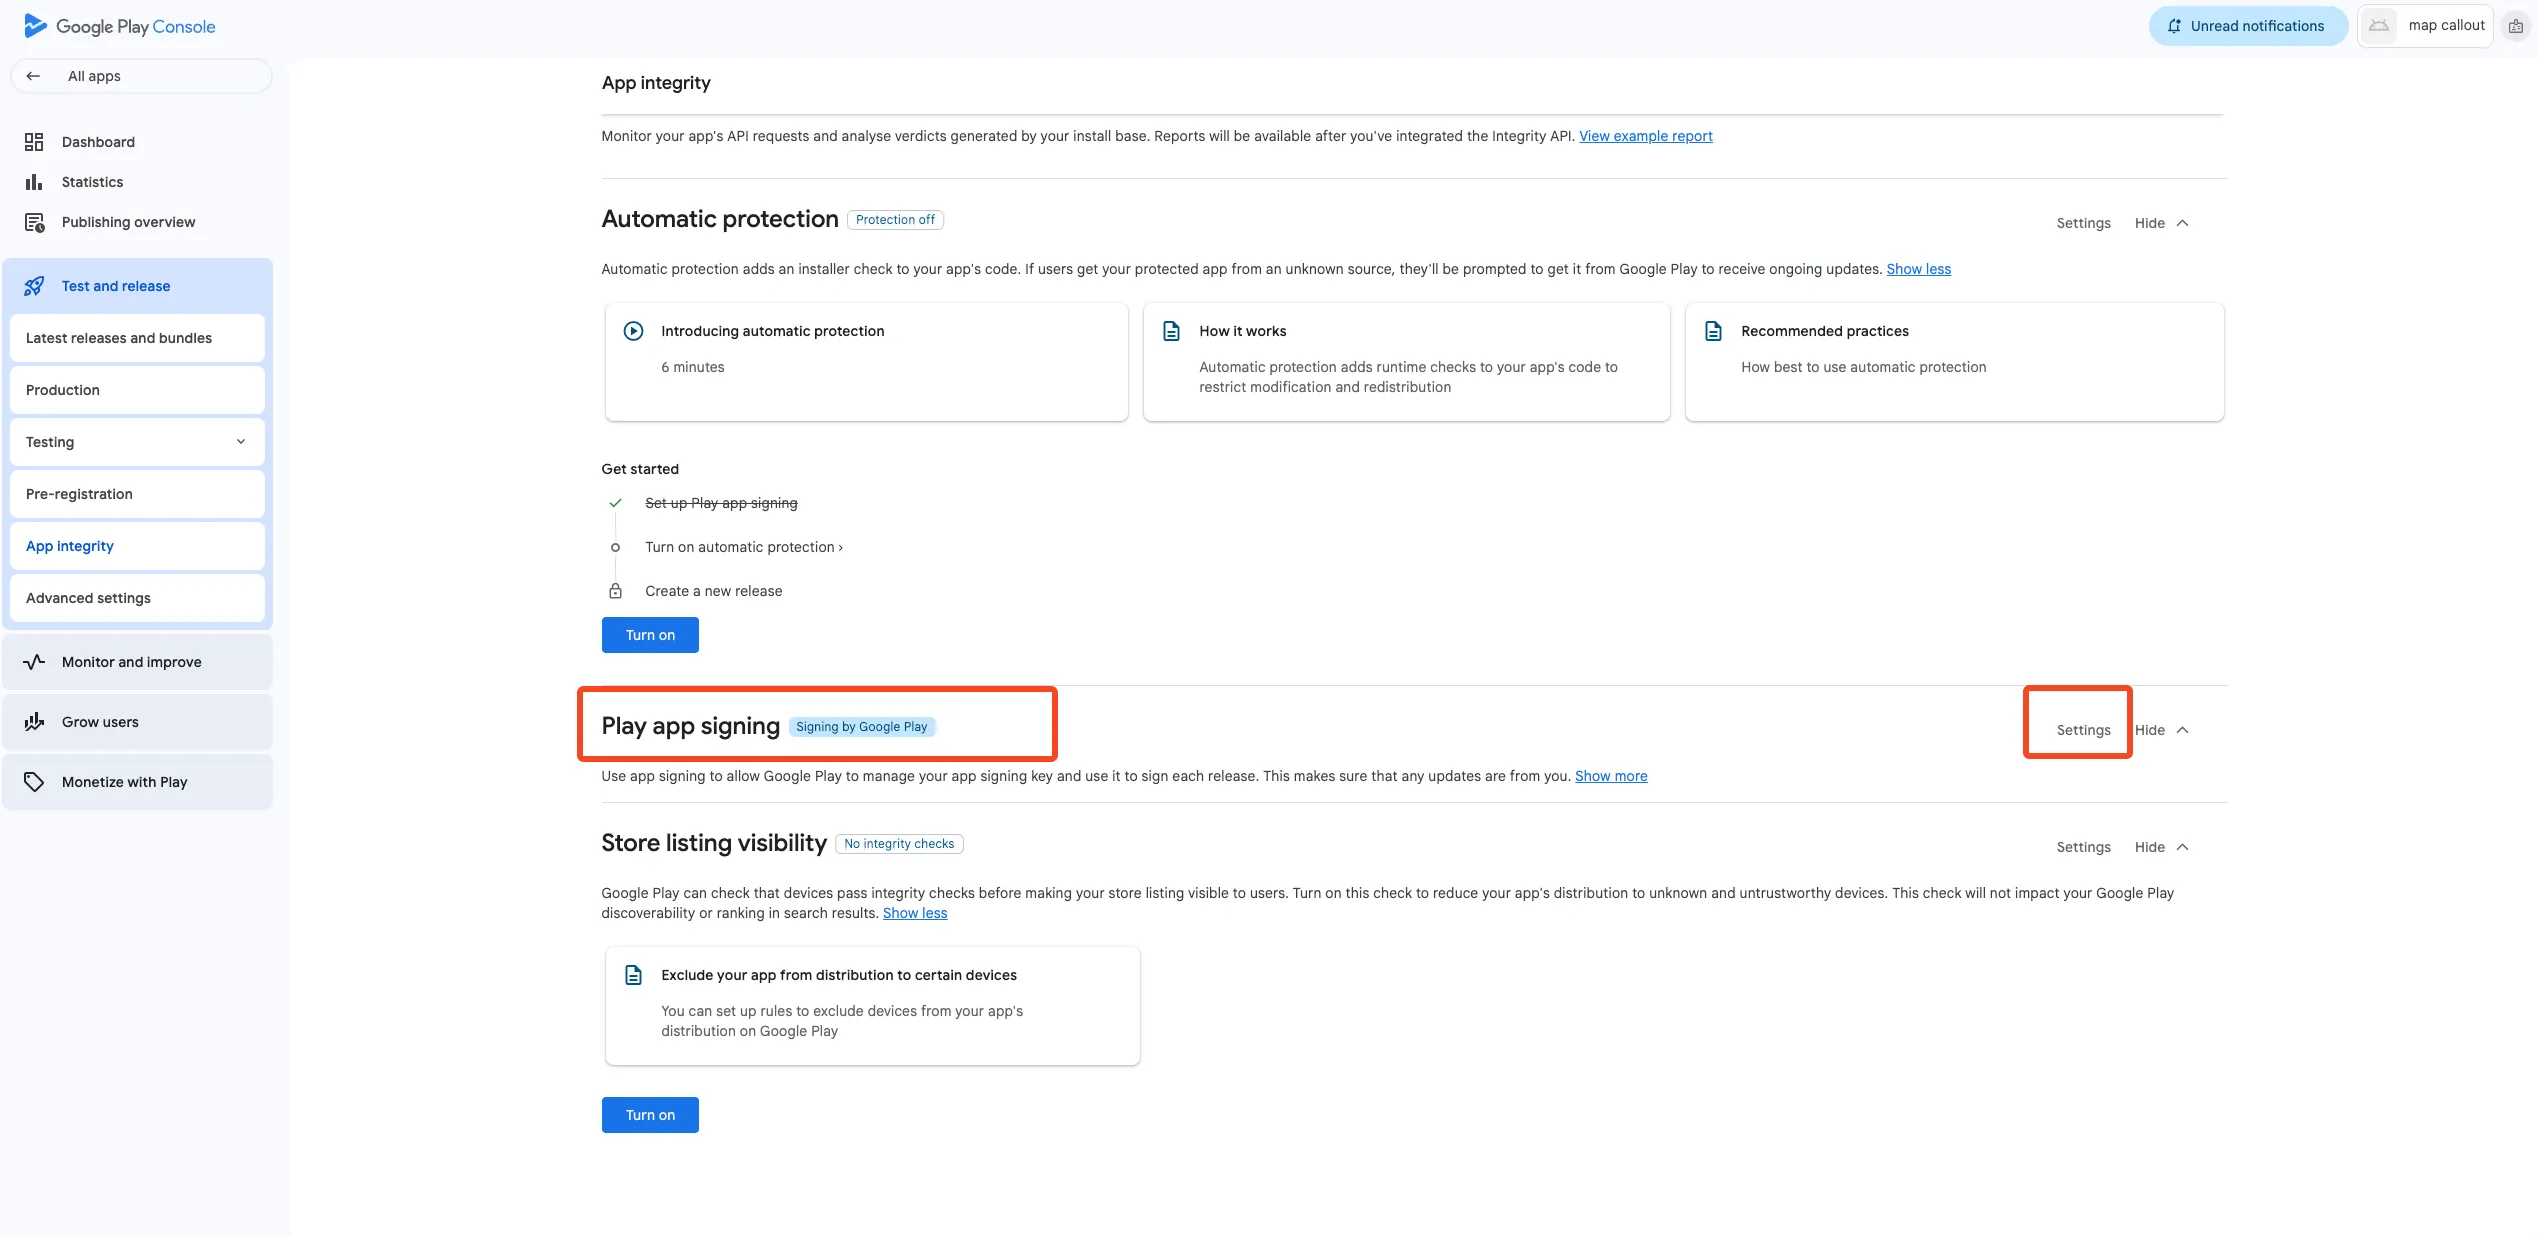
Find App signing section
-
Request upload key reset / replacement
-
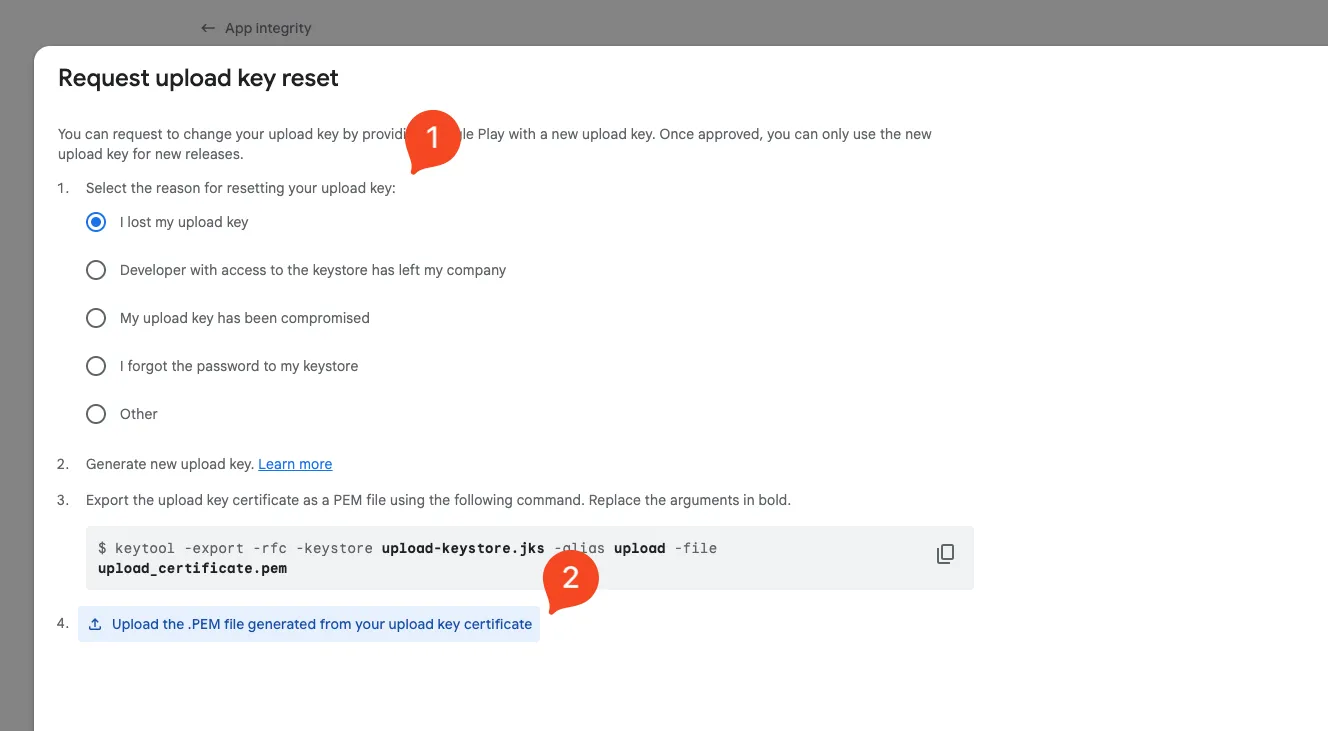
Provide the new upload certificate
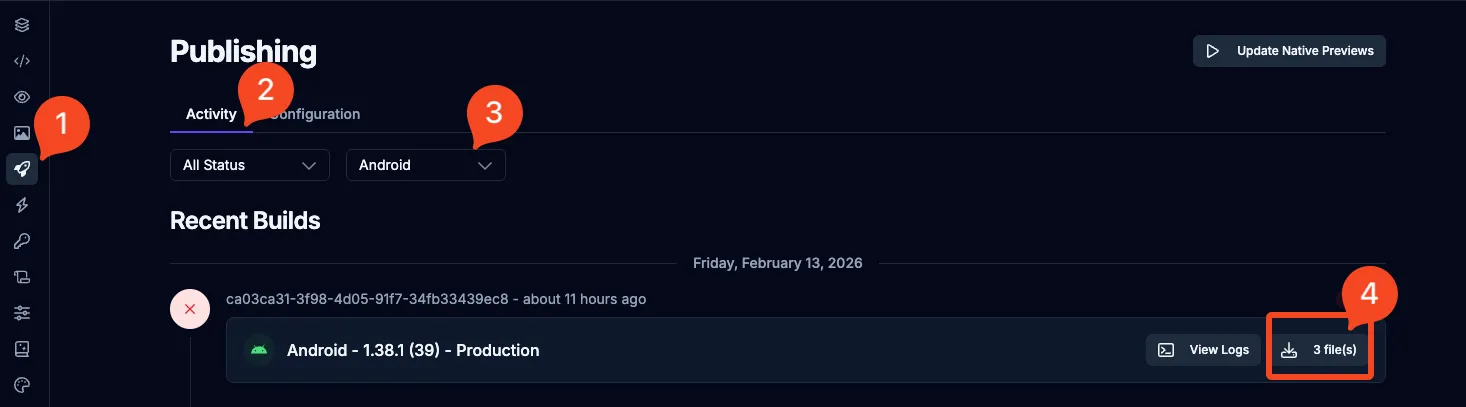
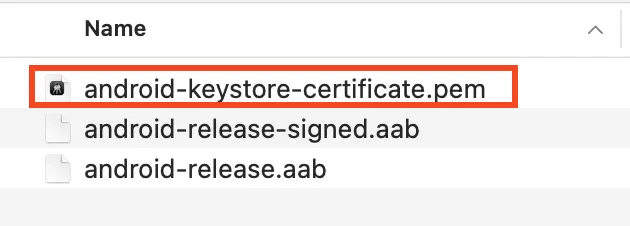
Download the generated signing files from Draftbit Next publish output
-
Upload the new upload certificate
-
Wait for Google confirmation
After you’ve uploaded the new upload certificate, Google will review your request to reset the upload key. This review process is handled by Google and can take several days to complete. During this time, you don’t need to take any further action—simply wait for Google to complete their verification.
Once Google has finished processing your request and has updated the upload key for your app, they will send a confirmation email to the address associated with your Google Play Developer account. Make sure to check your email (including your spam or promotions folder) for this notification.
Only after receiving confirmation from Google should you proceed with submitting a new build through Draftbit. Attempting to publish before the upload key is updated may result in further errors.
-
Publish again through Draftbit
Run a new Android publish through Draftbit. The upload should now succeed with the registered key.