iOS Publishing (Cloud)
Draftbit supports publishing your app to the Apple App Store. In order to do this, you’ll need to complete a few setup steps and provide us with some information. This guide details those steps.
App Configuration
Section titled “App Configuration”Before you start the publishing process, make sure your app’s configuration properties are up to date in the App Configuration view. At a minimum, we recommend you review and update:
- App Name: The name shown on the device home screen after install
- Slug: A URL-friendly identifier used in publishing/build processes
- URL Scheme: URL scheme for deep linking into your app (e.g., myapp:// would use ‘myapp’).
- Description: A short description of your app
- App Icon: Your app’s icon (we recommend uploading a 1024×1024 PNG)
- Splash Screen: The launch screen users see while your app loads
For more details (and the full list of available properties), see App Configuration.
Apple Developer Account
Section titled “Apple Developer Account”First, in order to publish to the Apple App Store, you’ll need an Apple account and a Developer membership.
- Create an Apple Account if you don’t already have one
- Enroll in the Apple Developer Program
- Pay the $99/year fee
- Provide the required information
- Verify your account by providing a government-issued photo ID that matches the information you provided on sign-up if required.
See this guide for more information on how to sign up.
Create a Bundle Identifier
Section titled “Create a Bundle Identifier”Next, you’ll need to create a Bundle Identifier (ID) for your app. This is unique to your app which identifies it inside of Apple’s system.
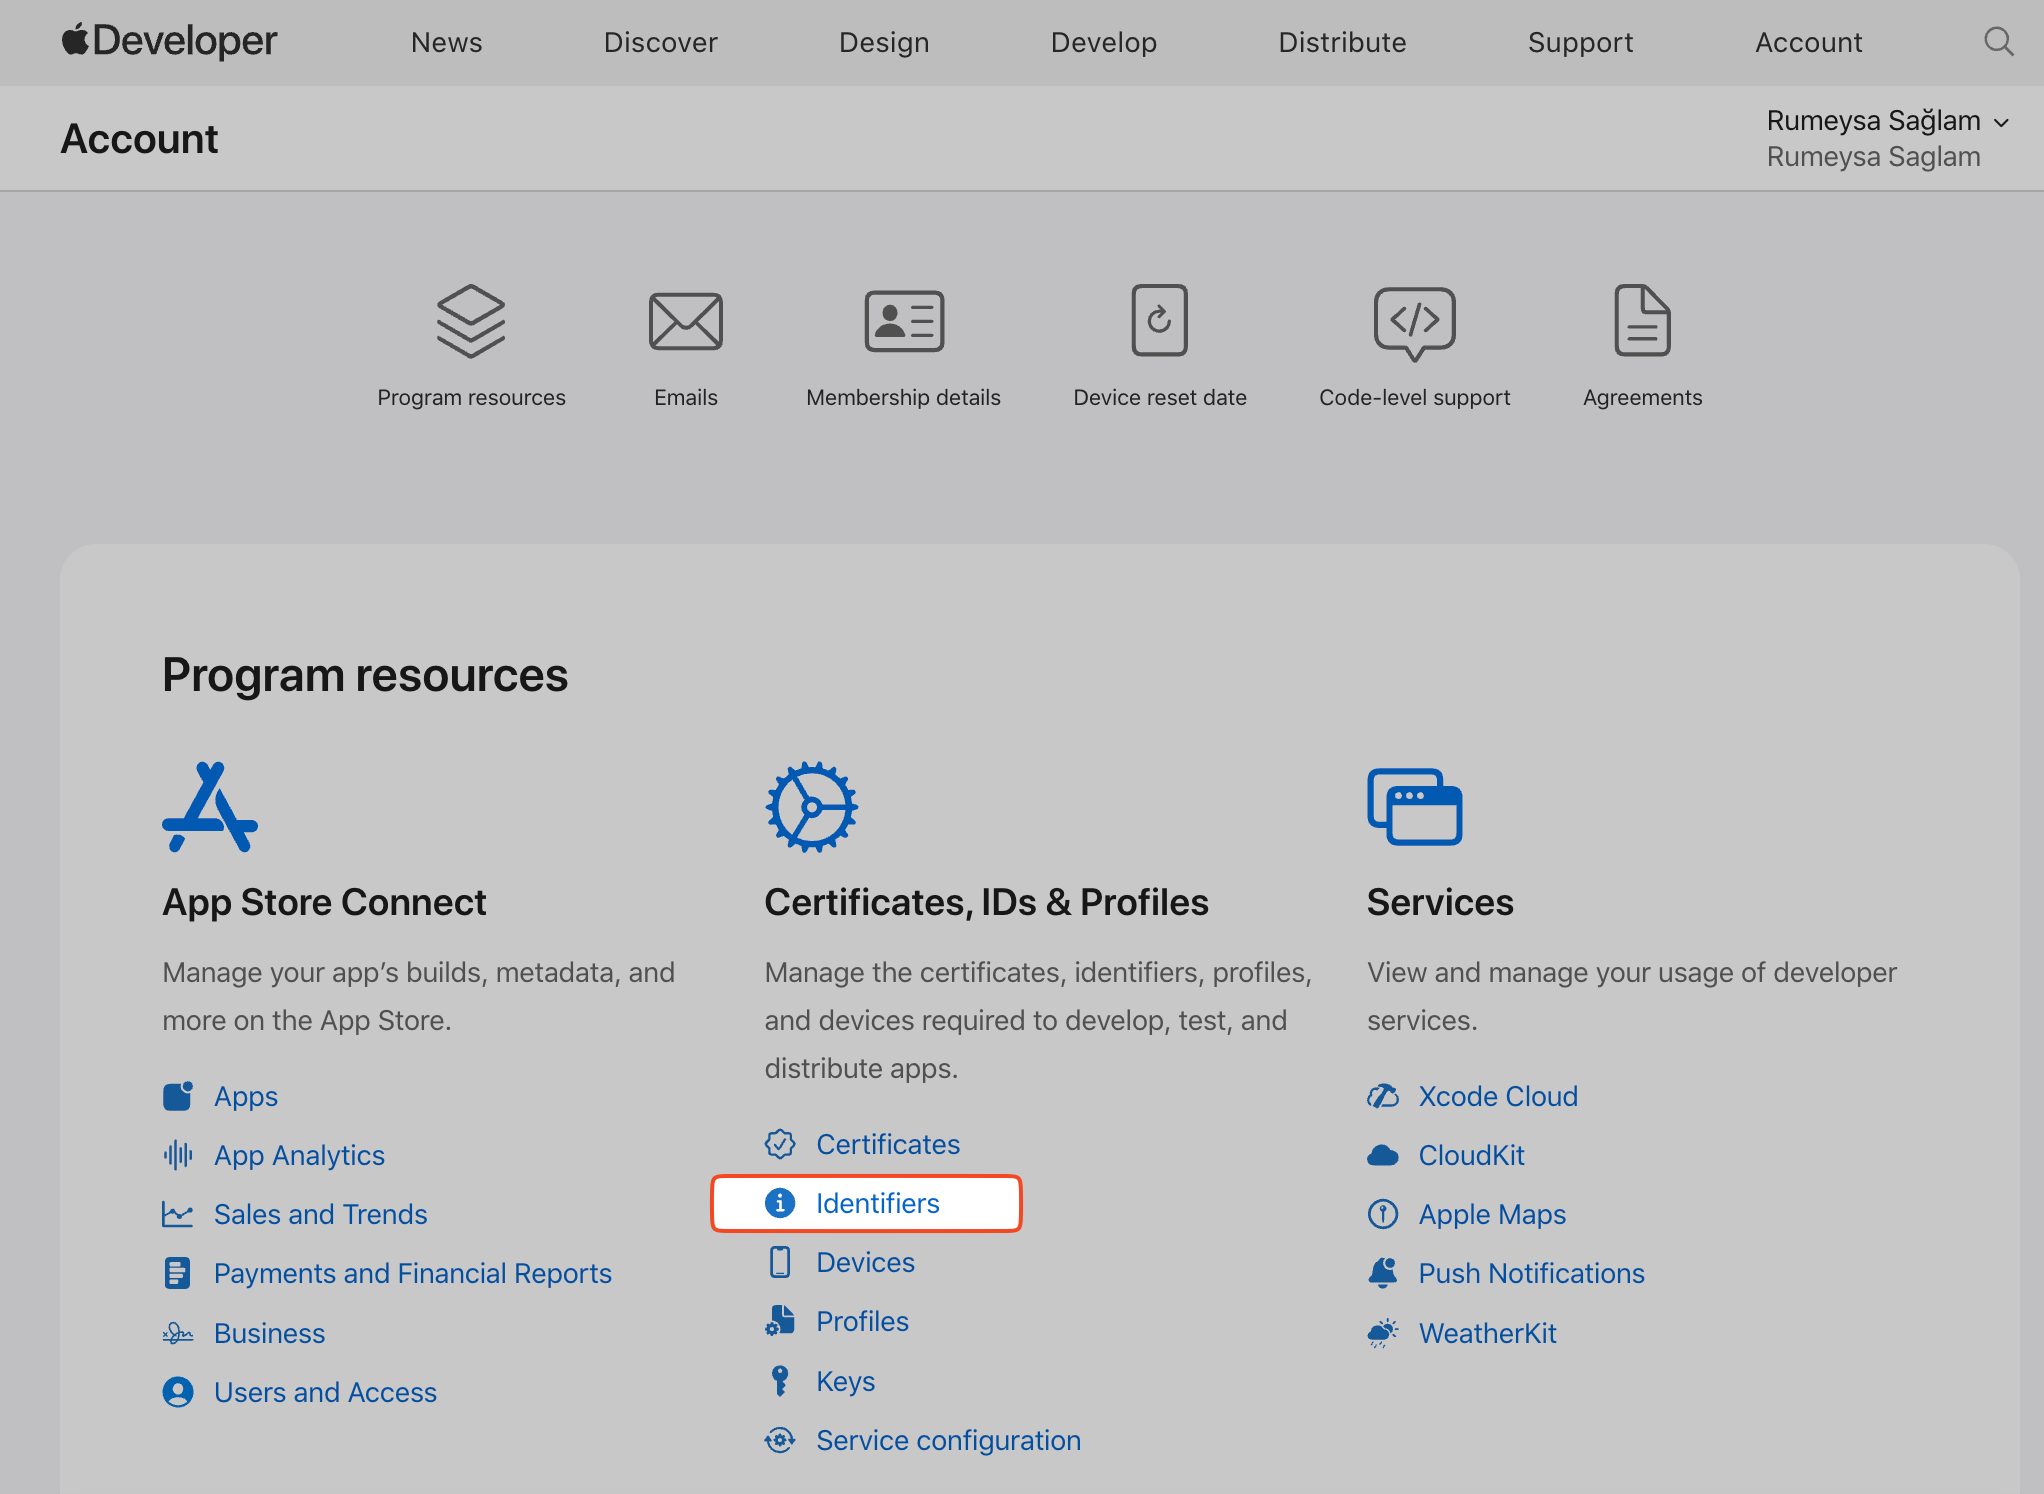
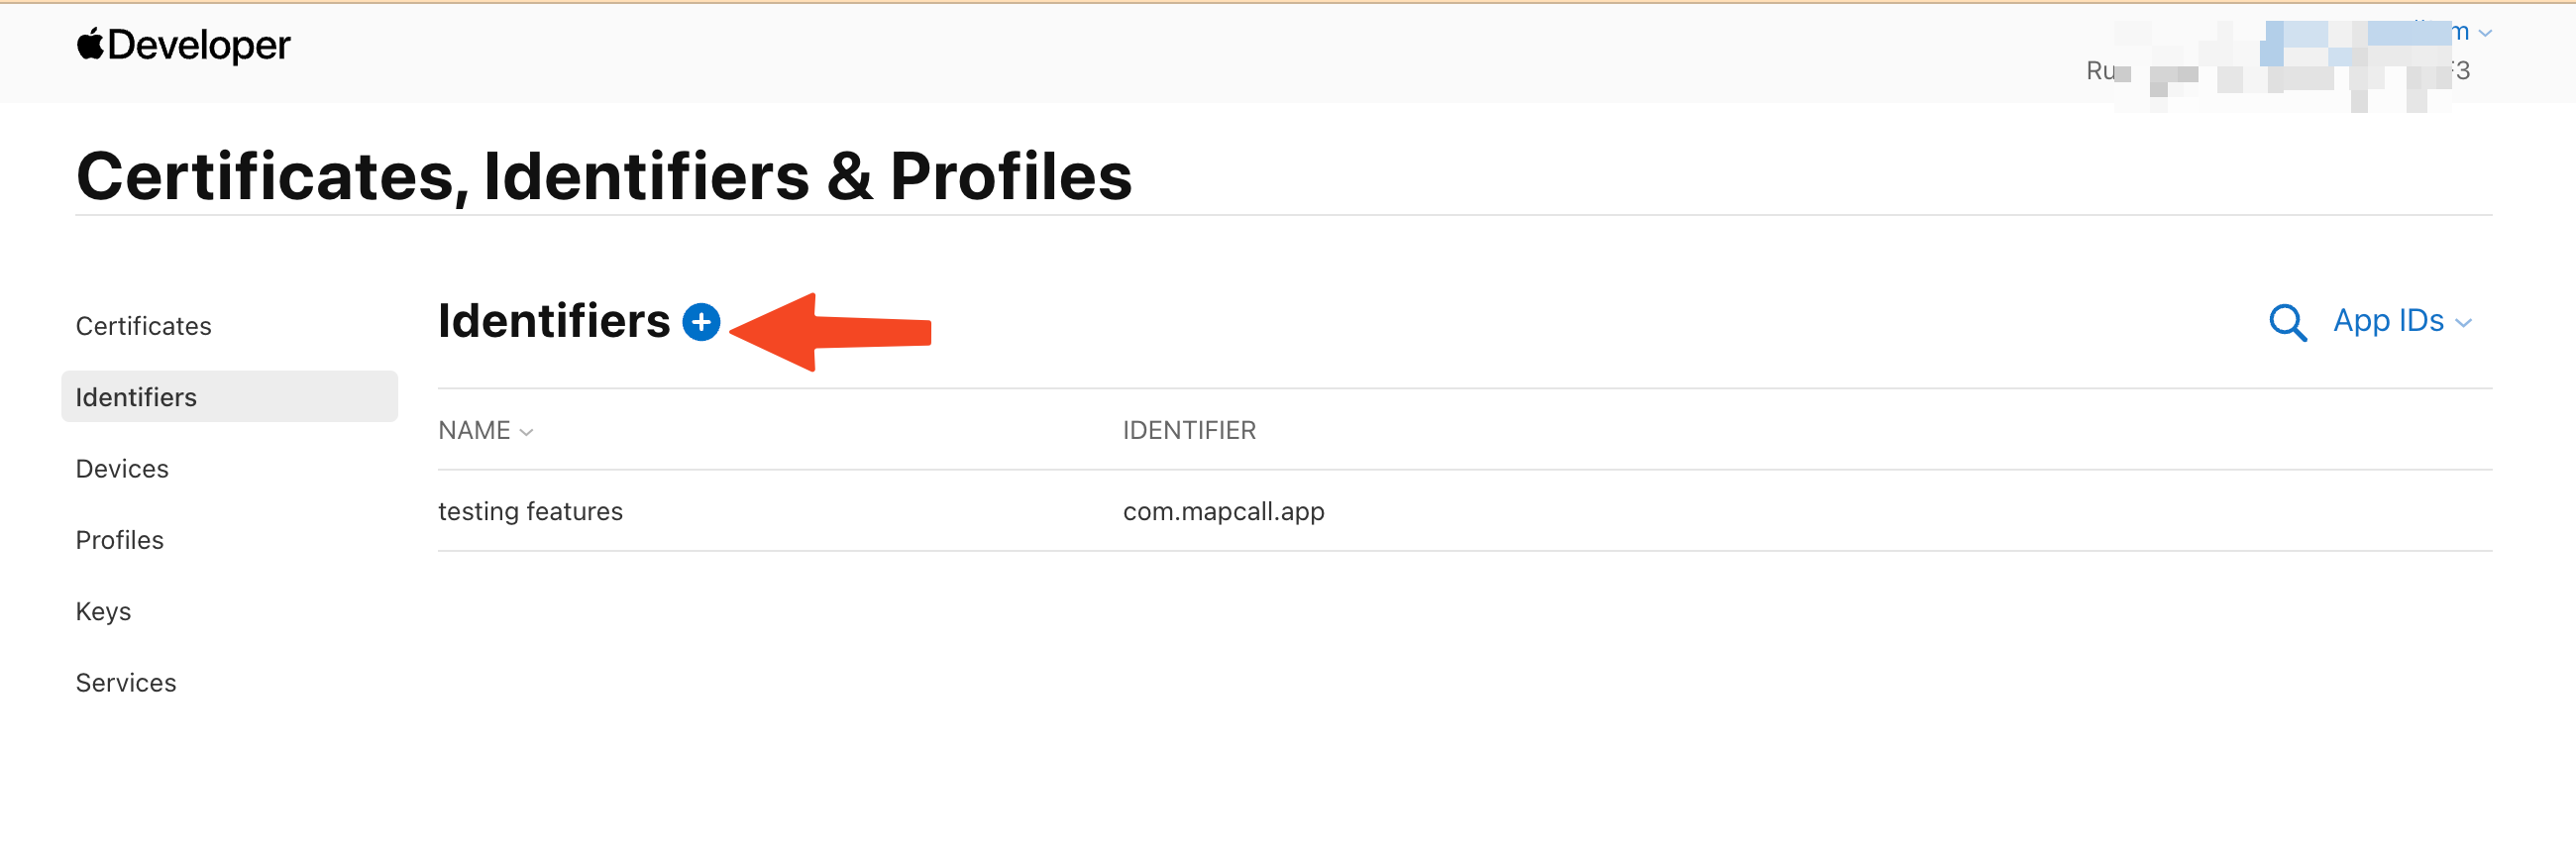
Log in to your Apple Developer account and select Identifiers from Certificates, IDs & Profiles section.
Click on the Add button (+).
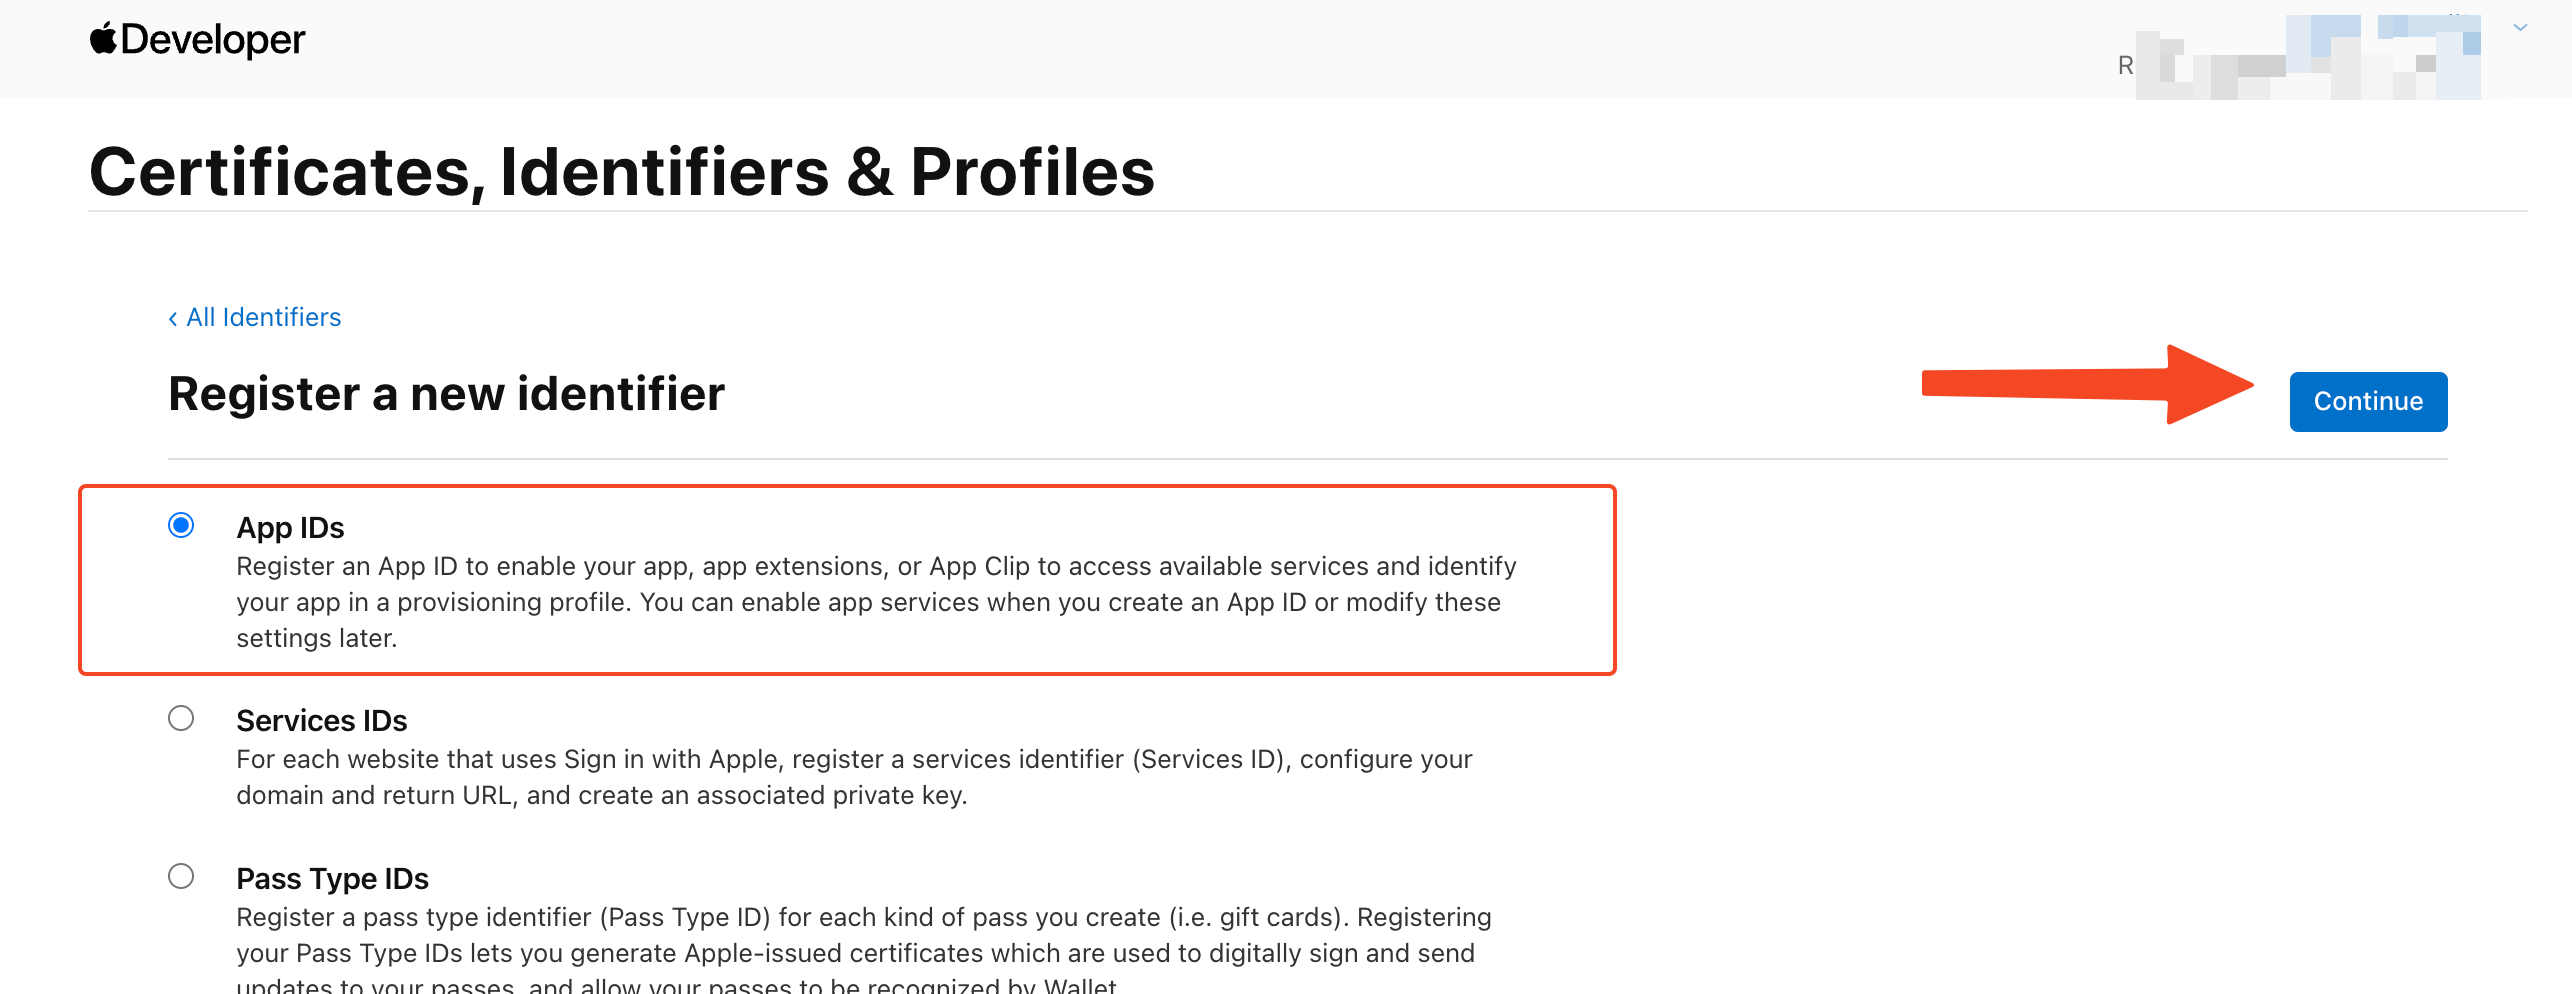
The Register a new identifier page will open. Select App IDs and then select Continue.
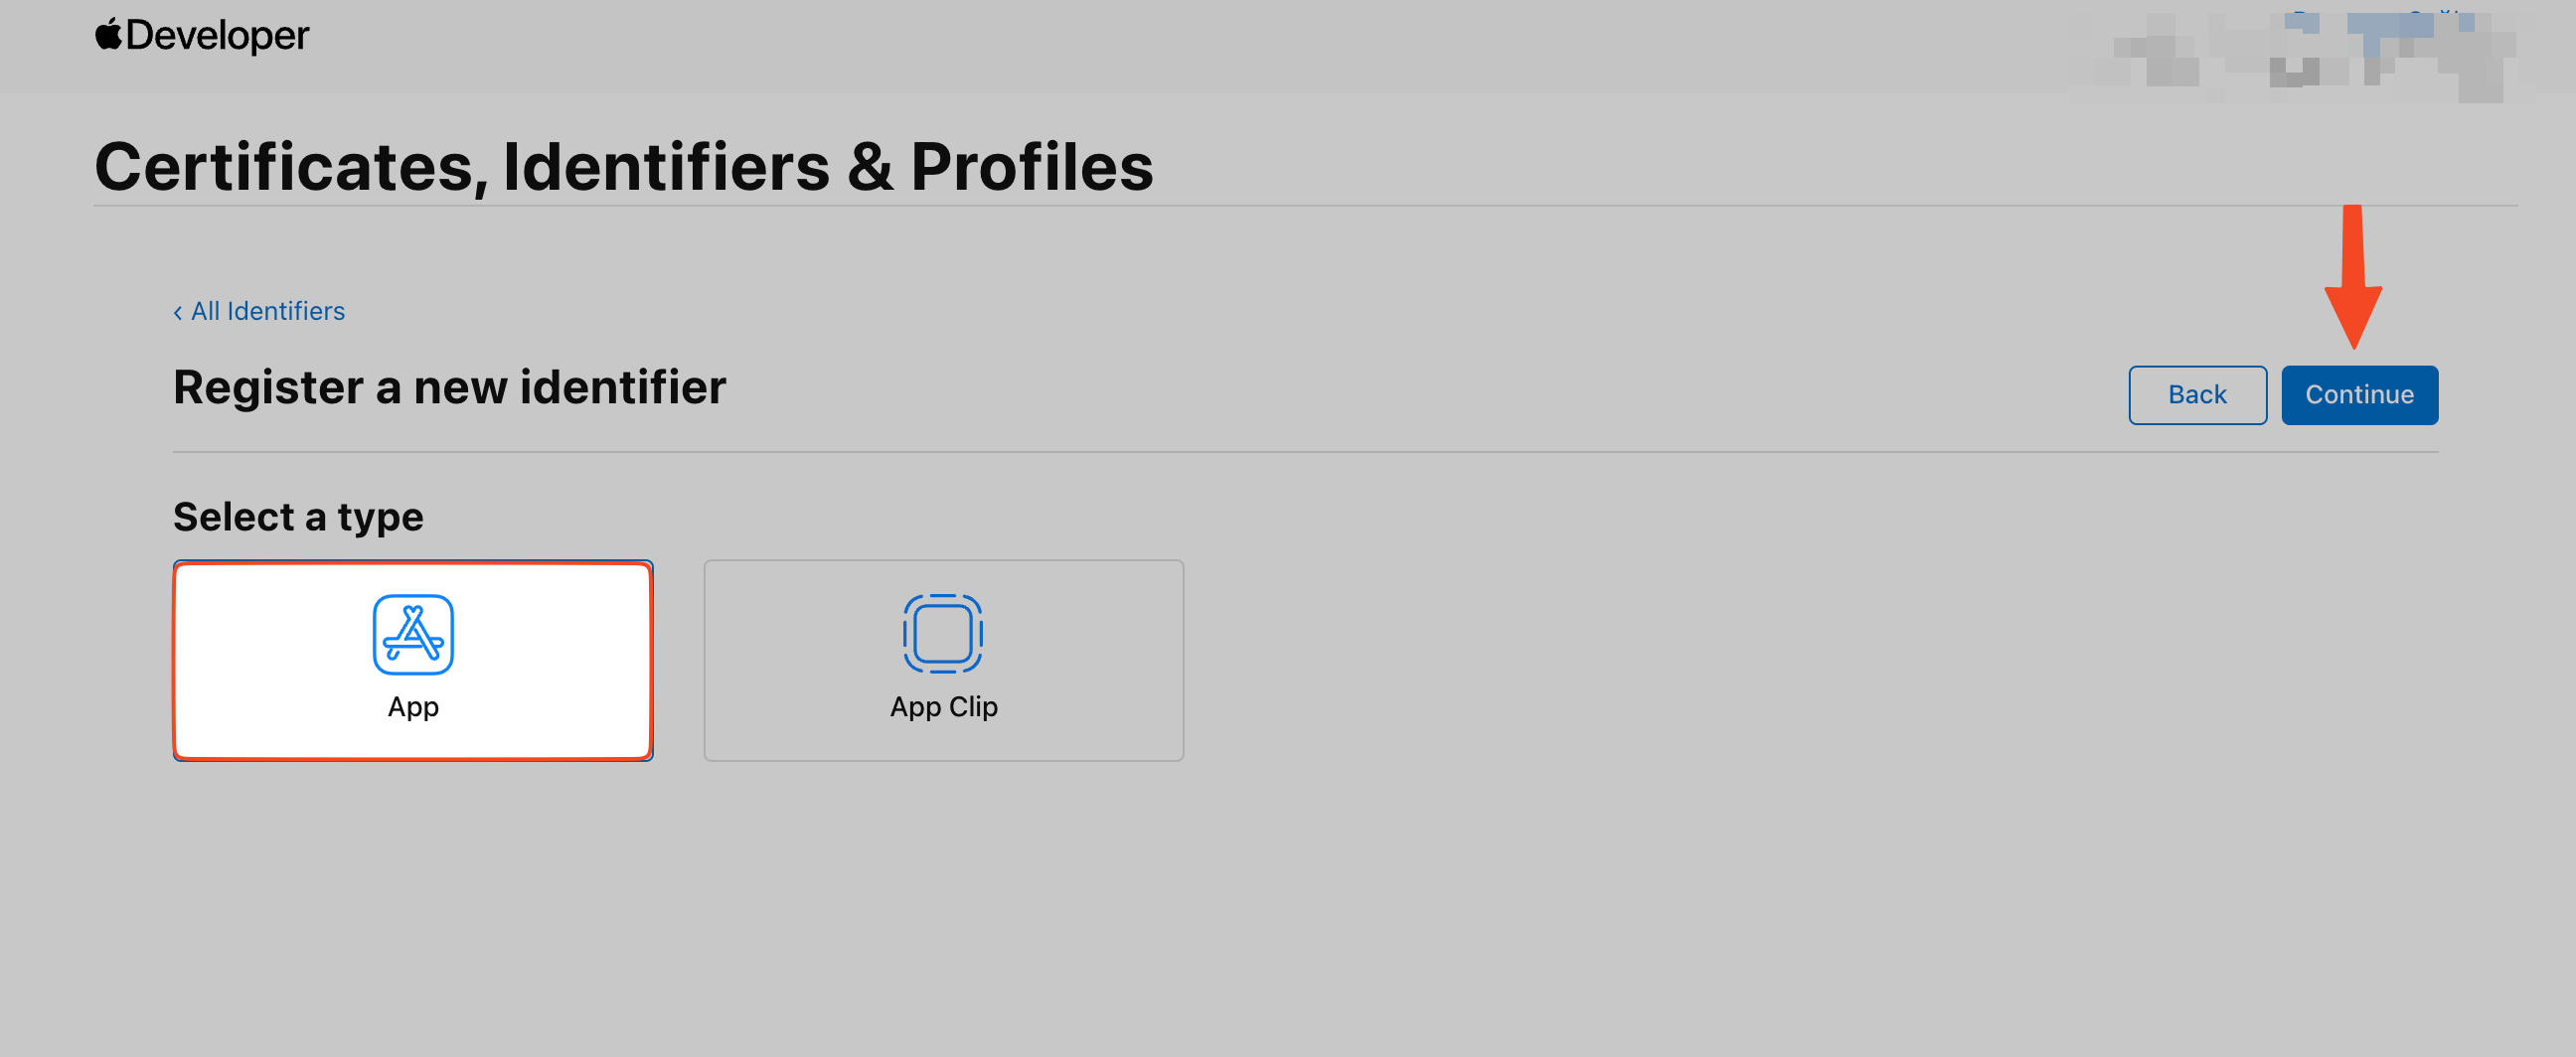
Select App and then click Continue.
Enter the Apple Bundle information:
- Bundle ID: Enter the Bundle Identifier you created in the previous step into this field.
- Description: Enter a short description for your Bundle
- Capabilities: Scroll down and select the capabilities that are required for your app.
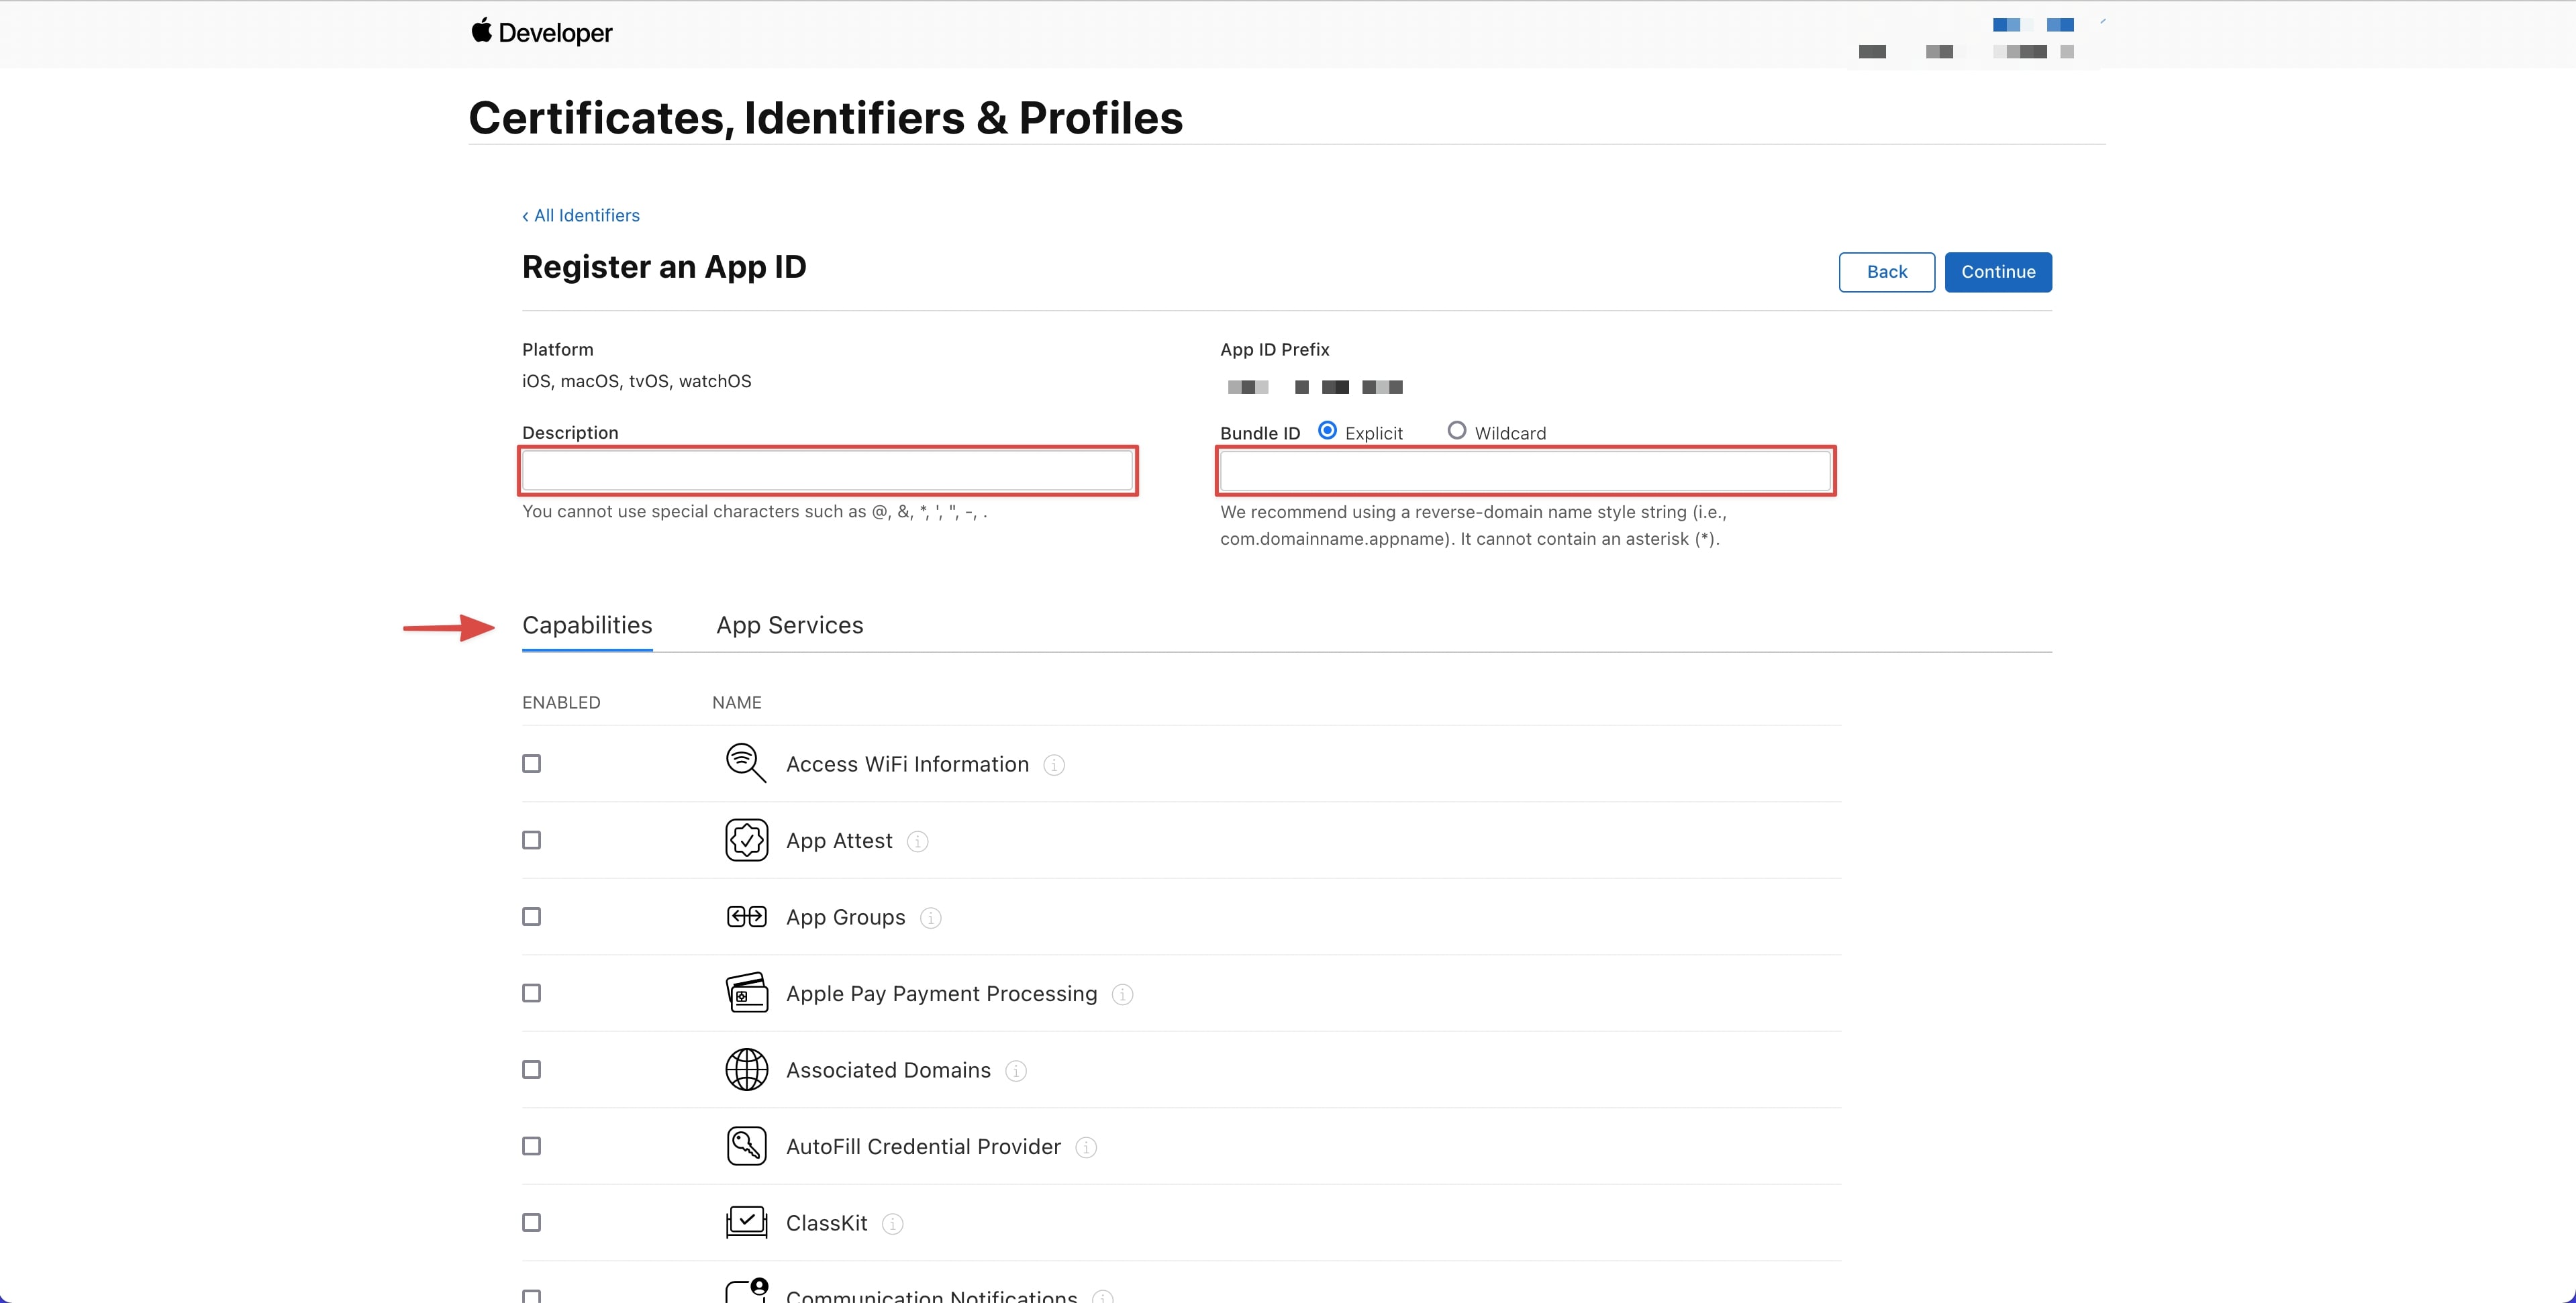
Check the boxes next to any other capabilities your app requires. For example, if your app requires Map capabilities make sure to check the box for that.
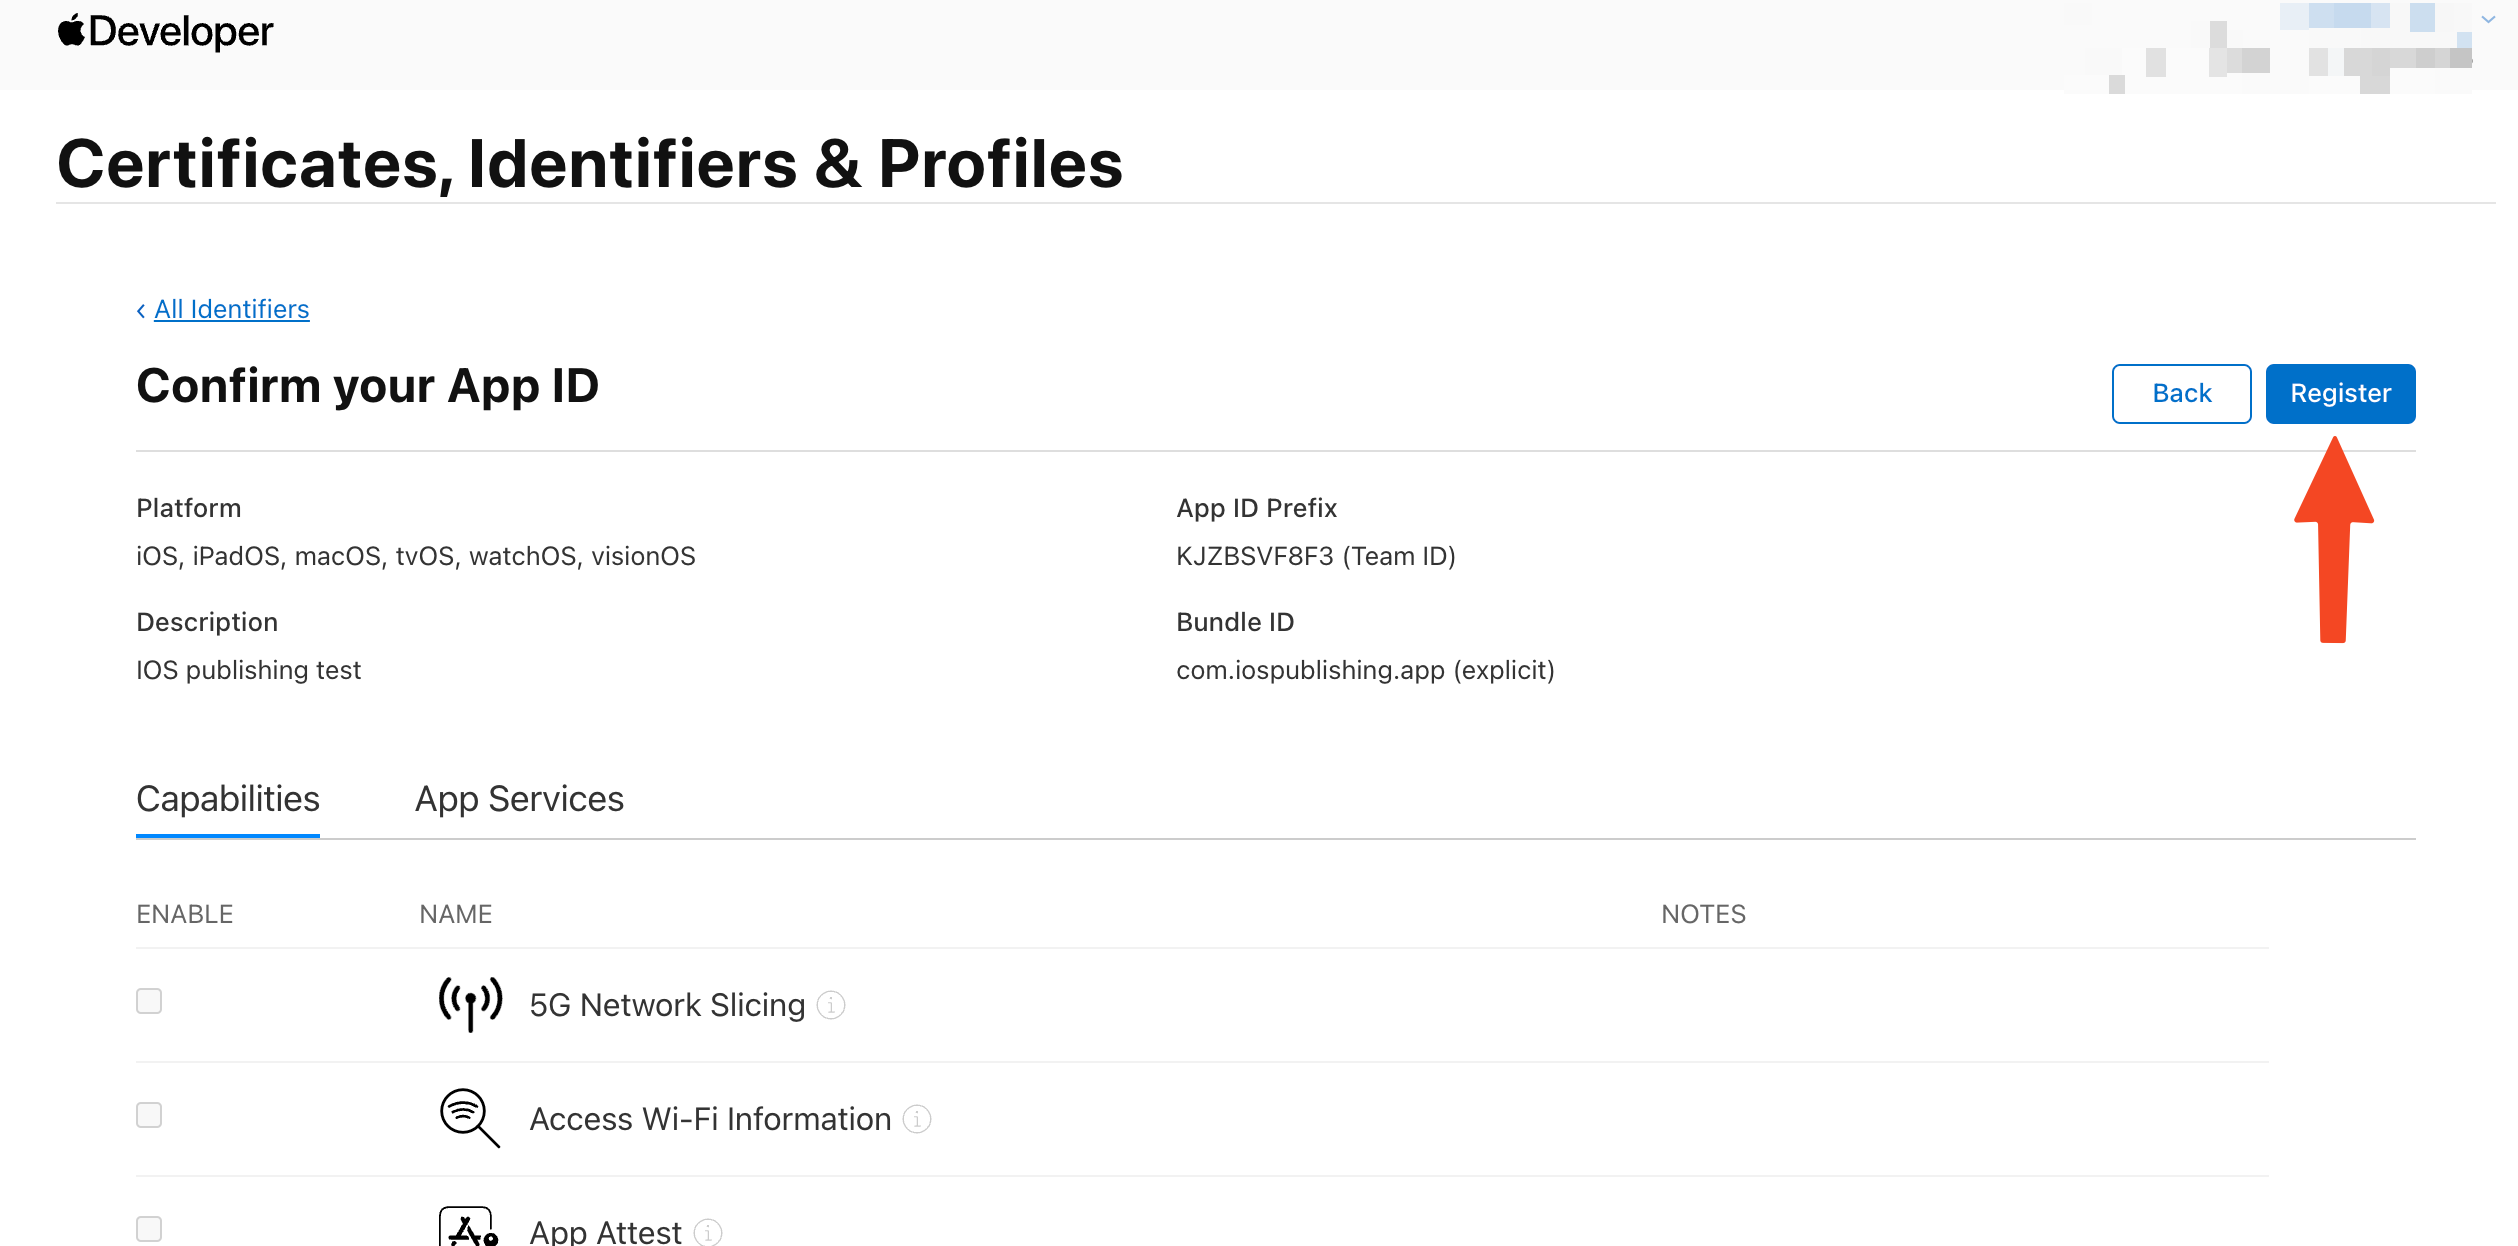
When you’re finished, select Register.
Add a New App in App Store Connect
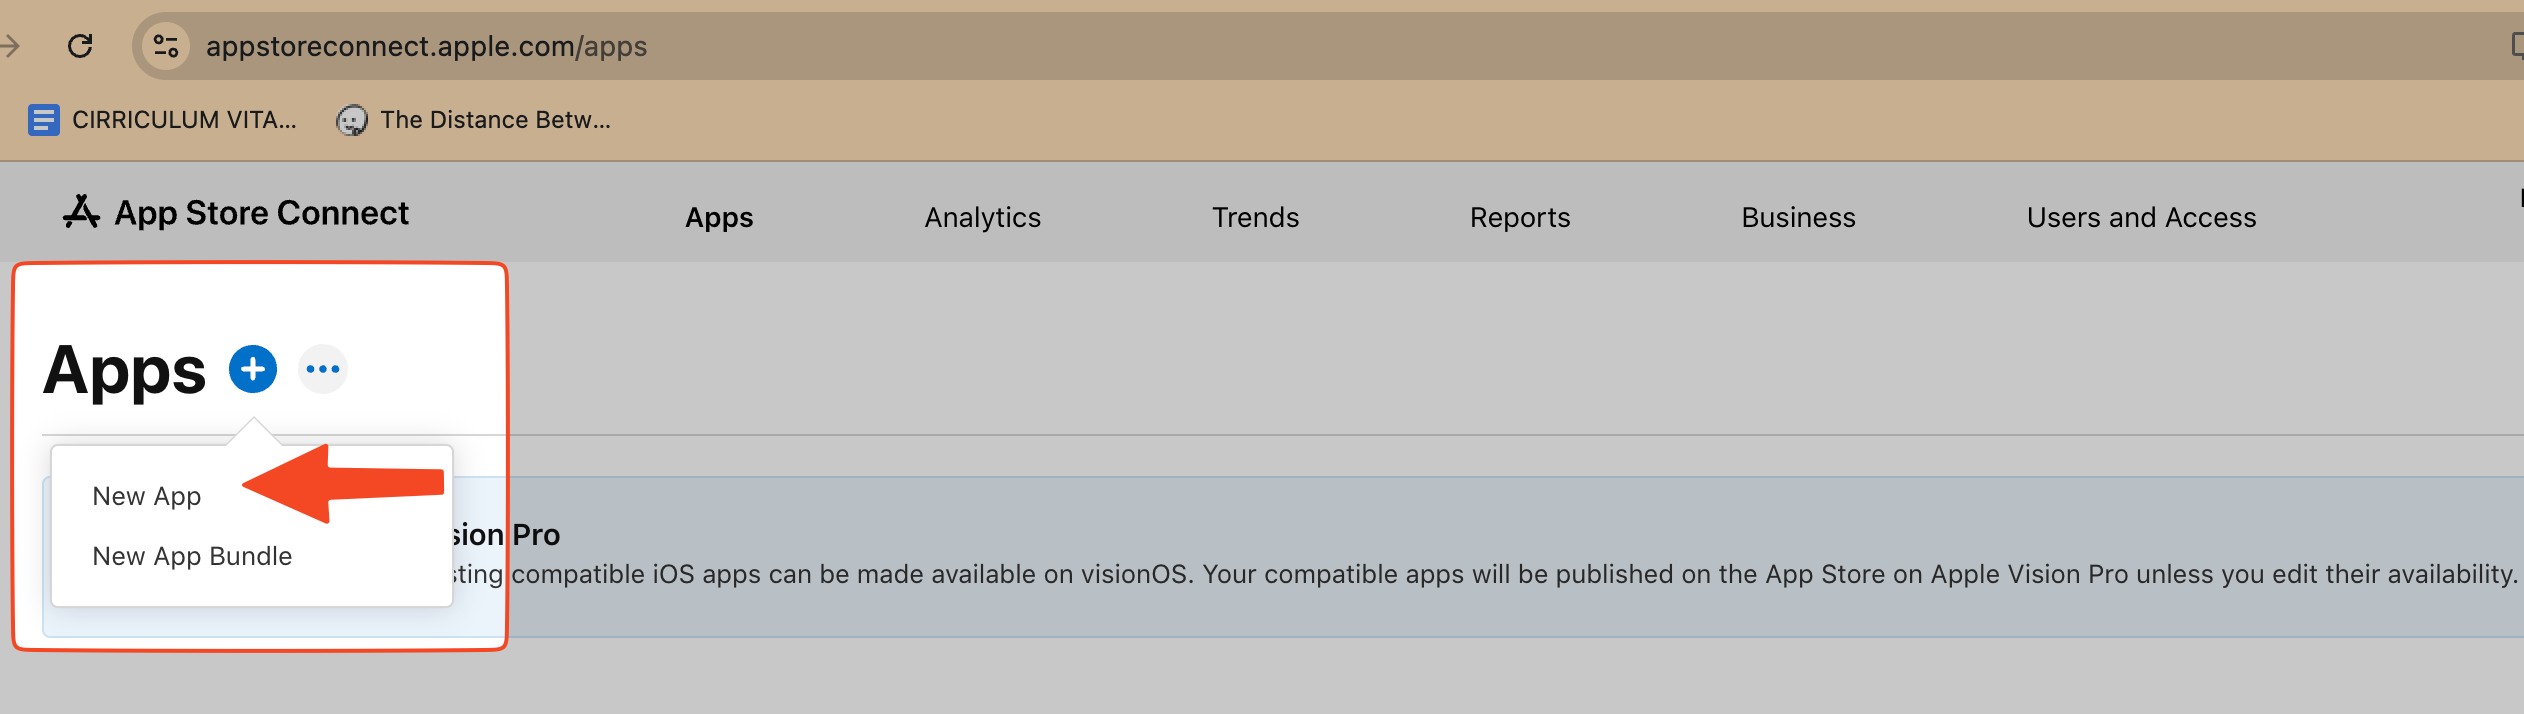
Section titled “Add a New App in App Store Connect”Now, you need to add your app to App Store Connect which is where you will manage and submit your app to the App Store.
Go to App Store Connect, select Apps, then click on the Add button (+) and then select New App.
Enter your app information in the modal that appears:
- Platform: for mobile apps this will be iOS.
- Name: Enter a Name for your app (this is the name that will show in the App Store).
- Primary Language for your app.
- Bundle ID: Select the Bundle ID you created in the previous step.
- SKU: Enter a unique identifier. We recommend using your Bundle ID here, as long as it’s unique.
- User Access: You should leave this set to Full Access unless you intend to only use this app privately. If you select Limited Access, you’ll need to add the users that you would like to grant access to this app. This will only appear if you have other users included in your App Store Connect account.
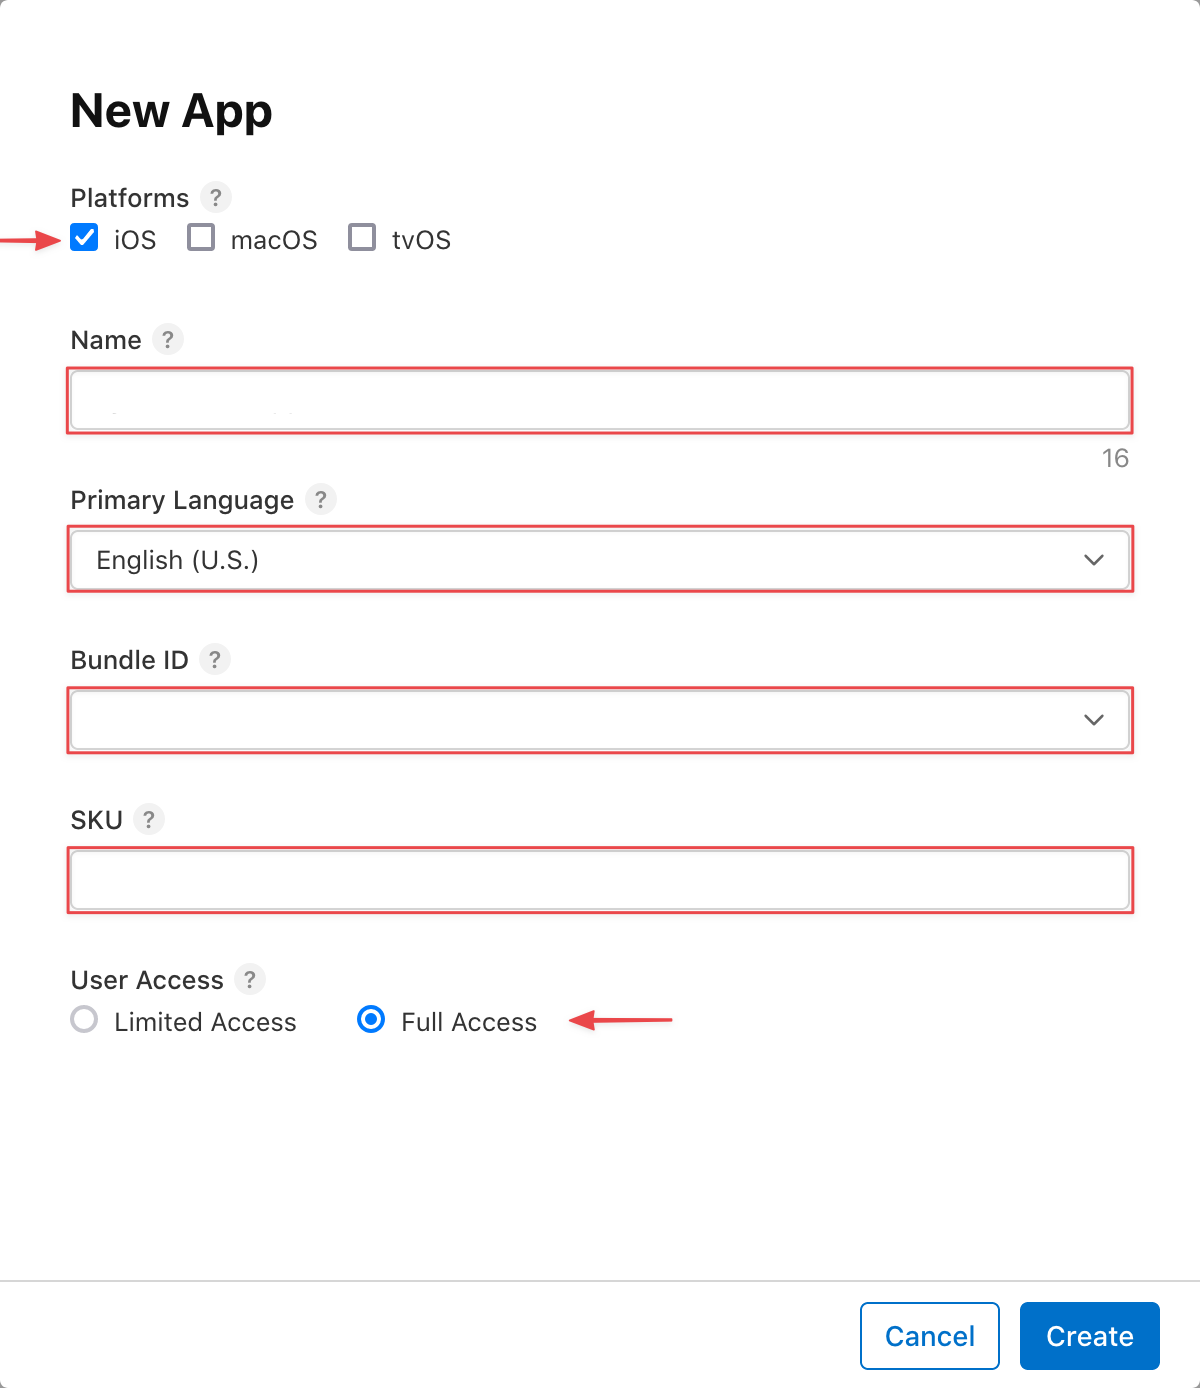
When you’re done, select Create.
Get Your Team ID
Section titled “Get Your Team ID”Next you’ll need to get your Team ID.
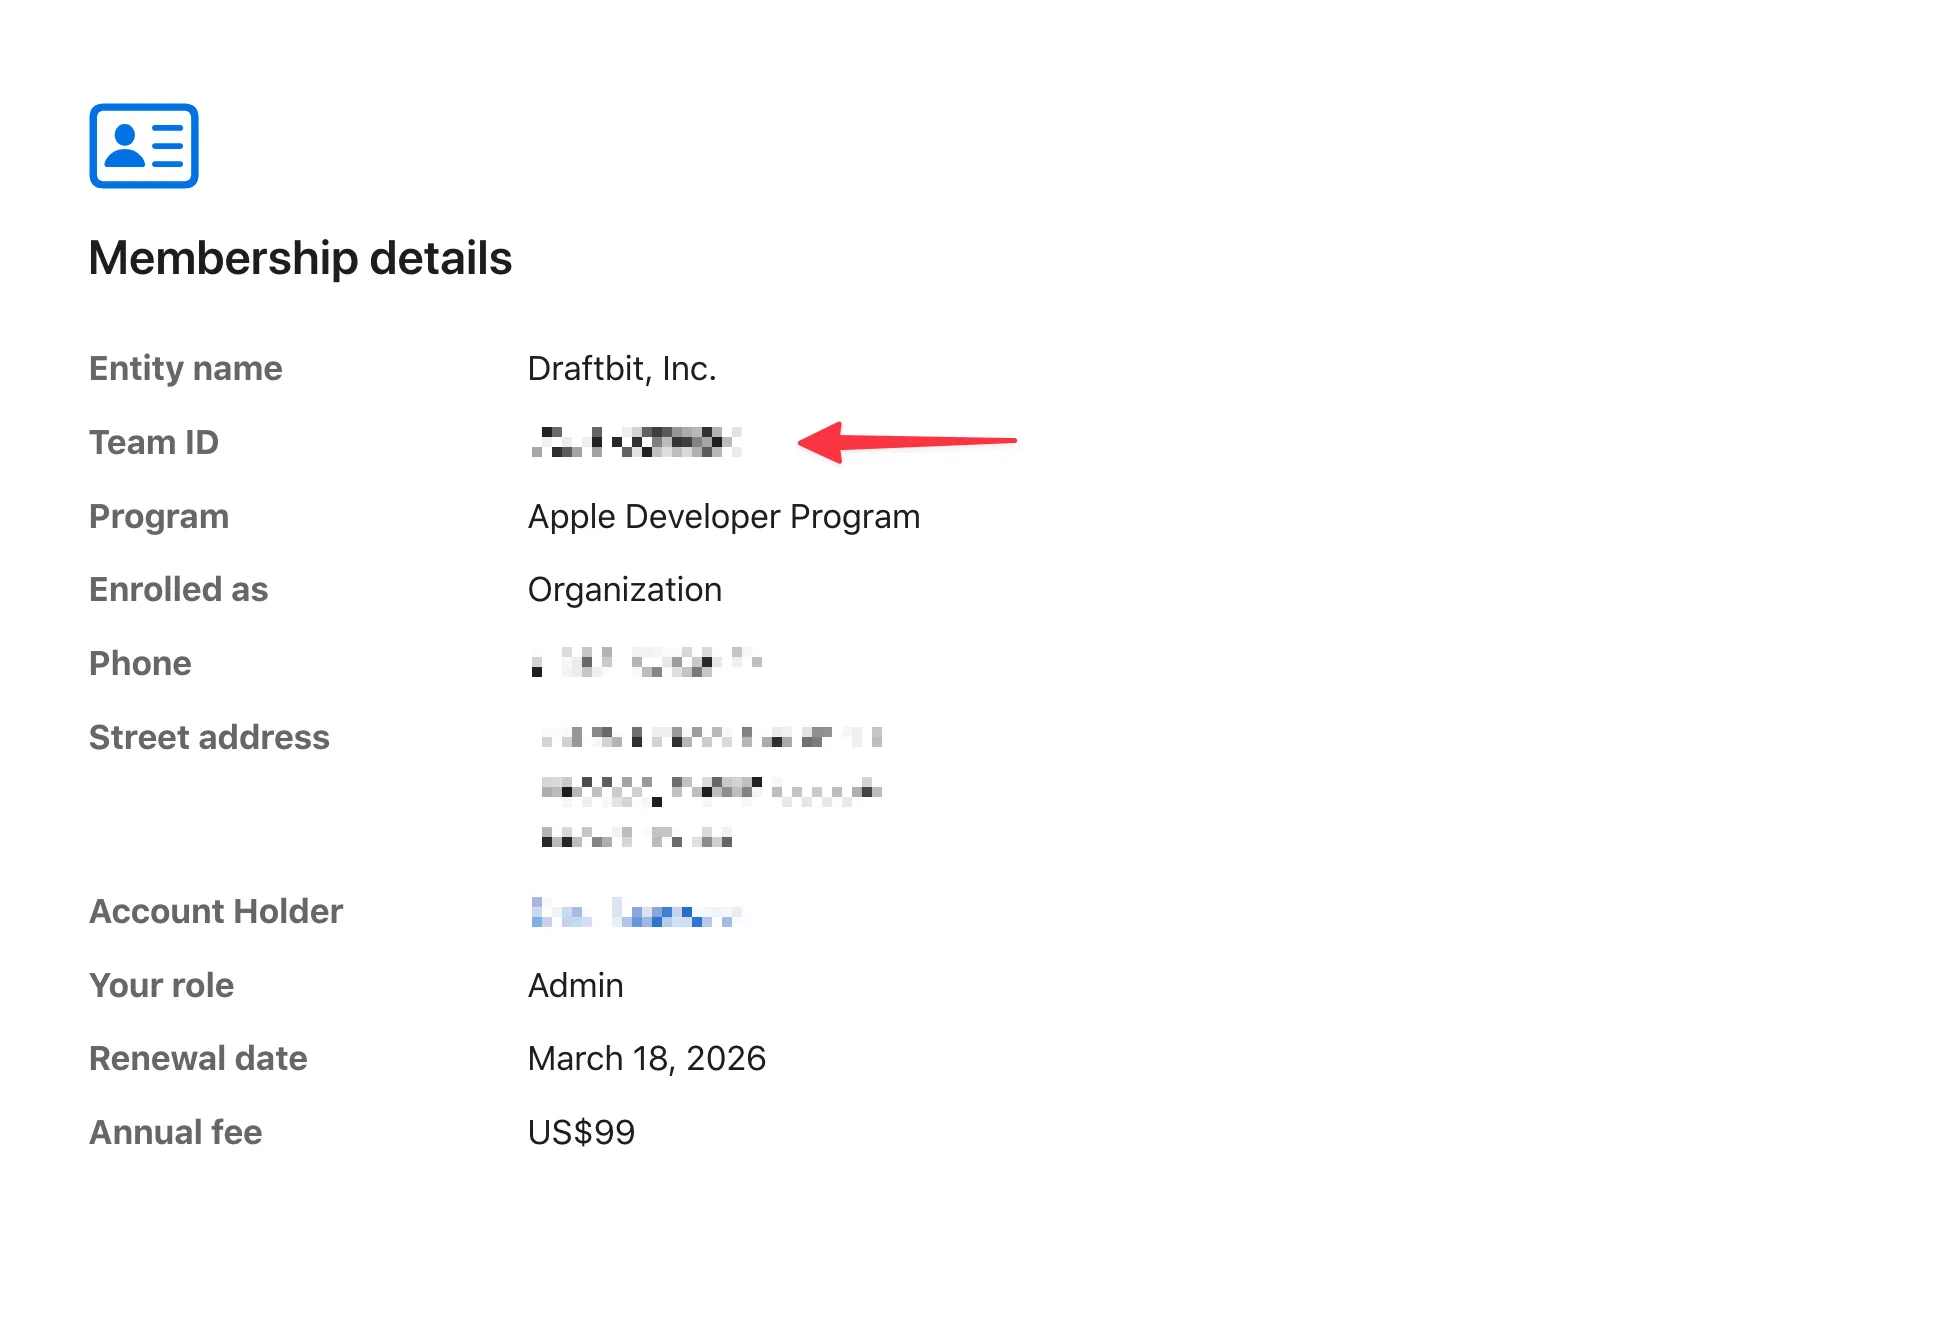
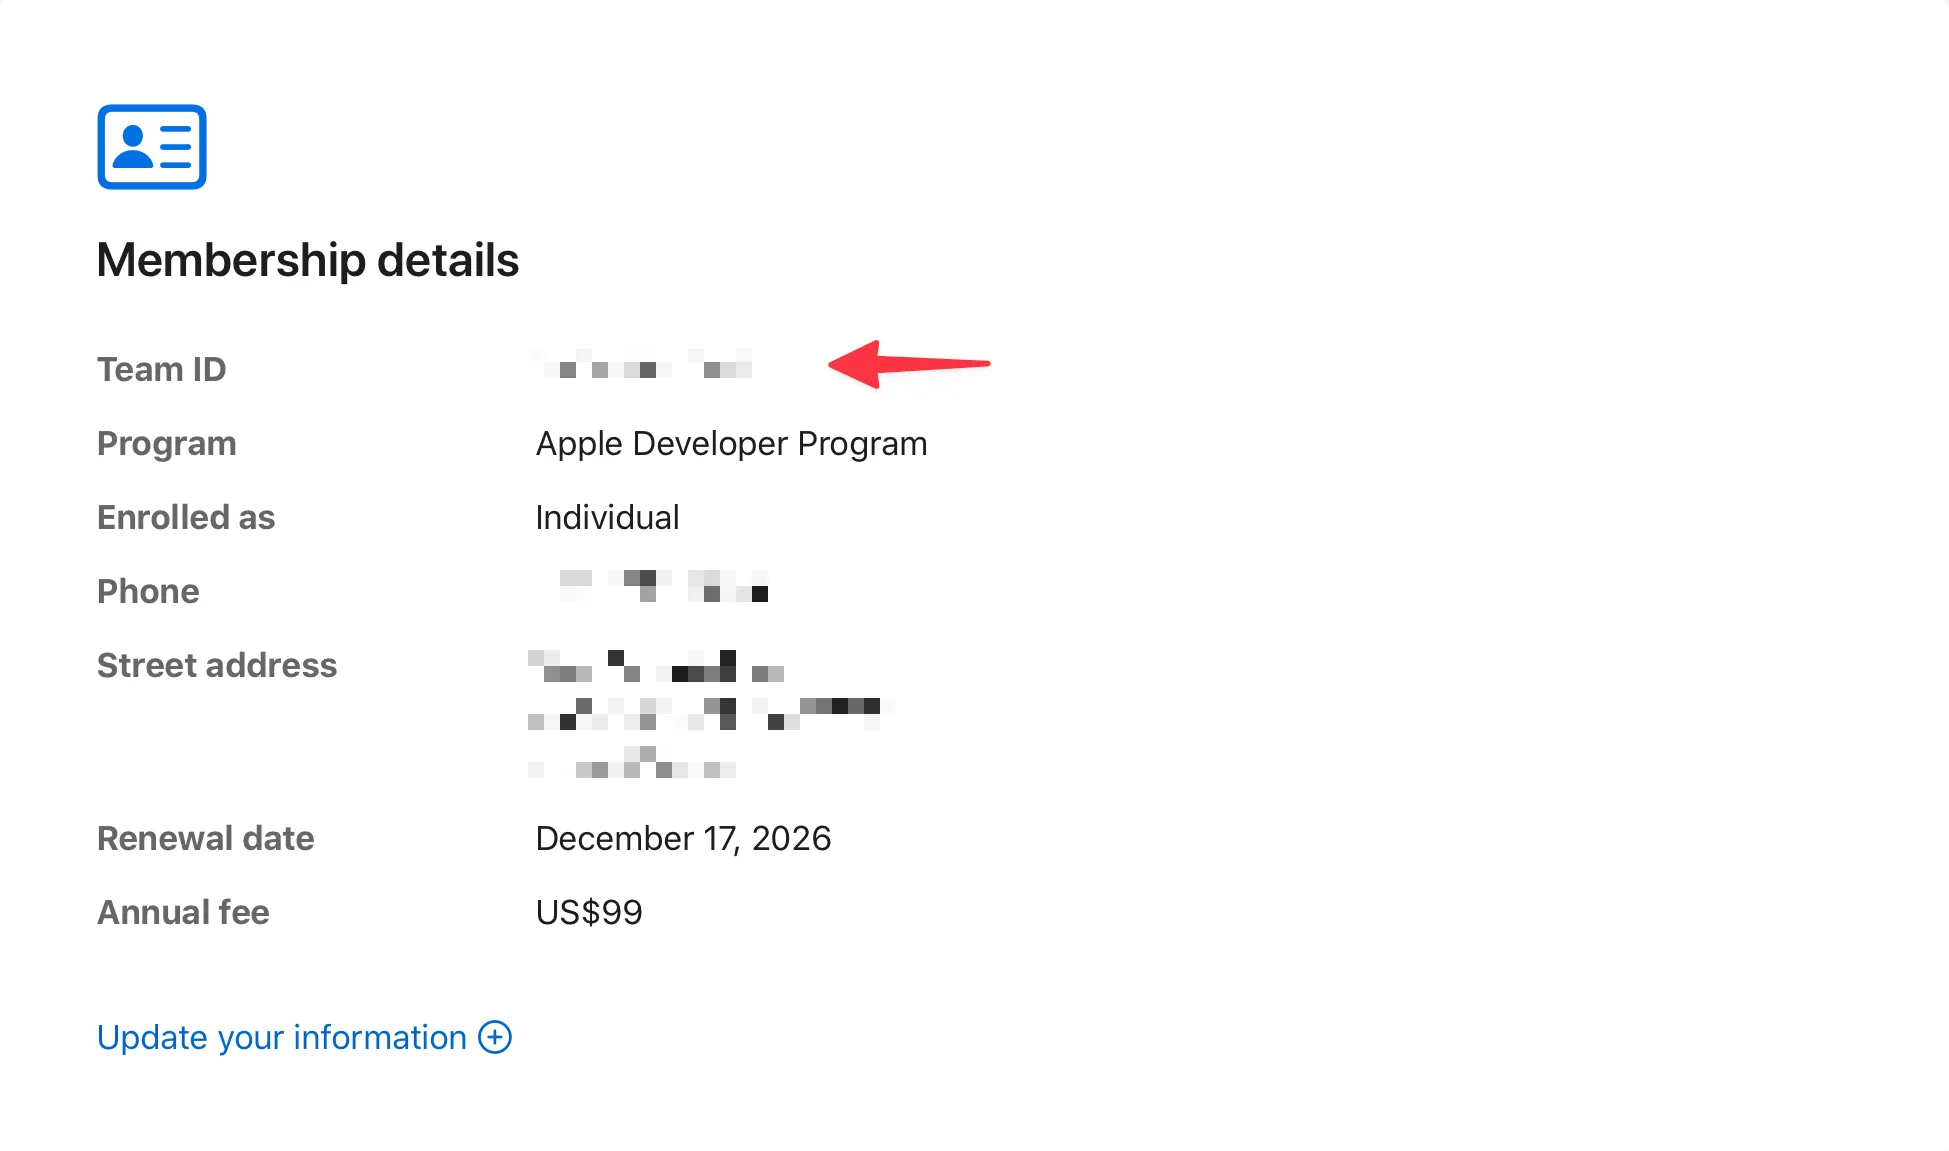
From the main page of your Apple Developer Account, select Membership Details from the top menu. Copy the Team ID associated with your Developer Account for future reference.
Organization Membership Details
Individual Membership Details
Get Your API Key
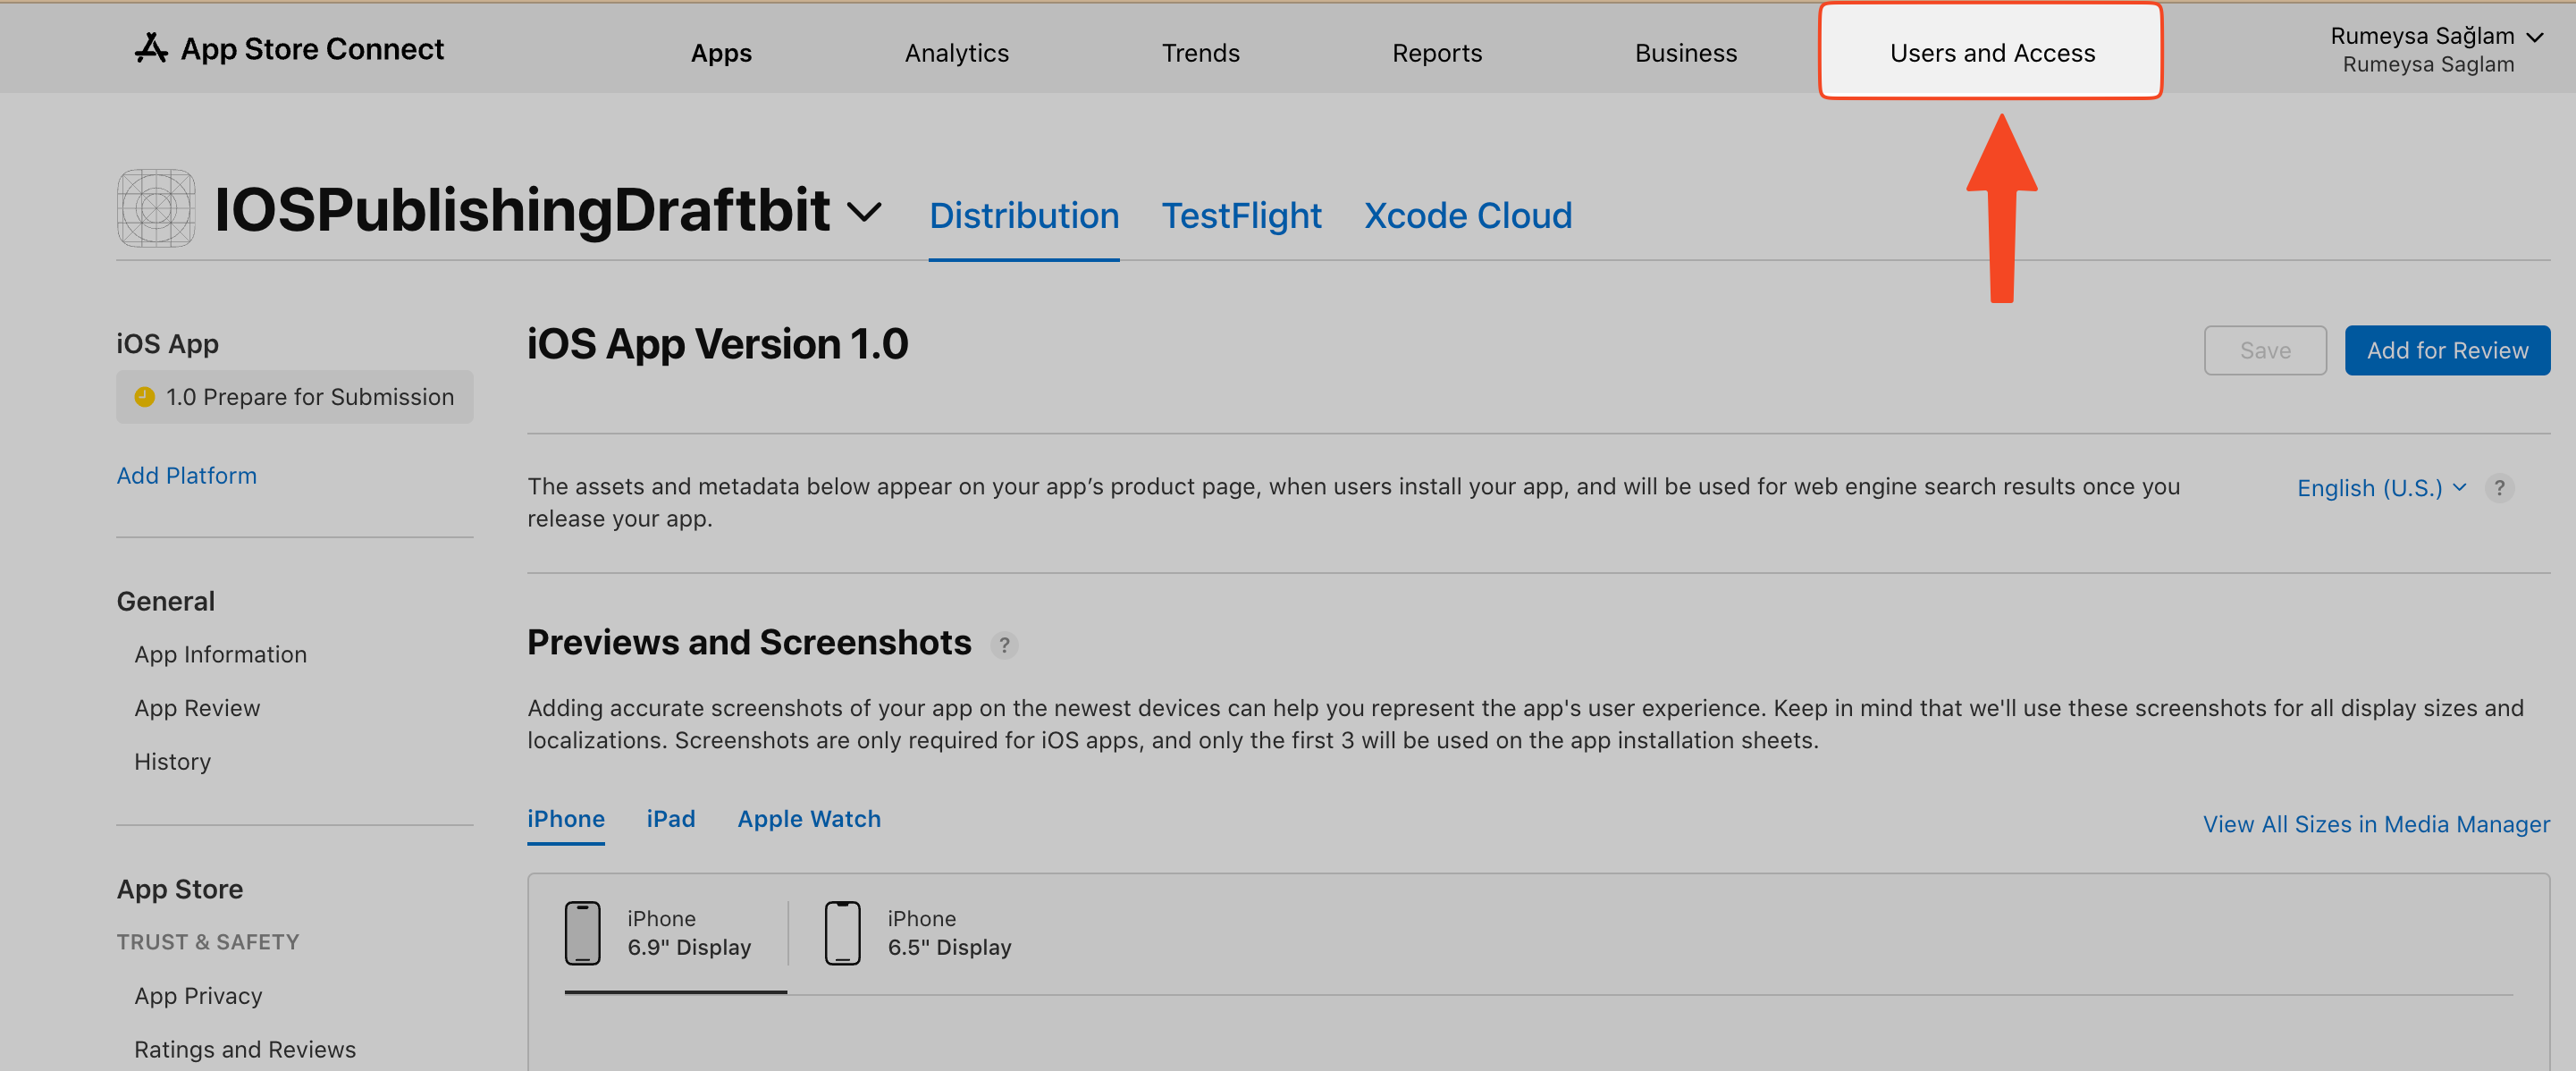
Section titled “Get Your API Key”At this point, you need to generate an API Key. On the screen that you were navigated to after creating the app, choose Users and Access.
From the Users and Access page, select Integrations tab on the top.
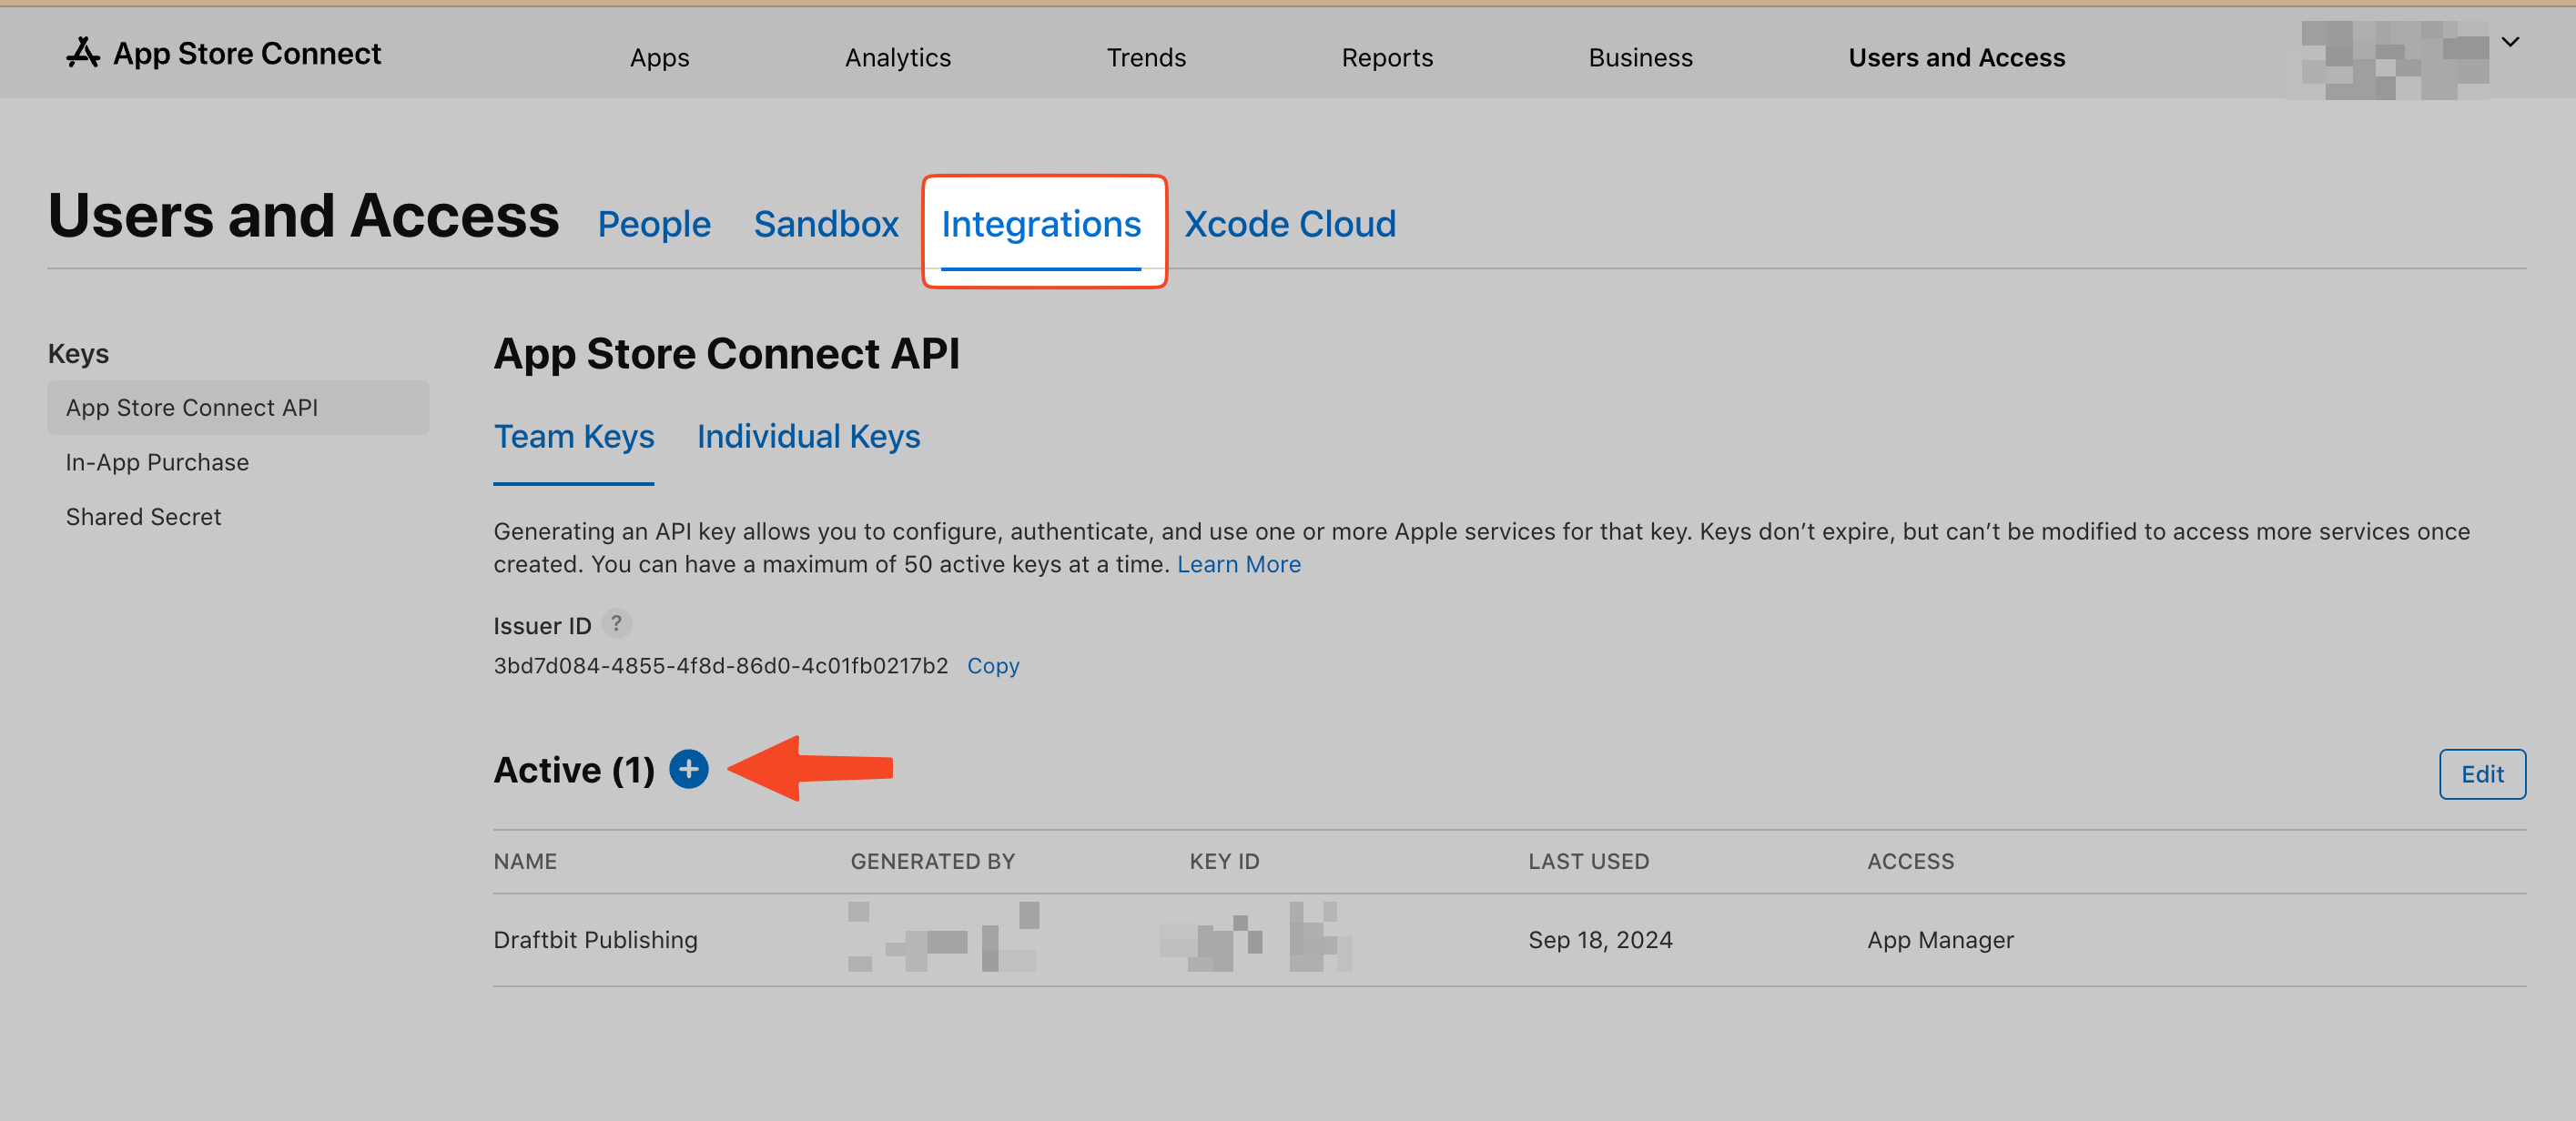
If you see the Request Access button, click on it. If you haven’t added a key before, click on the Generate API Key. Otherwise, select the Add button (+).
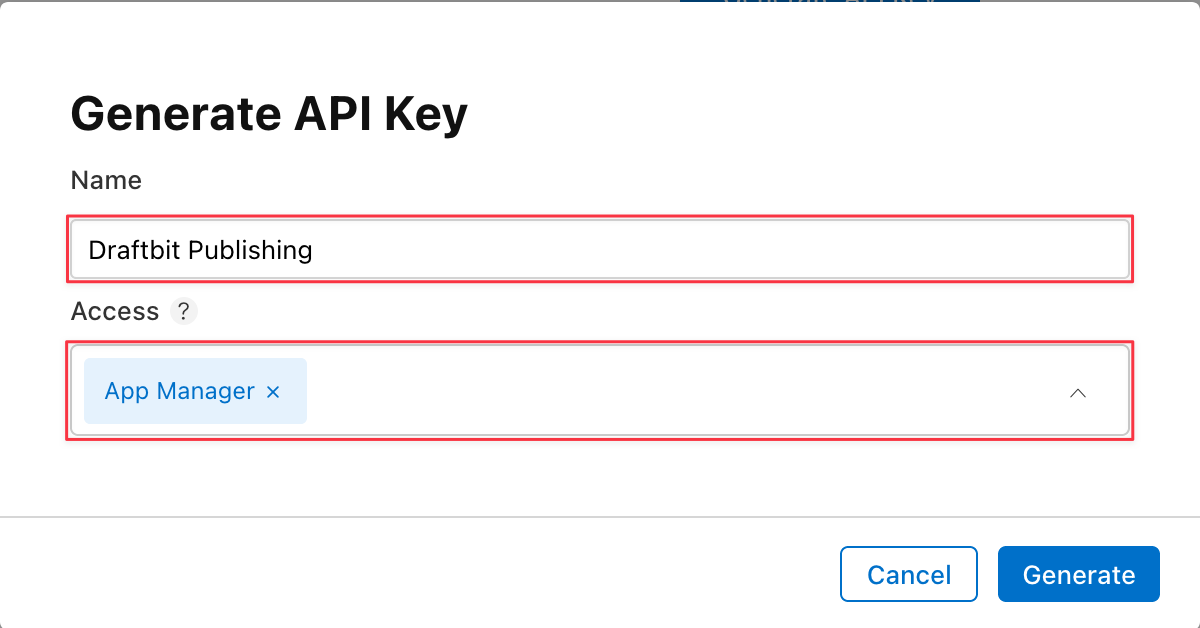
Enter your API Key Information in the modal that appears:
- Name: Enter a name for the key. This is a reference and is not part of the key itself. We recommend naming it ‘Draftbit Publishing’ so it will be easier to identify in the future.
- Access: Select App Manager as the access type. For additional information on Roles, see the docs here.
When you’re done, select Generate.
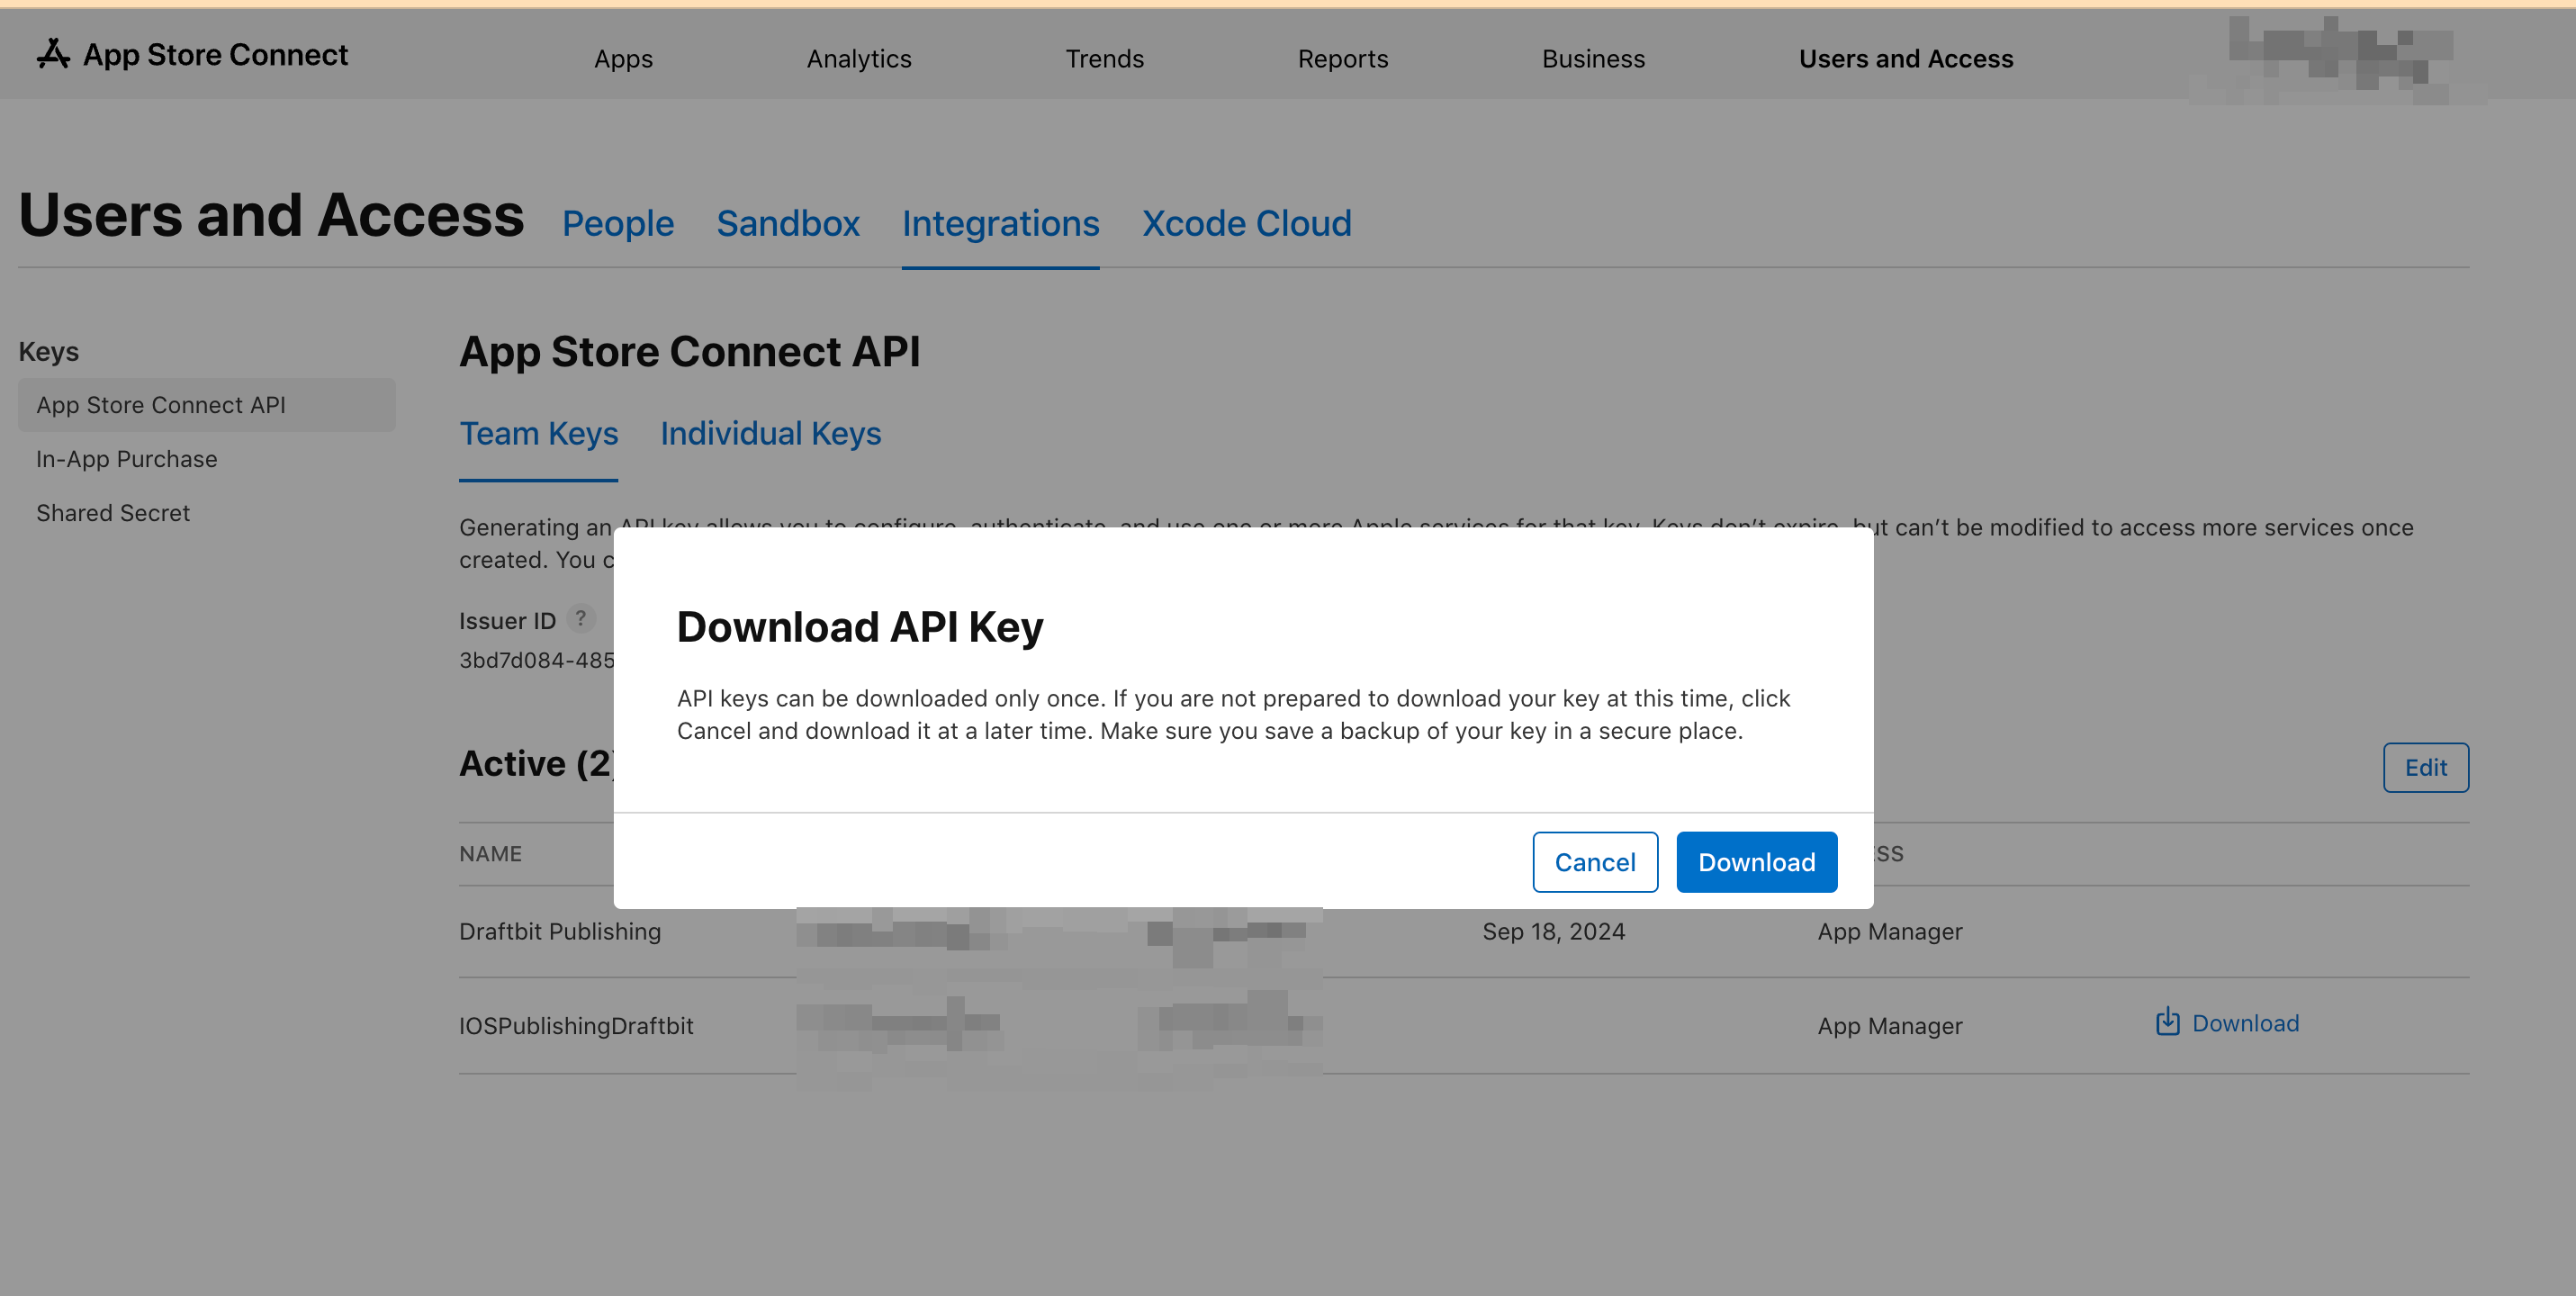
Find the row for the API Key you just generated and select Download API Key. A modal will appear, select Download. Refresh the page if the link doesn’t appear immediately.
Get Your Issuer ID
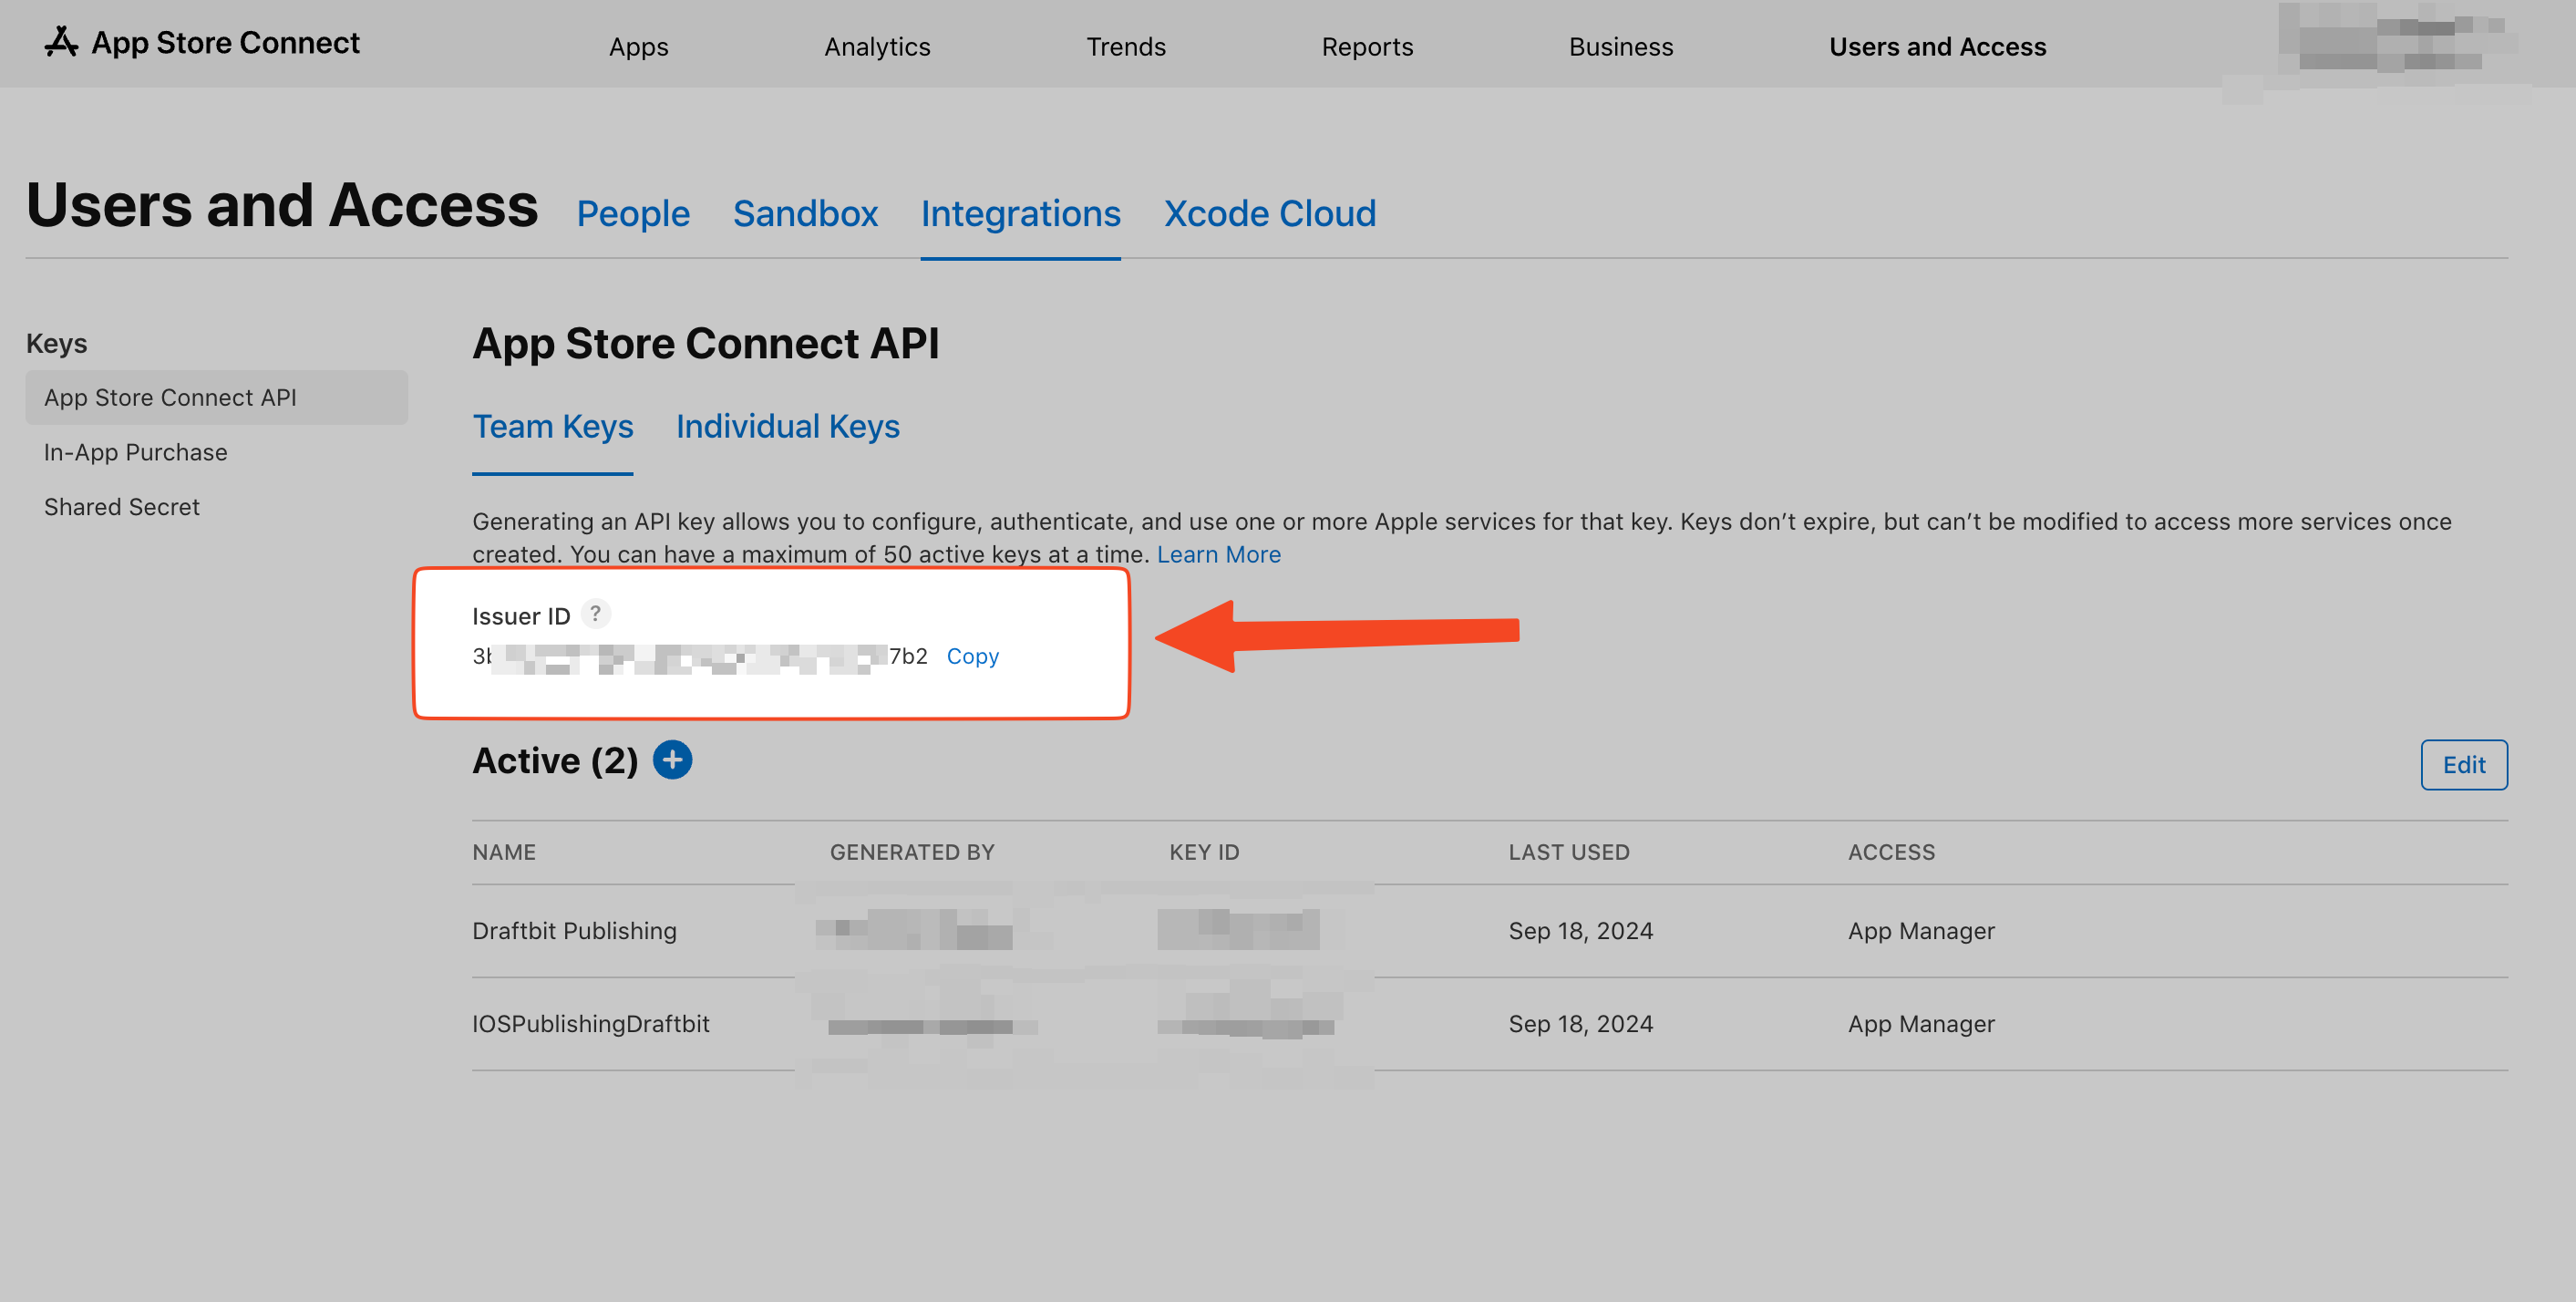
Section titled “Get Your Issuer ID”Next you’ll need to get your Issuer ID. In App Store Connect, go to Users and Access page and select Integrations tab. Find the Issuer ID and select Copy for future reference.
Get Your Key ID
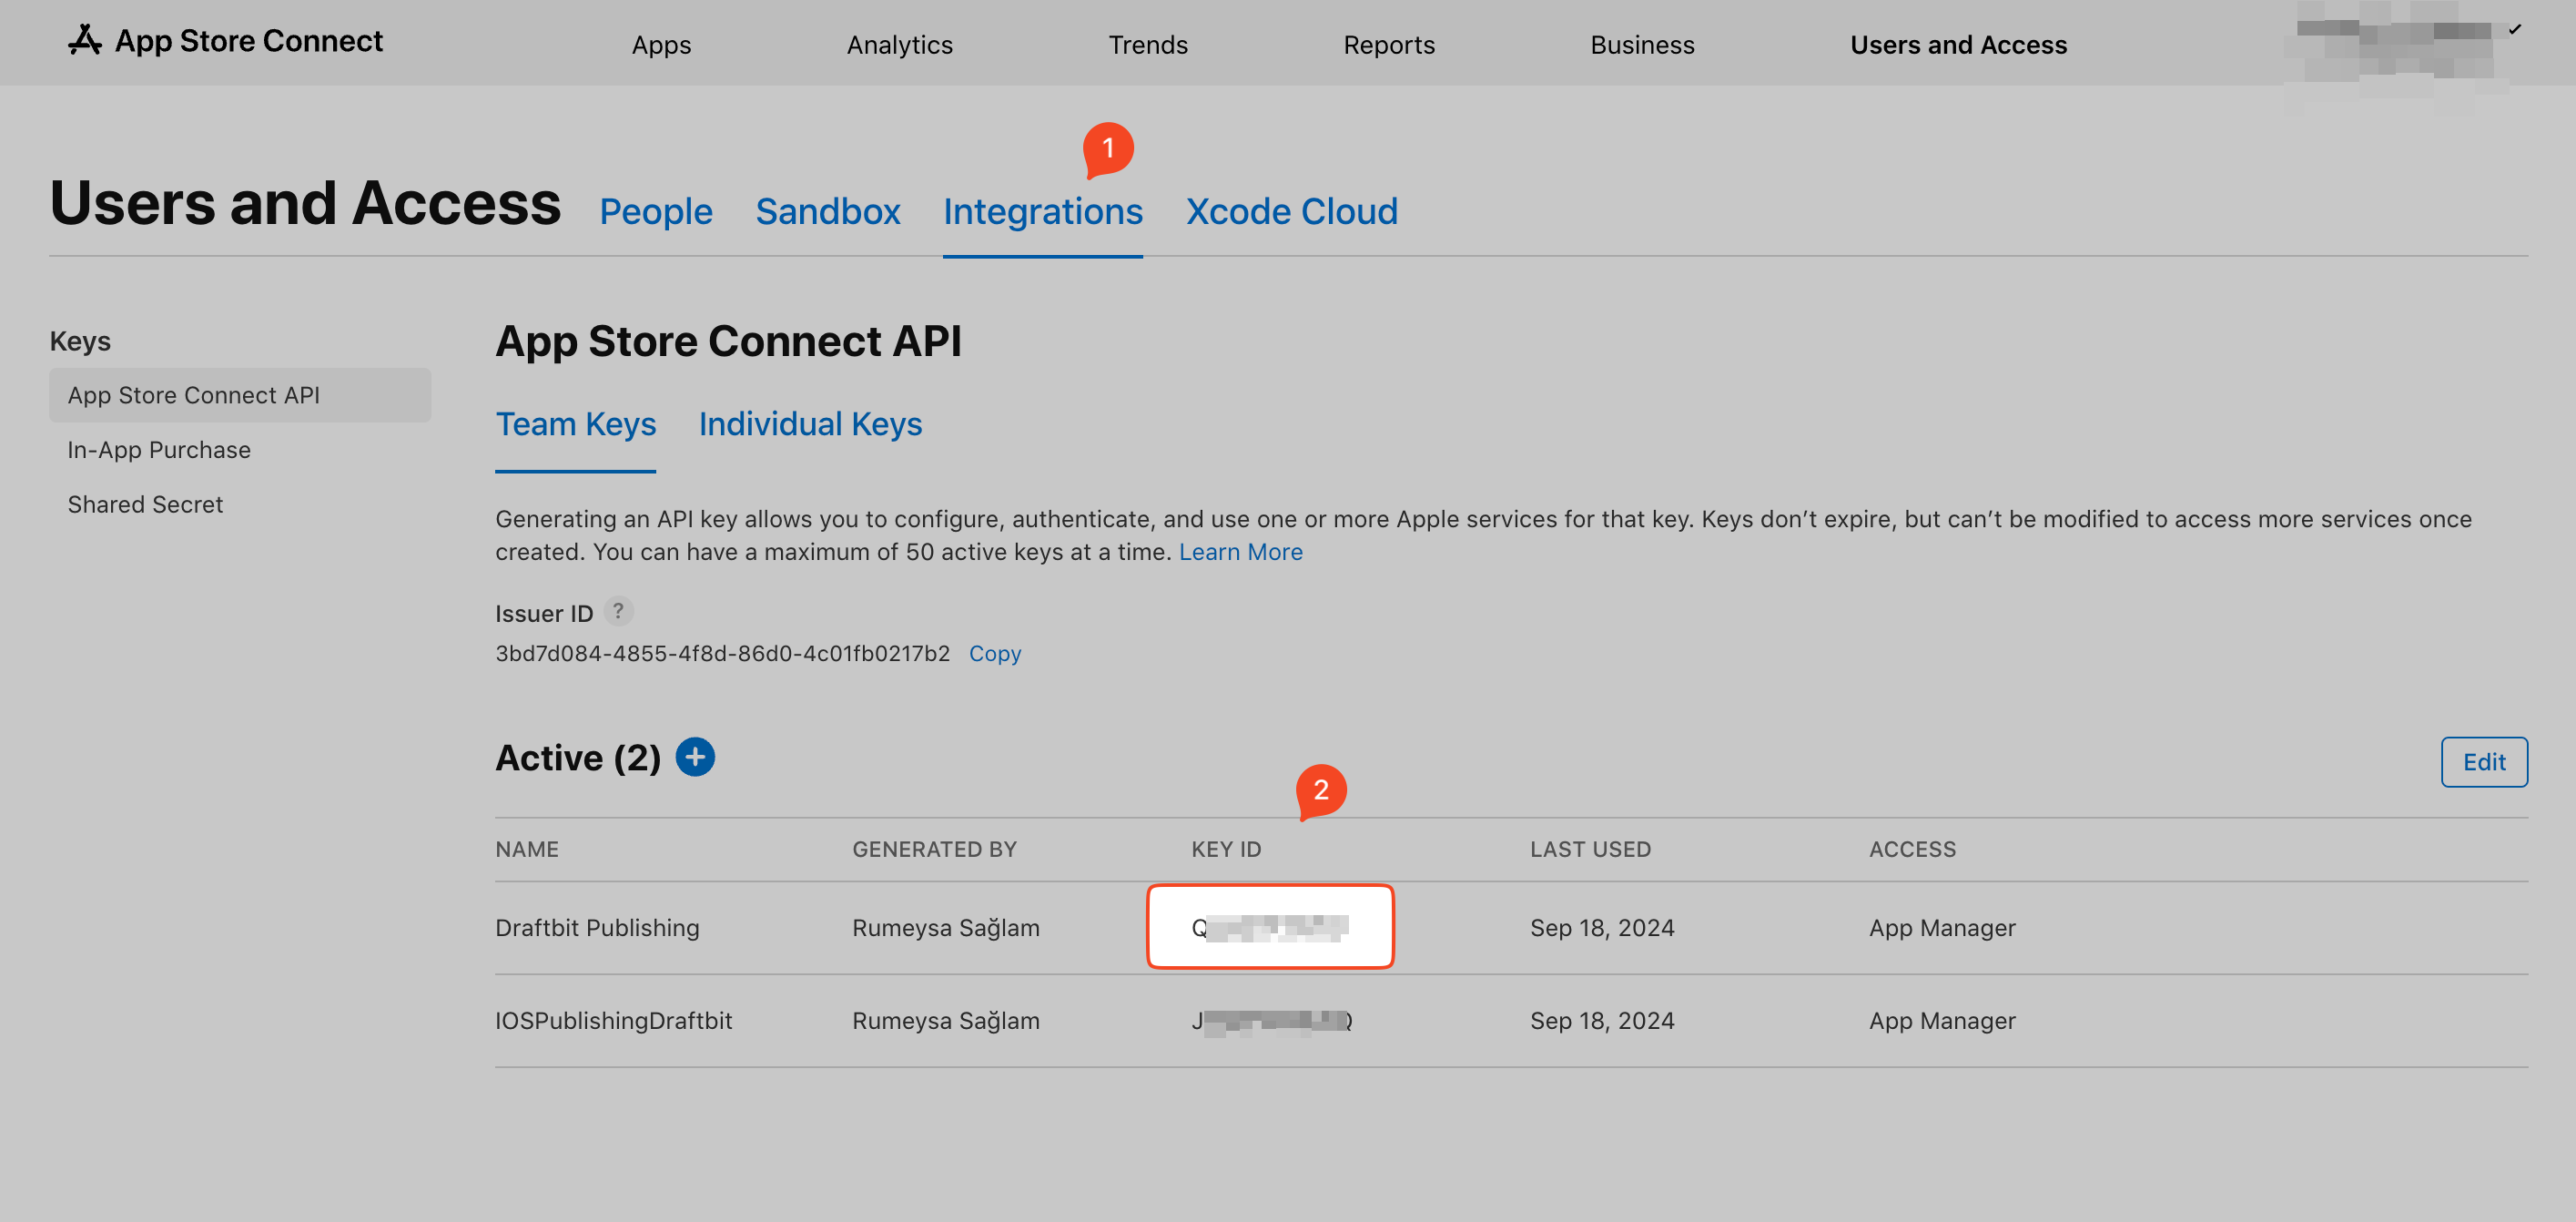
Section titled “Get Your Key ID”Now, you need to get the Key ID for the API Key you generated. In App Store Connect, go to Users and Access page and select Integrations tab. Find the row for the API Key you generated and select Copy Key ID for future reference.
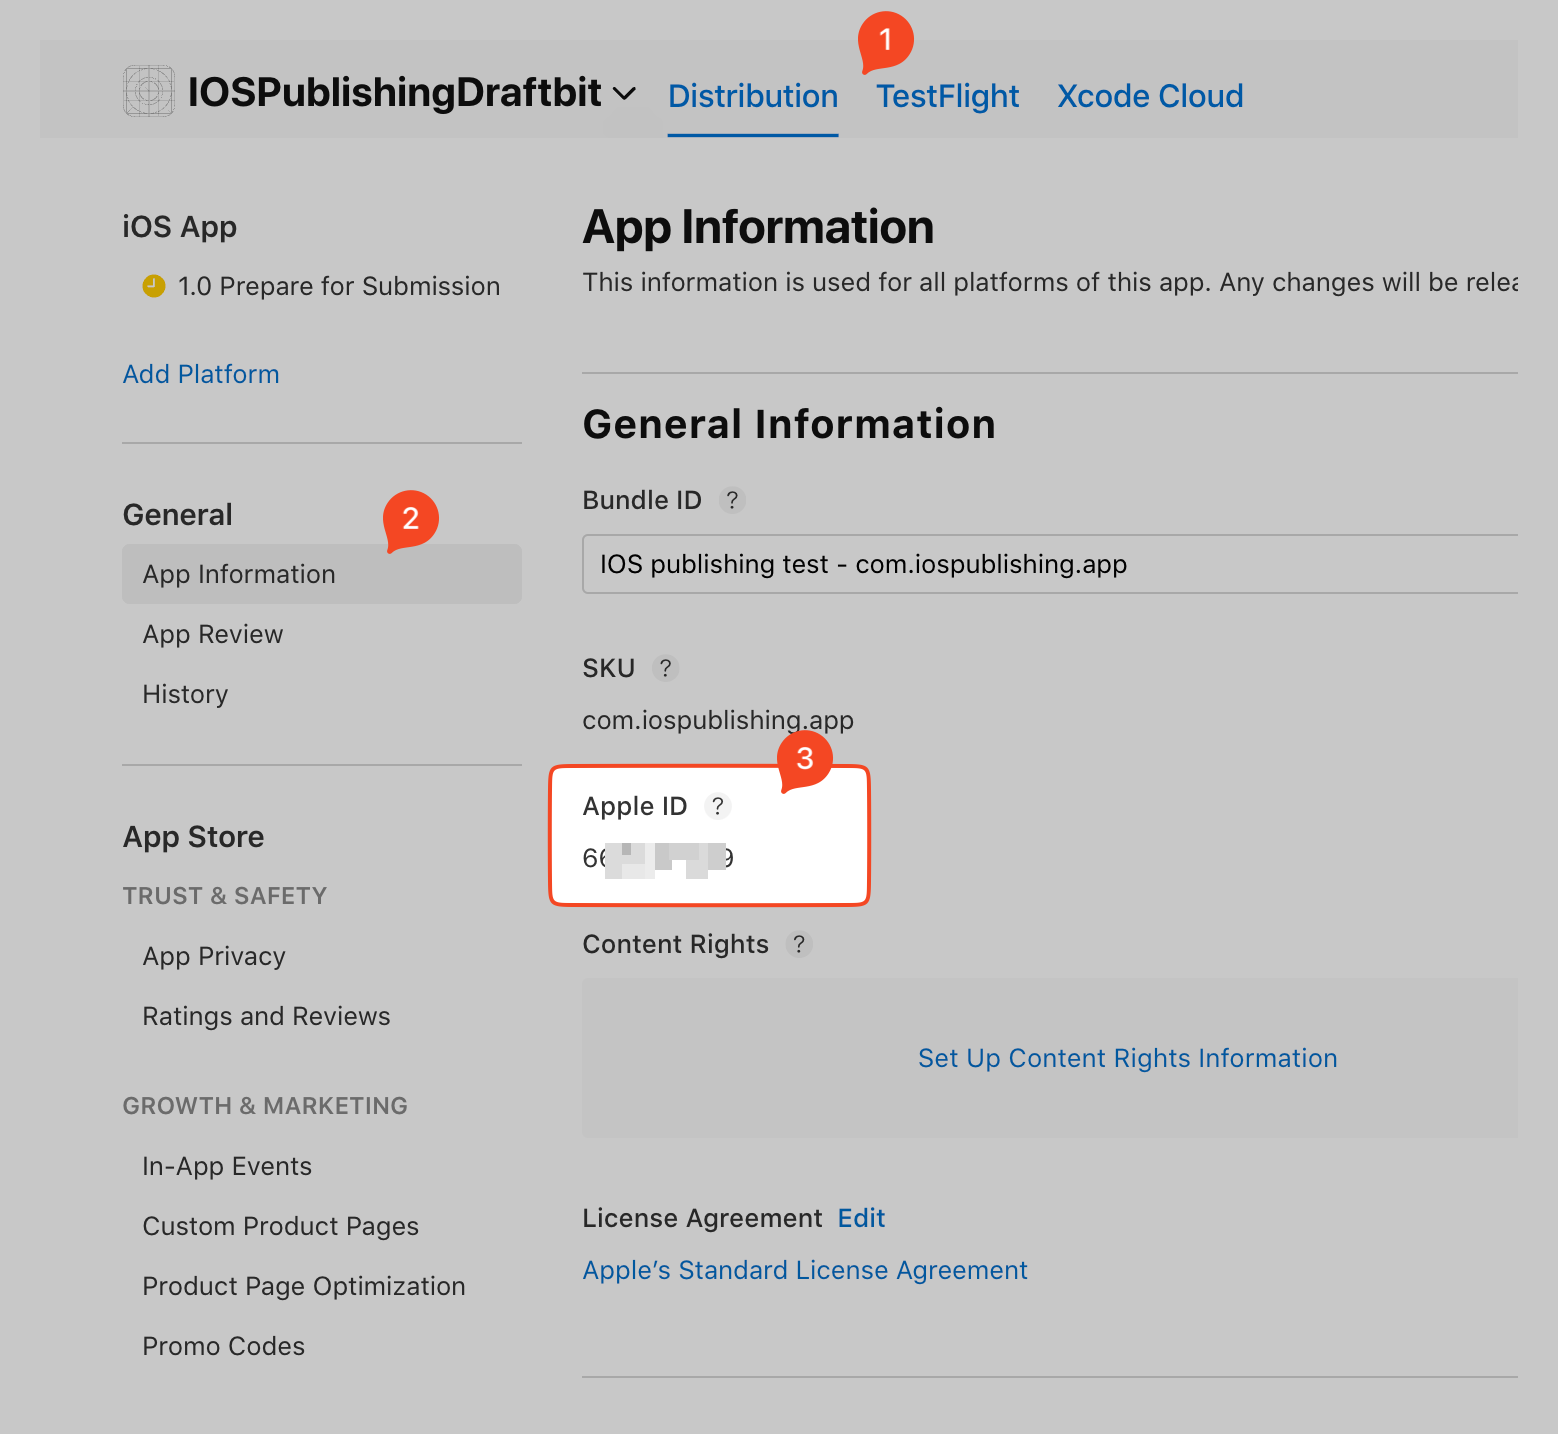
Get Your App Store App ID
Section titled “Get Your App Store App ID”Finally, you need to get your App ID that was assigned to your new app.
- Go to App Store Connect go to the Apps.
- Click on your app in the list.
- Click App Information under the General heading on the left
- Scroll down to the General Information section
- Copy your Apple ID
Configure Your App Settings
Section titled “Configure Your App Settings”Go to Publishing page and select the Apple App Store option.

- Enter the Bundle Identifier you created in the previous step into the Bundle ID field.
- Enter the Team ID you copied during the previous step into the Team ID field.
- Past the Key ID you copied during the previous step into the App Store Connect API Key ID field.
- Paste the Issuer ID you copied during the previous step into the App Store Connect Issuer ID field.
- Paste the Apple ID you copied during the previous step into the App Store App ID field.
- Upload the API Key file that you downloaded in the previous Step
- Click the Save Configuration button
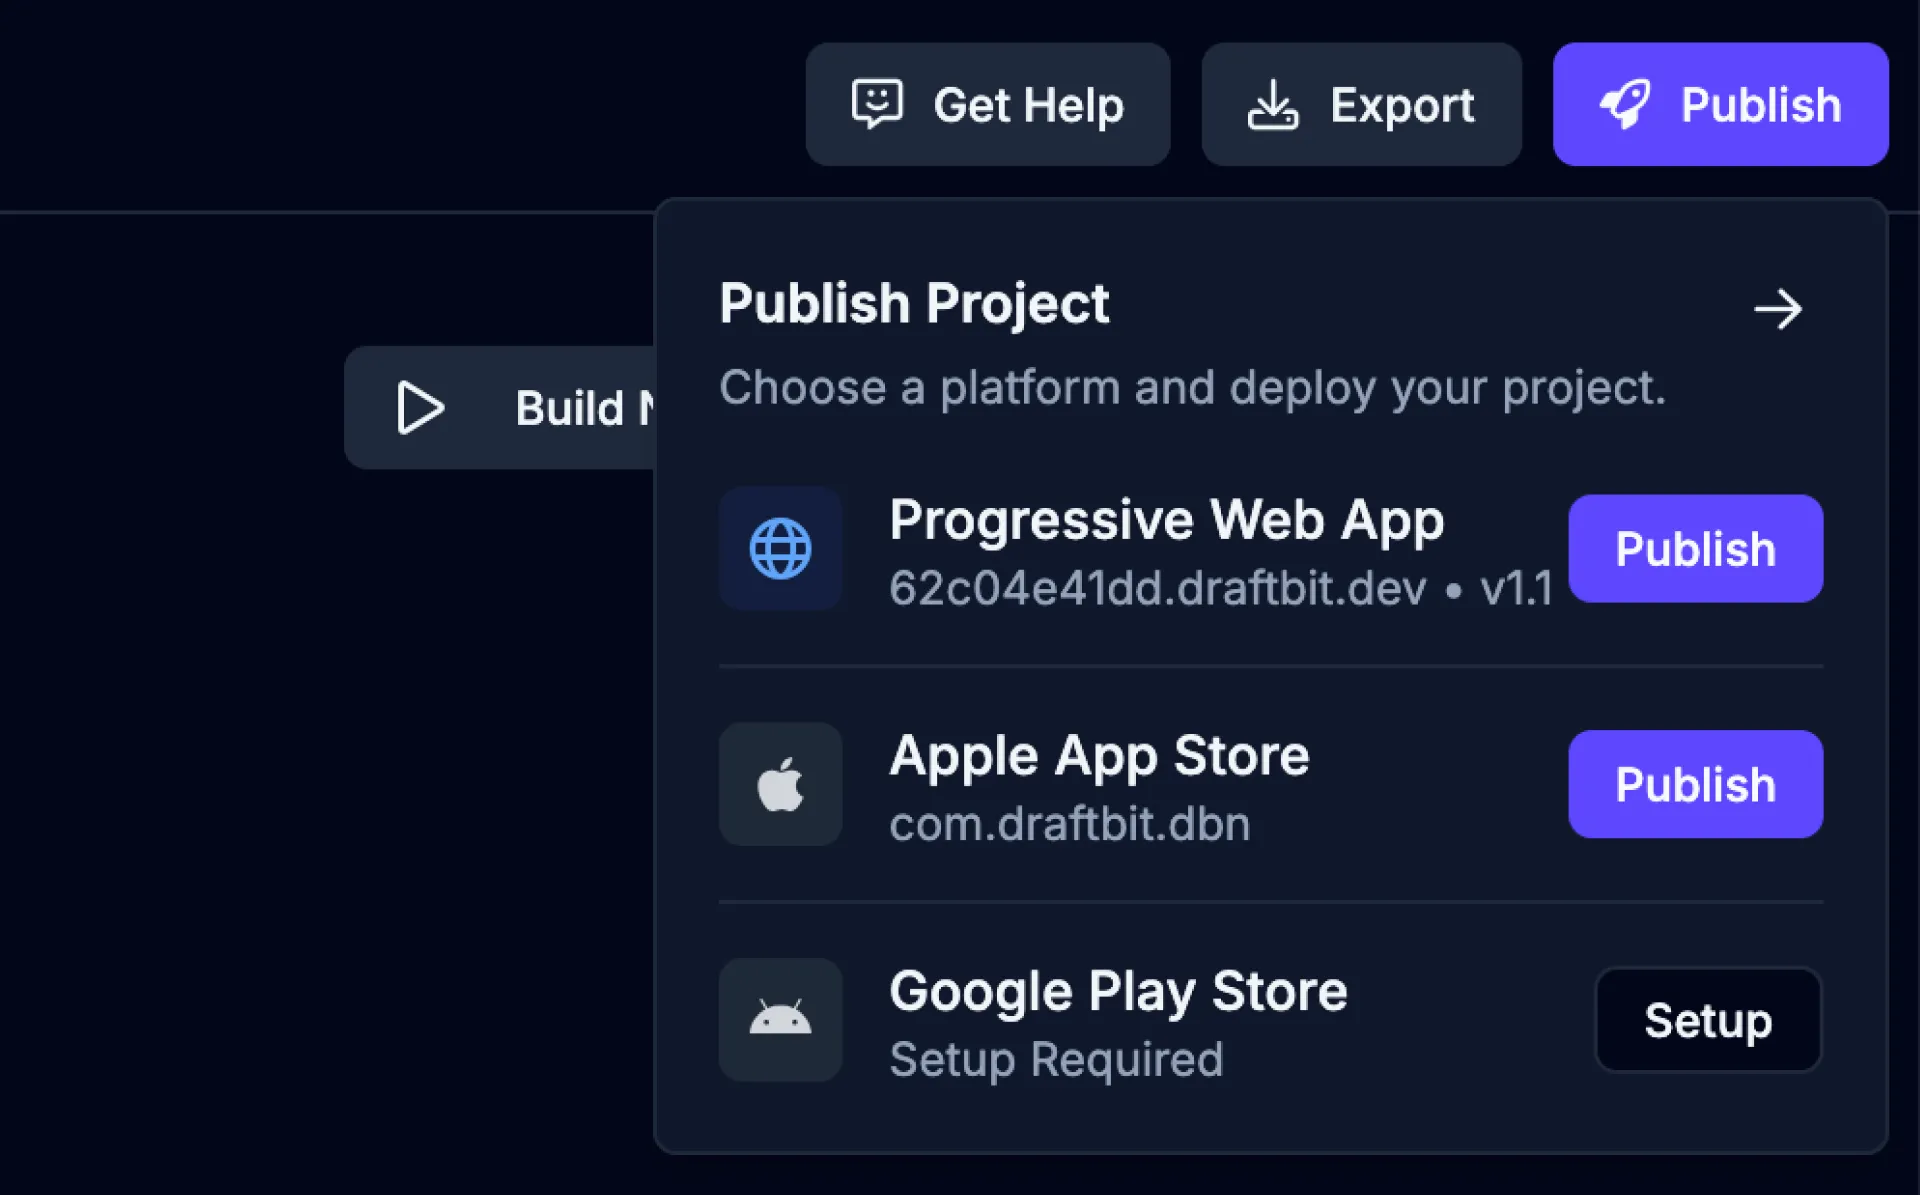
Publish Your App
Section titled “Publish Your App”Now, you’re ready to publish your app to the Apple App Store.
-
Open the Publish dropdown
Click the
 button from the top-right of the Builder to open the Publish dropdown.
 -
Choose Apple App Store
Click the
 button for the Apple App Store option.
 -
Start a new publish
Enter a version name, number, and environment for your publish and then click the
 to start the publishing process.
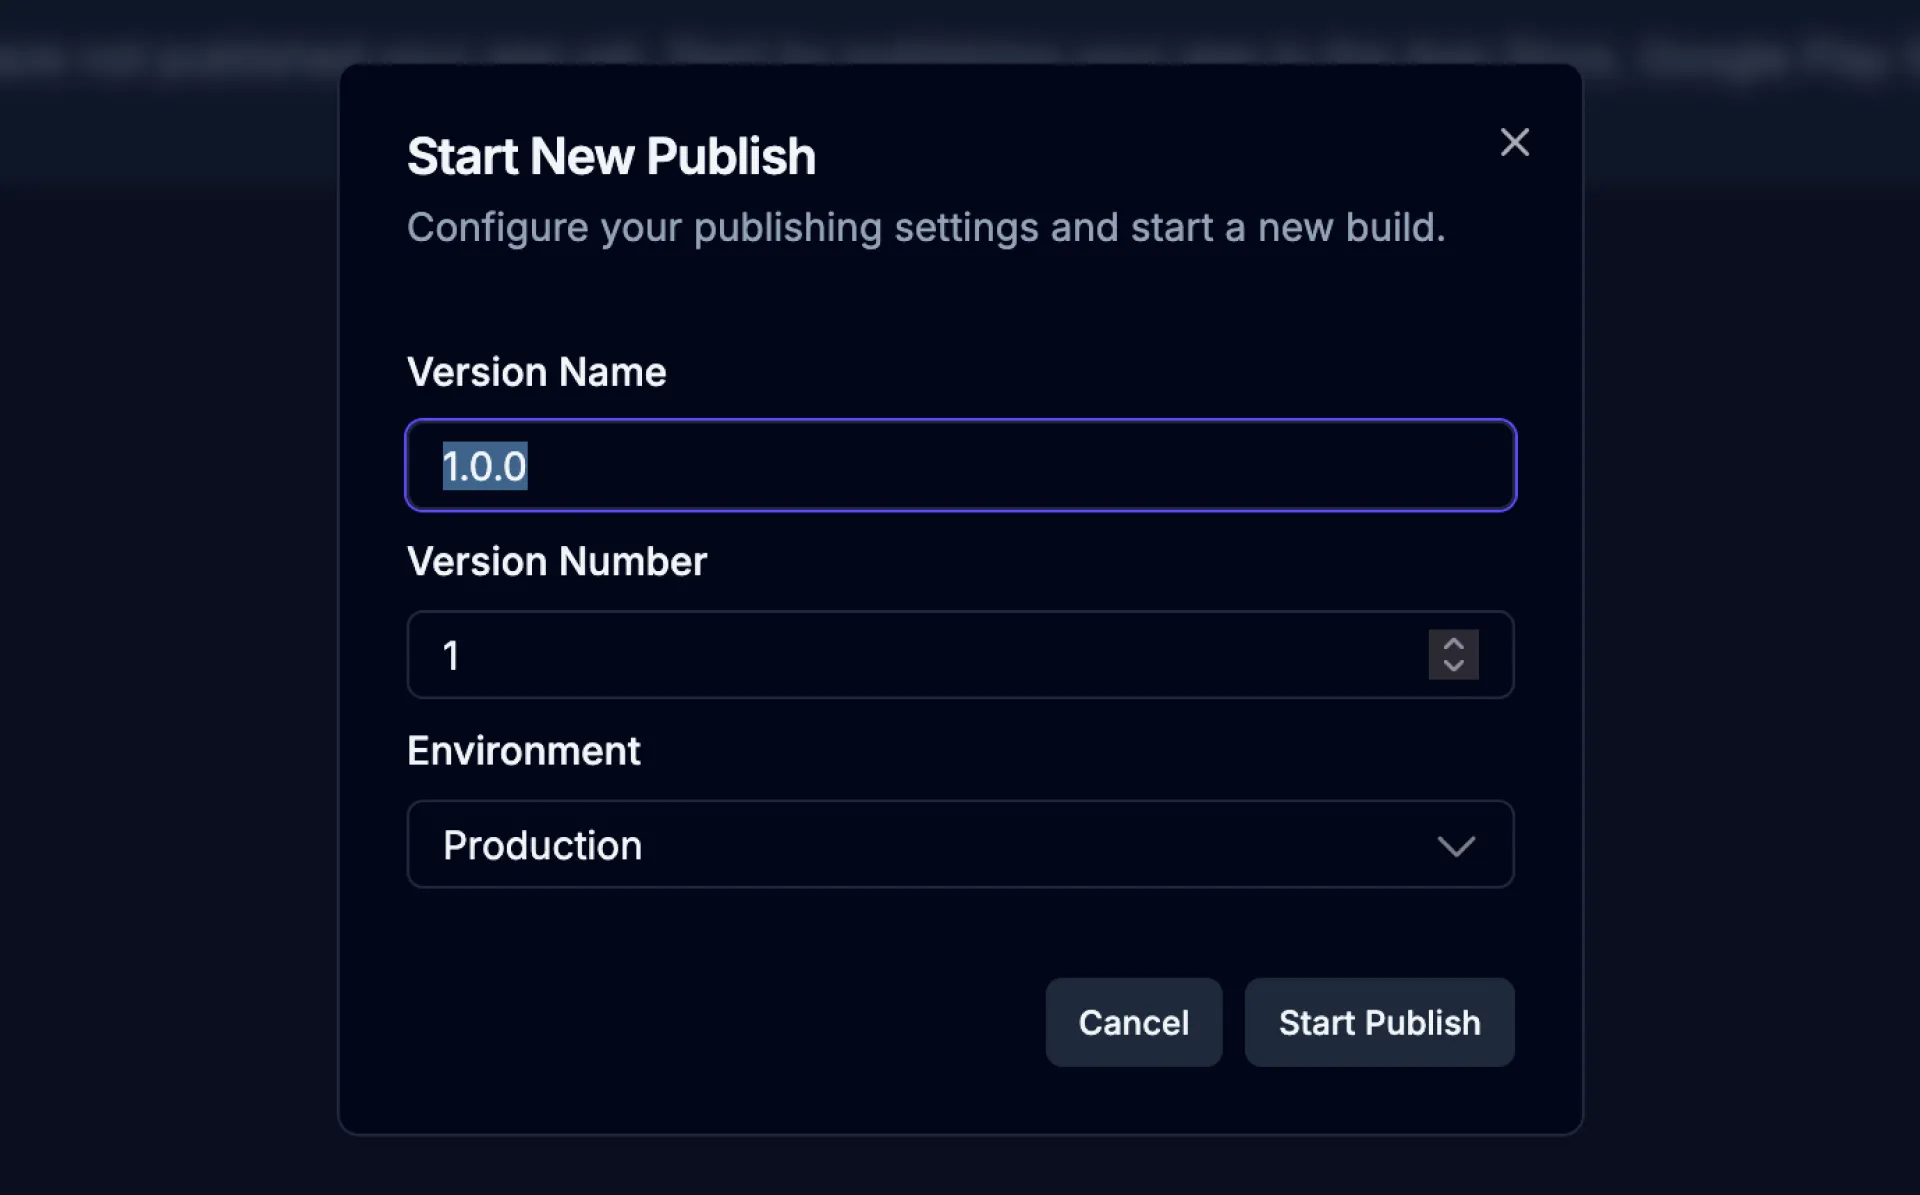
| Name | Description |
|---|---|
| Version Name | A name for this version of your web app (e.g., “Initial Release”, “Major Update”, “v3”). |
| Version Number | The version number assigned to this publish (e.g., “1”, “2.0”, “3.1”). |
| Environment | The environment to publish your web app to. Only Production is supported. |